Showing posts with label pie. Show all posts

Monday, June 20, 2016

Broccoli and Mushroom Roll-ups

Yum
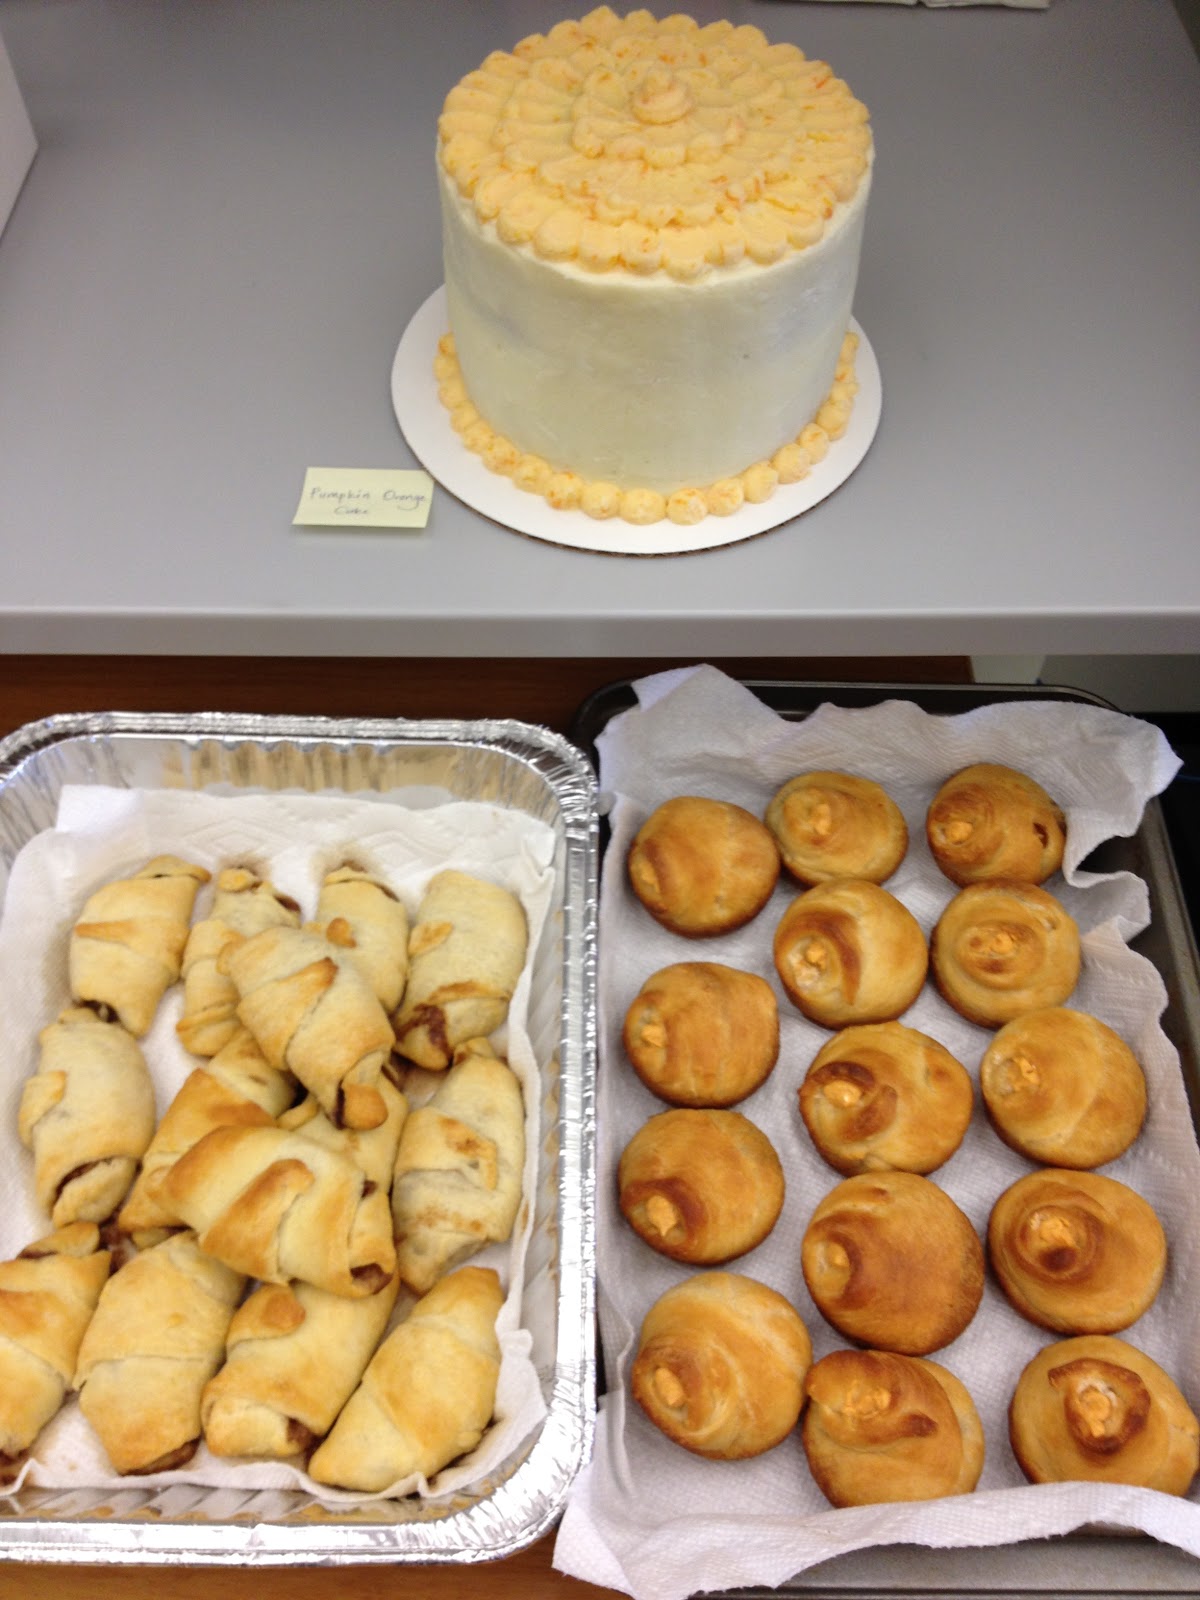
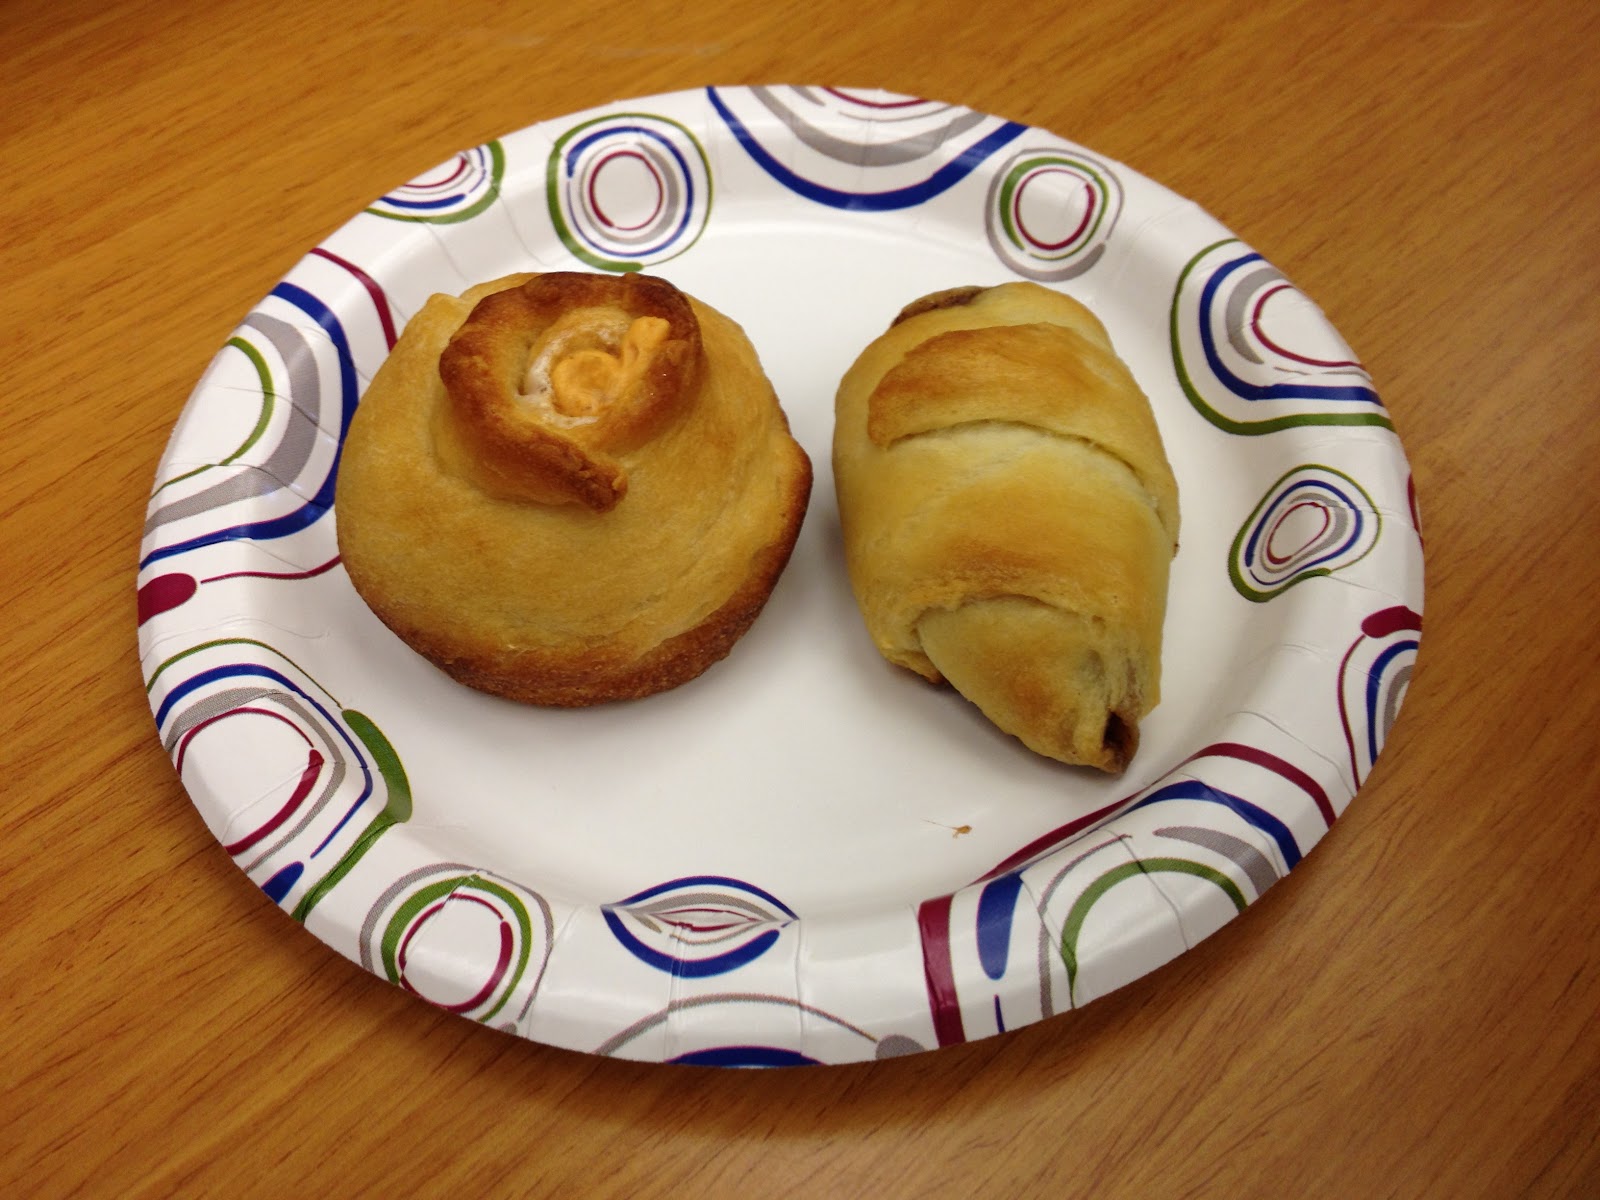
Any buttery flaky pastry gets infinitely better with a creamy filling in the center - be it something sweet like nutella, pastry cream; or savory like spinach & ricotta cheese. With pre-made pastry dough, delicious appetizer roll-ups can be whipped up in a snap! This time I used broccoli and mushrooms for the filling, and gave it a creamy component by mixing in some cream cheese. While broccoli and mushrooms are some of my favorite ingredients, you can follow the same steps with any other vegetables of your choice, ensuring that you’ve cooked out most of the moisture so it won’t leave the pastry soggy.


DSC_5854.JPG


Ingredients: (Makes 8 pieces)
1 cup chopped broccoli florets
4 oz chopped mushrooms (~1.5 cups)
½ small onion - chopped
2 cloves of garlic - minced
1 tsp oil
Salt, black pepper to taste
2 oz cream cheese - can use low fat
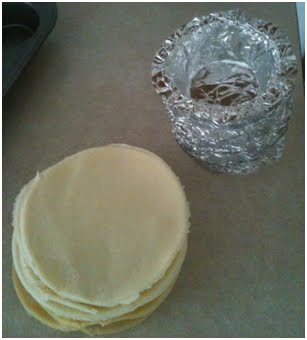
1 tube of Crescent rolls (8 pieces) - can use reduced fat


Filling:
Heat oil over medium-high, add onions and garlic and saute for a minute. Add mushrooms and reduce them to about half, stirring occasionally. Add broccoli, season with salt & pepper, and saute for another minute. Turn the heat to low, add cream cheese and mix well. Take the pan off the heat once completely combined.


DSC_5846.JPG


Assembly:
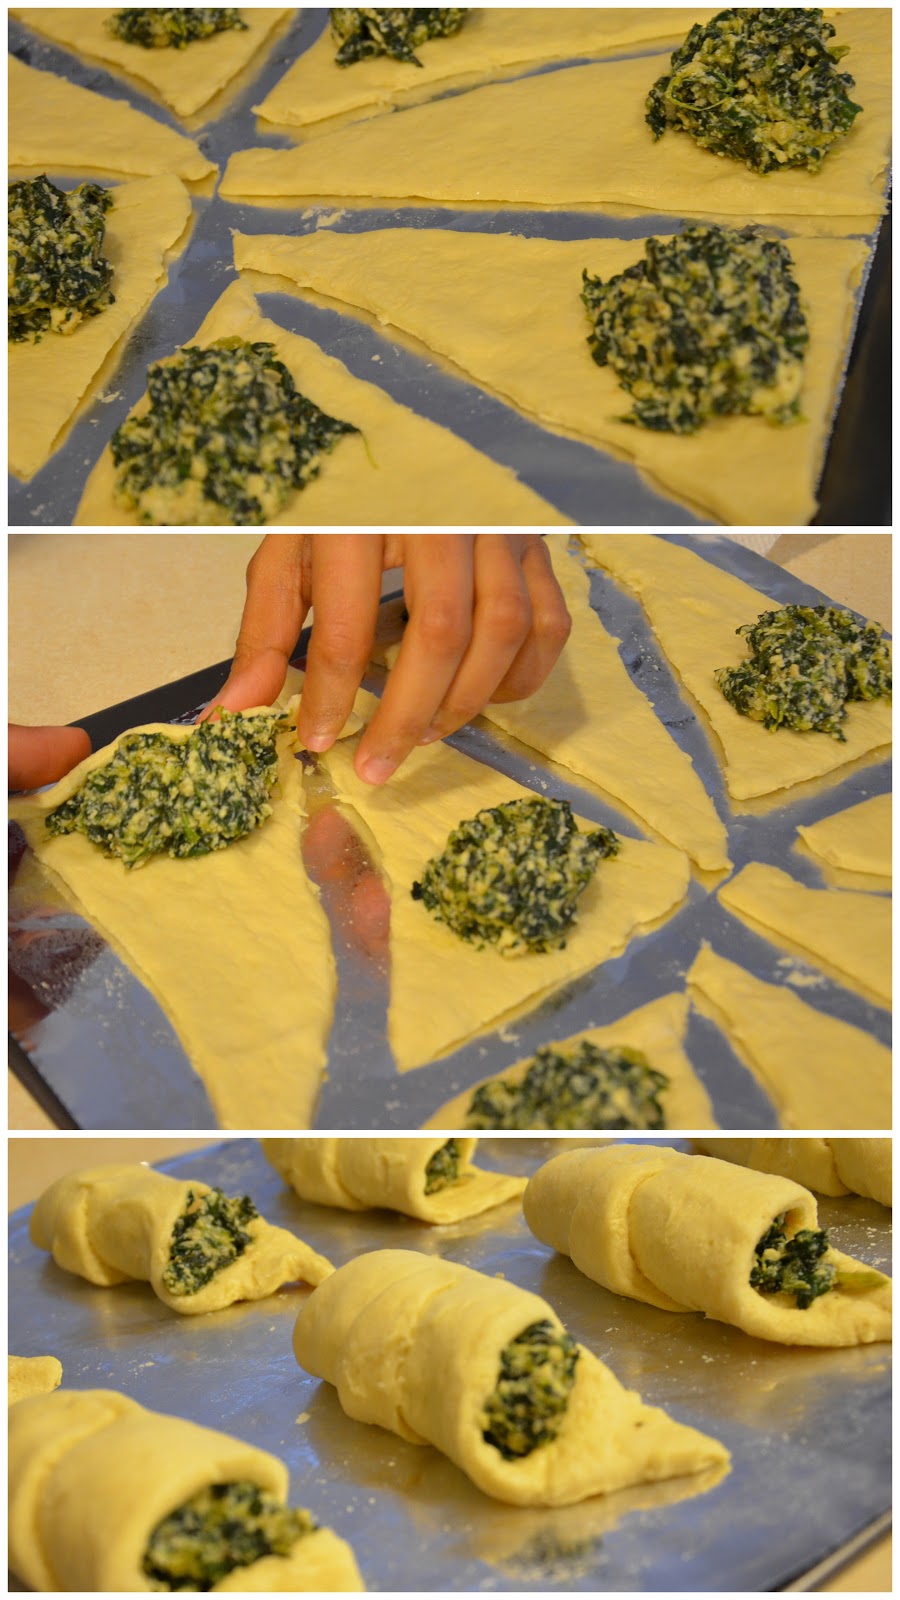
Preheat oven to 375 F (or as per package directions for the pastry).


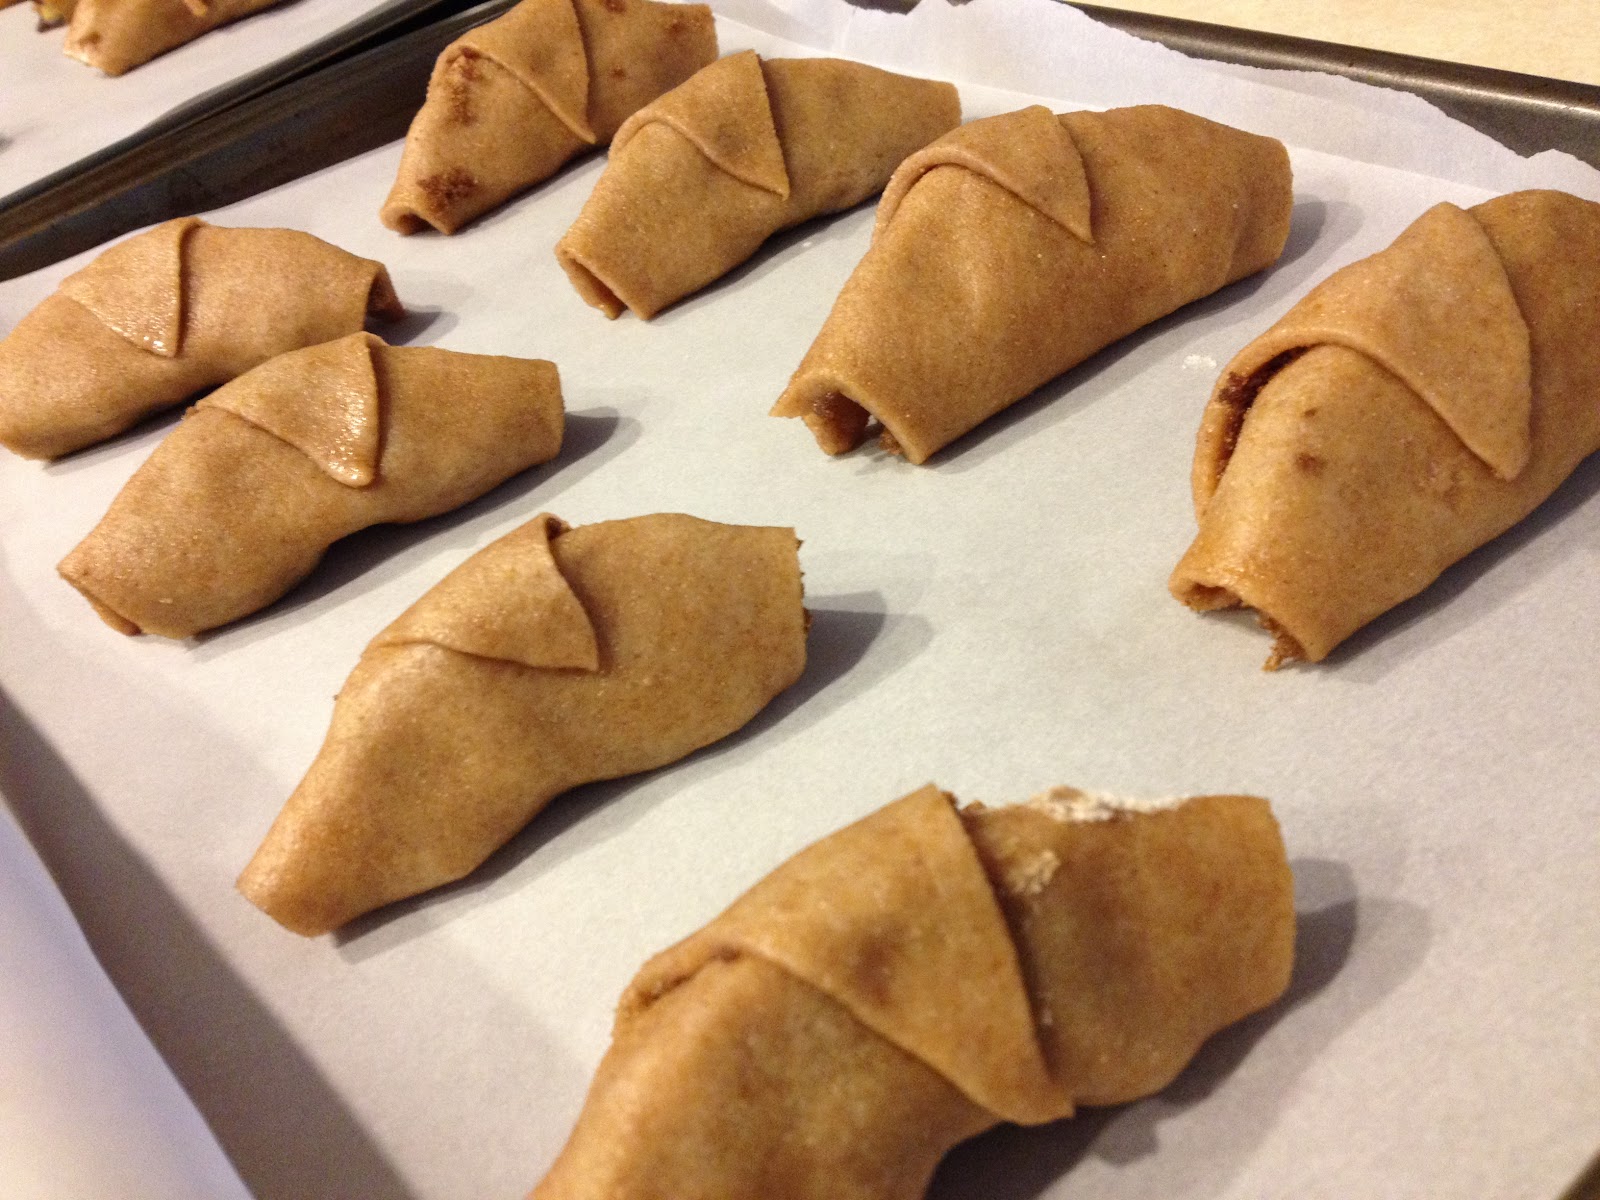
Roll out the Crescent dough and gently tear apart each triangle. Add about a Tbsp of the filling at the wide edge and roll towards the other end. Press down on the seam to seal it.


mushroom broccoli crescent rolls.jpg


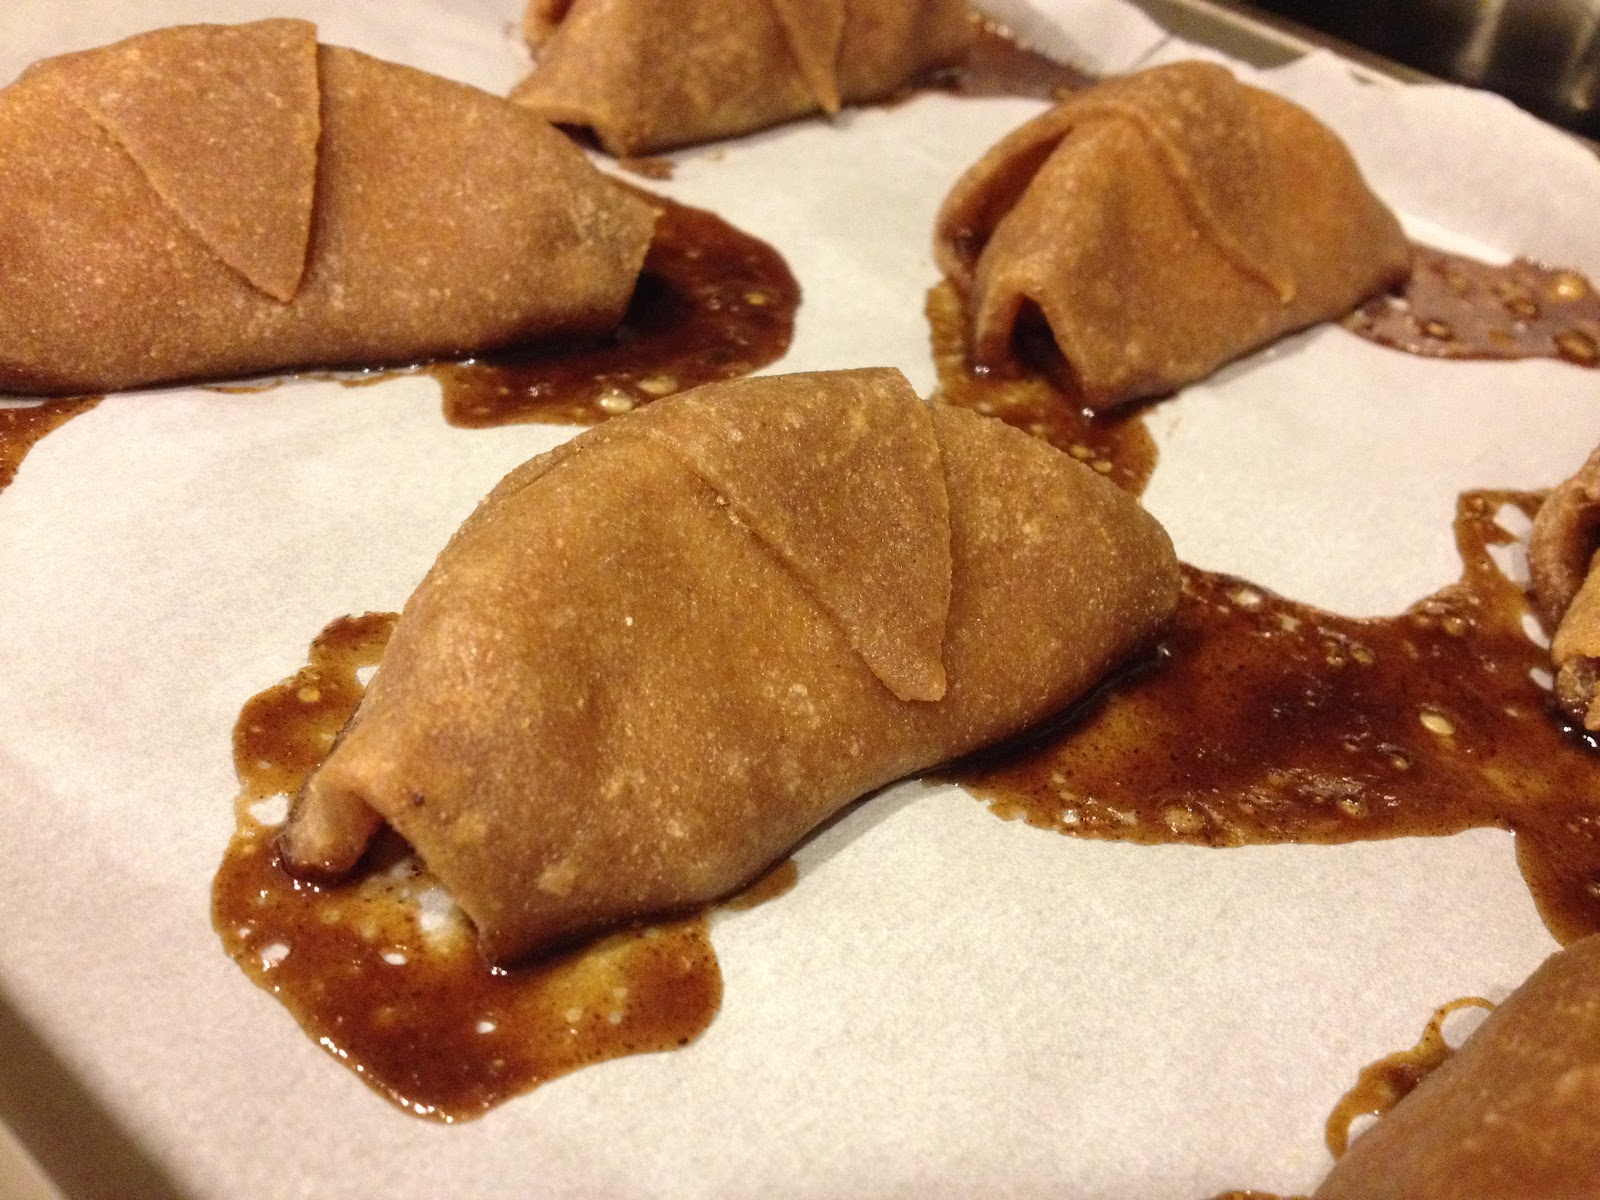
Place the roll-ups on a greased baking sheet (or lined with parchment paper), and bake in preheated oven for ~12-15 minutes until golden brown. Serve warm.


DSC_5850.JPG


~Gayatri

Find us on Facebook:

Thursday, March 17, 2016

Spinach Pie Roll-Ups

Yum
Several months ago, Gayatri and I cooked up one of our elaborate multi-course dinners. This one had a Mediterranean flair, with eggplant fanned and stuffed with a savory tomato-feta sauce, and baklava ice cream for dessert. For an appetizer, we put our own spin on the traditional spanakopita and served these delightful mini-spinach pies. Using pre-made dough, prep and assembly were super easy - and eating them was even easier! This is a delicious, appropriately hued dish to accompany any shamrock-related shenanigans today - happy St. Patrick’s Day!

DSC_4081.JPG

Ingredients: (makes 16 mini pies)
~1 cup chopped spinach (fresh, or frozen that has been thawed and drained)
~1 cup ricotta cheese
~¼ cup feta cheese
1-2 cloves garlic, minced
1-2 TBSP chopped onion (fresh or dried)
ground pepper, paprika to taste
2 cans crescent rolls
salt to taste (optional)
cooking oil


Heat oven to 375°F.

In a pan over medium heat, sauté spinach, garlic, and onion in a little oil until the onions are soft. Reduce heat to medium-low and add the ricotta and feta cheeses, stirring to break down any lumps until the mixture is smooth. Season with ground black pepper and paprika to taste. Remove from heat and let it cool 5-10 minutes.

While the spinach-cheese mixture is cooling, roll out the crescent roll dough and separate each wedge. Spoon about 1-2 tablespoons of spinach mixture onto the wide end of each wedge, then roll it up starting with the wide edge and pinch the end shut.

  Halloween dinner with Sarah-002.jpg

Arrange on a baking sheet, leaving at least an inch of space (they will puff up a little bit). Bake at 375°F for 10-12 minutes until the edges have a nice golden-brown color. Serve warm and enjoy!

~Karla

Find us on Facebook

Happy St. Patrick's Day! Here's a gratifyingly green snack to kick off your festivities!http://cooksofcakeandkindness.blogspot.com/2016/03/spinach-pie-roll-ups.html

Posted by The Cooks of Cake and Kindness on Thursday, March 17, 2016

Thursday, November 5, 2015

Pumpkin Pie Puffs

Yum
A few weeks ago, we had a Fall Dessert Day at work for everyone to bring in their favorite fall treats. Of course, Gayatri and I had to make something...but wanted it to be more interesting than traditional pumpkin or apple pie. Gayatri made a delectable orange-pumpkin cake with orange-zest cream cheese frosting. My first thought was to make a batch of apple pie roll-ups with Crescent rolls instead of pie crust (which I did end up making), and then I wondered if I could make something similar with pumpkin pie filling instead. Just rolling a blob of pumpkin pie filling in a Crescent roll might leave the whole thing a limp soggy mess, though, so I turned to trusty Google to get some ideas. Marshmallows were the key! Crescent rolls + marshmallows = beautiful pastry puffs, which I could then stuff with tasty pumpkin pie filling. 

IMG_5371.JPG

Ingredients: (makes 16 puffs)
For the puffs
2 can Pillsbury crescent rolls
16 large marshmallows
16 mini marshmallows
~2 tsp pumpkin pie spice*
½ cup butter, melted

For the filling
1 can (~15oz) pumpkin puree (NOT pumpkin pie filling)
8oz cream cheese
½ tsp pumpkin pie spice
½ cup powdered sugar

*Pumpkin Pie spice (makes about ¼ cup)
⅛ cup ground cinnamon
2 tsp ground nutmeg
2 tsp ground ginger
½ TBSP ground allspice


Making the puffs
Separate and spread out the crescent roll dough. Dip a large marshmallow in the melted butter, then roll in the pumpkin pie spice mix. Place it in the middle toward the wide end of a crescent roll wedge and put a mini marshmallow on top of it, then bring up the sides of the crescent roll to wrap around the marshmallow, forming a satchel or pouch (similar to these Easter surprise rolls but with the extra mini marshmallow). The mini marshmallow will help keep an opening for the pouch so it can be filled later.

Once the pouch is formed, dip the bottom in melted butter, then place in a muffin pan. Repeat with the remaining marshmallows.

Bake at 375F for 12-15 minutes until the tops are golden brown. As the pouches bake, the marshmallows will puff up inside them, then melt, leaving a hollow puff with a pocket for filling. Let the puffs cool before filling.

 IMG_4841.JPG

Making the filling
Combine pumpkin puree, cream cheese, and sugar and mix until smooth. Spoon into a large Ziploc bag with a large round icing tip (if you don’t have an icing tip, snip off a corner of the bag).

Once the puffs are cool to the touch, pipe the filling in through the opening left by the mini marshmallow (in case the puff opening collapsed, use a knife to poke through). Each puff should be able to hold about 2 tablespoons of filling - and you can feel the puff expanding a bit in your hand as it is filled.

It's best to wait to fill these until just before serving, otherwise the pastry might get a little soggy.

IMG_5375.JPG

Happy indulging!

~Karla


Find us on Facebook:


Not your typical pumpkin pie - a delicious fall treat!http://cooksofcakeandkindness.blogspot.com/2015/11/pumpkin-pie-puffs.html

Posted by The Cooks of Cake and Kindness on Thursday, November 5, 2015

Monday, September 14, 2015

Apple Pie Roll-ups

Yum
This tasty snack is inspired by the Pillsbury apple pie crescents, which look super easy to make. I had some apples that needed to be used, and wanted to try something other than my go-to easy apple crisp. Unfortunately, I didn’t have any Pillsbury crescent rolls, or apple pie spice, or even pie crust. So, I made my own! If you have all the ingredients on-hand, these not-too-sweet treats are simple to make, and you’ll have trouble stopping at eating just one!


IMG_4572.JPG


Ingredients: (makes 16)
2 apples
2 9” pie crusts (*see footnote for recipe)
½ cup brown sugar
1 tsp ground cinnamon
½ tsp ground nutmeg
¼ tsp ground cloves
¼ tsp ground cardamom
3 TBSP unsalted butter, melted


IMG_4544.JPG


Heat oven to 375F.

Core, peel, and slice the apples into eighths so you have 16 pieces total.

In a small bowl, mix together the sugar, cinnamon, nutmeg, cloves, and cardamom.

Roll out the pie crusts and, using a knife or pizza cutter, cut each crust into 8 wedges. On each wedge, spread some of the sugar and spice mix.


IMG_4553.JPG
IMG_4555.JPG

Dip each apple piece into the melted butter, then place at the large end of each wedge. Roll up the apple slice in the crust, tamping the end down, and place on a lined baking sheet.


IMG_4561_crop2.jpg
IMG_4566.JPG

Brush each roll-up with the leftover butter. Bake at 375 F for 10-12 minutes until crust is browned and crispy. Let cool 5-10 minutes.


IMG_4578.JPG


Enjoy as-is or with a scoop of vanilla ice cream!


~Karla


Pro-tip: if you use a smaller apple (or only use one apple cut into 16ths), or have large pie crust wedges, pinching the edges together will help keep the delicious caramelized sugar-spice glaze from seeping out during baking.


*Whole-wheat pie crust recipe (makes 2 9-inch crusts when rolled out to about ⅛ inch thickness):

½ cup canola oil
1.5 cups whole wheat flour
4 tsp sugar
½ cup buttermilk (1 cup buttermilk = 1 cup milk + 1 TBSP vinegar or lemon juice)
dash of salt

Stir together flour, sugar, salt. Add oil and mix. Pour in buttermilk and knead w/ hands. Form into ball (or 2 balls). Cover in plastic wrap and refrigerate at least 1 hour before using.

Like us on Facebook:

Bite-sized apple pie! These roll-ups are fun and easy to make!http://cooksofcakeandkindness.blogspot.com/2015/09/apple-pie-roll-ups.html

Posted by The Cooks of Cake and Kindness on Monday, September 14, 2015

Friday, March 13, 2015

Happy Pi(e) Day!

Yum
Not that we need a reason to eat pie, but March 14th (3.14) makes for a good excuse. Like every year, we had a celebration at work yesterday featuring a variety of pies (a lot of them were homemade!). Of course we had to make the uber berry pie that we love so much, and Karla even cut out the pie crust so it would say "pi" :-)


We also attempted a Boston cream pie - which really is a cake, but does have the word "pie" in the name, so it works for Pi day! The pudding part of the pie didn't set as thick as intended so it wasn't as much a layer of filling, but was still delicious and moist.


Check out our
mixed berry pie recipe, and stay tuned for the Boston cream pie recipe coming next month.

~ Karla & Gayatri

Tuesday, March 3, 2015

Cabbage and potato pie

Yum
Continuing with more guilt free, cold day comfort food, here is a recipe for a pie that uses hardly any oil, and is a good vehicle for any veggies in your fridge that you need to use up. I made this with green cabbage, but will use red cabbage next time for more color. I also didn’t have a lot of vegetables, so I used only mushrooms. Hence it turned out to be not a very colorful pie, but it was certainly delicious.

 
Ingredients:
6-8 whole cabbage leaves + 1 cup chopped cabbage
3 small-medium potatoes - boiled
About 1 cup of chopped vegetables (optional) - I used only ½ cup of mushrooms. Peas, broccoli, carrots etc. would add a lot of taste and color!
½ cup of soy based vegetarian protein / cooked ground meat (optional) - I used MorningStar Grillers Crumbles
Garlic - 1 clove minced
Salt
Pepper
Paprika/ chili flakes (optional)
 
Preheat oven to 375 F.
 
Mash the potatoes and set aside. Boil water in a large sauce pan and add the cabbage leaves. Once tender, remove from the water (about 2-3 minutes), cut out the thick stem and set them on some paper towels. In the same water, add the chopped cabbage and cook for another couple minutes. You may add salt to the water before cooking cabbage, but thats optional. Drain and add the cooked chopped cabbage to the mashed potatoes.
With very little oil, saute the garlic and mushrooms (or other vegetables if using any). Add the cooked soy protein/ground meat. Season to taste. Saute until heated through. Add to the mashed potatoes and cabbage. Season this mixture with salt and pepper (add chili flakes or paprika if desired).
 
Lightly grease a pie pan or a small cast iron skillet. Arrange half of the cabbage leaves to completely cover the bottom, and if possible the sides of the pan. Add the filling over the cabbage leaves and flatten the mixture with a spatula. Cover with the remaining cabbage leaves. Sprinkle a little salt and freshly ground pepper on top. Cover the pan with aluminum foil.
 
Place a cookie sheet (or larger baking pan) in the oven with about ½ an inch of water. Place the pie pan on the cookie sheet and bake covered for 35-40 minutes until lightly browned on top. Remove the aluminum foil and broil on high for a minute or two till the top is browned to your liking.
 
Let it cool for 5-10 minutes before cutting. Enjoy with a side of some crisp salad.

~Gayatri

Note: I used a 6” cast iron skillet and needed 6 small cabbage leaves to cover the bottom, sides and top. For a larger baking dish, you might need more cabbage leaves.  


Friday, September 23, 2011

Miniature Über-berry Pies

Yum
The days are getting shorter and soon, instead of bemoaning how hot and humid it is, we'll be griping about the cold! As a final farewell to summer, here's a classic recipe for berry pie that's pretty simple but easily lends itself to personalization - like these cute little mini-pies!


Ingredients:
~6 cups berries - strawberries, blueberries, raspberries, blackberries, your choice!
~1.25 cups sugar (I used Splenda)
1/2 cup flour (I used finely ground whole wheat flour)
~1 tbsp lemon juice
3 pie crusts (for regular pie, use only 2 pie crusts)

1. Preheat oven to
425°F.

2. Wash berries (slice if necessary, so they are roughly the same size) and mix them in a bowl.

3. In a separate bowl, mix sugar and flour. Combine the dry mixture with the berries.

4. Sprinkle lemon juice over the berry/flour mixture, let sit 10 minutes to let juices come out. Stir occasionally.


For regular pies
5. Place one pie crust in a 9-inch round pie pan and fill with the berry mixture.

6. For a double crust, lay the second pie crust on top and crimp the edges together, cutting away the excess. For a lattice crust, cut the second pie crust into ~1/2-inch strips. Lay one strip vertically in the center (dividing the pie in half), then one horizontally, also at the center. Working your way out, alternately lay strips horizontally and vertically in a lattice pattern until the strips are used up. Space the strips about 1/4 to 1/2 inch apart. Crimp edges together and cut away excess.

7. Slightly roll up the edges of the crust to help prevent berry juices from oozing over. As this doesn't always keep the juices in, line a cookie sheet with foil and put the pie pan on the cookie sheet to catch any rogue juice drippings.

8. Bake at
425°F for 10 minues, then reduce heat to 325°F and bake for another 50 minutes. Let cool.
For mini-pies:
5. Line a muffin pan with foil. Though it takes some work, lining each muffin cup separately will make it much easier to remove the mini-pies after baking. NOTE: It is best not to use muffin cup liners, as the crust will snag on the ridges and tear.
6. From each of the 3 pie crusts, cut circles about 3 inches in diameter with a cookie cutter, or some other circular object, like a huge mug :-) Save the rest of the crust.
7. Press the circular crust rounds into each muffin cup. The rounds should be large enough that some extra is able to fold out on the muffin pan. Spoon the berry mixture into each muffin cup.

8. Using the crust left over from cutting the small circular rounds, cut ~1/4-inch strips about 3-4 inches long. Arrange over the top of each muffin cup in a small lattice pattern (see step 6 for regular pies on how to do this). Crimp edges together and slightly roll them up to help prevent berry juices from spilling over.

9.
Bake at 425°F for 10 minues, then reduce heat to 325°F and bake for another 10-20 minutes. Let cool.

Serve the pie à la mode for a sweet, anytime dessert!

~Karla


Note: Fresh berries work best, but if using frozen berries, make sure they are defrosted and discard excess liquid so that the pie doesn't get too soggy.