Saturday, October 29, 2011

Crépes and Crespelle

Yum
Lafayette, IN may not be the most exciting place, but there are some really good restaurants around. Bluefin Bistro in downtown Lafayette is one of our favorite places for lunch when we want to take a long(ish) lunch break. There’s only one vegetarian item on their menu, the mushroom and spinach crépes. I’m not complaining at all because I’d probably order the same thing every time even if they had other options. It is that good!! They top the crépes with a balsamic drizzle which gives it tanginess in every bite. I’ve made these at home a couple times, modifying the crépe batter every time, and I feel like I’ve gotten much better at making crépes :-). So this weekend I decided to try out another modification – crespelle. It is an Italian variant of crepes, in which crepes are used instead of pasta noodles to make Italian dishes like lasagna, cannelloni, manicotti etc. 


Ingredients:
Crépe filling
2 medium zucchinis, chopped
8 oz mushrooms, chopped
1 onion, thinly sliced
2 cloves of garlic, minced
2 tbsp orange juice (or water)
1 cup gouda cheese (optional)
1 tsp oil
salt to taste
(Other vegetables like broccoli, spinach, carrots, corn etc. can also be used in the filling)

Béchamel sauce
3 tbsp butter
3 tbsp whole wheat flour (or all purpose flour)
3 cups milk
ground nutmeg
salt and pepper

Whole wheat crépes (makes 8-10 crepes)
1 cup whole wheat flour
1 tbsp melted butter
1.5 cups milk
2 eggs
salt to taste

Crépe filling: Heat oil and add the sliced onions and garlic. Sauté until onions are caramelized. Add zucchini and mushrooms. Season with salt and cook uncovered until all the moisture is evaporated. Deglaze the pan with orange juice.


Béchamel sauce: Melt butter on medium heat. Add flour and keep stirring for a couple minutes. Add hot milk slowly to avoid forming lumps. Add salt and pepper to taste. Add a pinch of nutmeg. Keep stirring frequently until the sauce thickens. If lumps are formed, use a whisk to dissolve them.


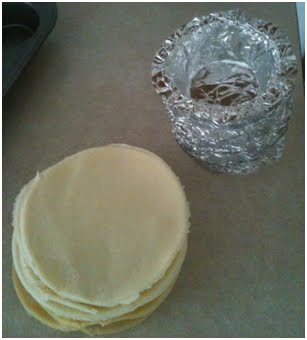
Crépes: Mix all the ingredients. Heat a nonstick pan on medium heat. Take the pan off the heat and pour about a quarter cup of the batter into the pan. Give the pan a quick swirl to coat it evenly with the batter. Return pan back to the stove and cook until the crépe is golden brown on the bottom. Flip it over and cook until golden brown on the other side.
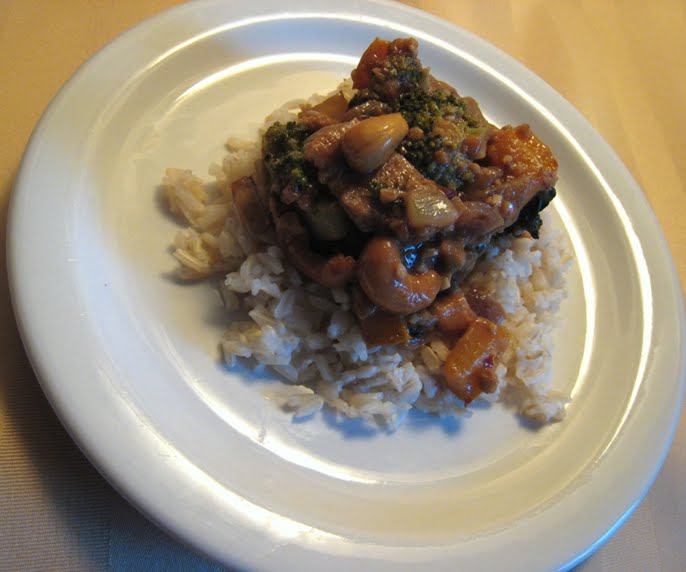
Assemble the crépes by spreading a couple spoonfuls of the filling on half of the crépe. Drizzle with cheese.


Fold it in half and then again in half. Drizzle with reduced balsamic vinegar and serve. (To make balsamic drizzle, heat balsamic vinegar over medium heat until it boils, turn down heat and let it cook for a couple minutes).

Crespelle (recipe source: http://www.manusmenu.com): Preheat oven to 350 F. Coat the bottom of an oven proof dish with béchamel sauce. Arrange the folded crépes in the pan.
 
 
Pour the remaining béchamel sauce over the crépes. Sprinkle grated parmesan cheese on top (optional). Bake for 20 minutes and broil on high for a minute or so until the top is golden brown.


~Gayatri

Friday, September 23, 2011

Miniature Über-berry Pies

Yum
The days are getting shorter and soon, instead of bemoaning how hot and humid it is, we'll be griping about the cold! As a final farewell to summer, here's a classic recipe for berry pie that's pretty simple but easily lends itself to personalization - like these cute little mini-pies!


Ingredients:
~6 cups berries - strawberries, blueberries, raspberries, blackberries, your choice!
~1.25 cups sugar (I used Splenda)
1/2 cup flour (I used finely ground whole wheat flour)
~1 tbsp lemon juice
3 pie crusts (for regular pie, use only 2 pie crusts)

1. Preheat oven to
425°F.

2. Wash berries (slice if necessary, so they are roughly the same size) and mix them in a bowl.

3. In a separate bowl, mix sugar and flour. Combine the dry mixture with the berries.

4. Sprinkle lemon juice over the berry/flour mixture, let sit 10 minutes to let juices come out. Stir occasionally.


For regular pies
5. Place one pie crust in a 9-inch round pie pan and fill with the berry mixture.

6. For a double crust, lay the second pie crust on top and crimp the edges together, cutting away the excess. For a lattice crust, cut the second pie crust into ~1/2-inch strips. Lay one strip vertically in the center (dividing the pie in half), then one horizontally, also at the center. Working your way out, alternately lay strips horizontally and vertically in a lattice pattern until the strips are used up. Space the strips about 1/4 to 1/2 inch apart. Crimp edges together and cut away excess.

7. Slightly roll up the edges of the crust to help prevent berry juices from oozing over. As this doesn't always keep the juices in, line a cookie sheet with foil and put the pie pan on the cookie sheet to catch any rogue juice drippings.

8. Bake at
425°F for 10 minues, then reduce heat to 325°F and bake for another 50 minutes. Let cool.
For mini-pies:
5. Line a muffin pan with foil. Though it takes some work, lining each muffin cup separately will make it much easier to remove the mini-pies after baking. NOTE: It is best not to use muffin cup liners, as the crust will snag on the ridges and tear.
6. From each of the 3 pie crusts, cut circles about 3 inches in diameter with a cookie cutter, or some other circular object, like a huge mug :-) Save the rest of the crust.
7. Press the circular crust rounds into each muffin cup. The rounds should be large enough that some extra is able to fold out on the muffin pan. Spoon the berry mixture into each muffin cup.

8. Using the crust left over from cutting the small circular rounds, cut ~1/4-inch strips about 3-4 inches long. Arrange over the top of each muffin cup in a small lattice pattern (see step 6 for regular pies on how to do this). Crimp edges together and slightly roll them up to help prevent berry juices from spilling over.

9.
Bake at 425°F for 10 minues, then reduce heat to 325°F and bake for another 10-20 minutes. Let cool.

Serve the pie à la mode for a sweet, anytime dessert!

~Karla


Note: Fresh berries work best, but if using frozen berries, make sure they are defrosted and discard excess liquid so that the pie doesn't get too soggy. 

Thursday, September 15, 2011

Eggplant Parmigiana

Yum
Did you know eggplant is botanically classified as a berry?! We didn't either! We think that eggplant is typically under-appreciated as a food, but it can be super delicious - stuffed, baked, in a stir-fry or even chili. However, one of the most common eggplant dishes you'll see in a restaurant is eggplant parmigiana. We made this a few times for some dinner parties (and my parents!) with great success. Here's the recipe we used, adapted from Simply Recipes.
Ingredients:
2 lbs (about 2 large) eggplants
1 28-oz can whole peeled tomatoes (or diced or crushed, whatever your preference)
1 clove garlic, minced
1/2 cup all-purpose flour (we used fine ground whole wheat flour)
1/2 cup fine dry breadcrumbs (we omitted these and replaced with flour)
4 large eggs, beaten (we used Egg Beaters)
1 1/2 lbs fresh mozzarella cheese, sliced into 1/4-inch rounds (or you can use shredded)
1 cup grated Parmesan cheese
1 cup packed fresh basil leaves (or ~1/2 cup loose dried basil)
olive oil (or canola oil)
salt, pepper

Pre-cooking steps

1. Cut eggplant into 1/4-inch slices (either rounds or lengthwise). In the bottom of a colander, arrange a layer and lightly sprinkle with salt. Repeat with remaining eggplant, salting between layers, until all the eggplant is in the colander. Weigh down the slices (a large stack of bowls worked for us) and let moisture drain for a couple hours. When we made this, we put paper towel between layers of eggplant to help absorb the moisture. NOTE: As an alternative, you can broil the slices for a few minutes per side instead of salting them.

2. While the eggplant is draining, make the tomato sauce by combining the tomatoes, garlic, and 1/3 cup oil and mix well. If you don't want tomato chunks, you can blend the mixture in a food processor to smooth it out. Season the sauce with salt and pepper to taste. (Additionally, we added some garlic, and oregano would also add some extra flavor.)

Cooking steps

3. Preheat oven to 350°F.

4. After eggplant has drained, wipe off excess salt and wipe or pat down with paper towel to remove as much extra moisture as possible. In a large shallow bowl, combine flour and breadcrumbs (or just flour). Pour beaten eggs into another large shallow bowl. Heat some oil in a large skillet.

5. To cook the eggplant, dredge the slices in the flour mixture, then dip them in the egg. Lightly fry the slices until they are golden brown on both sides. It's not necessary to use a lot oil, but if you run out just add a little at a time to the skillet. NOTE: As an alternative to frying - after dredging the slices in flour and egg, place them in a single layer on a baking sheet and bake about 5 minutes on each side.

6. In a baking dish, spread a cup of tomato sauce, then layer with about 1/3 of the eggplant slices. On top of the eggplant, spread a layer of mozzarella (either slices or shredded) using about half the cheese. Sprinkle with Parmesan cheese and basil. Repeat the process for a second layer, using the rest of the mozzarella. Put the remaining eggplant slices on top, then top with the remaining tomato sauce and sprinkle and even layer of Parmesan cheese.

7. Bake about 30 minutes, until cheese is melted and the top is slightly brown. Let the dish cool for about 10 minutes before serving.

The finished eggplant parmigiana can be served on its own, or with pasta of your choice. Enjoy!

~Karla

Thursday, September 1, 2011

Chocolate filled shortbread cookies

Yum


Shortbread cookies are very simple to make and can be easily flavored with chocolate or fruit jams. They do taste delicious without adding any of those flavors, but since it is not a very sweet cookie, I prefer some kind of filling to sweeten it up a little. I found a wonderful recipe for a chocolate filled shortbread in the book Crazy for Chocolate, which I’ve modified a little.


Ingredients:

Shortbread
125g (4oz) butter, chopped
1/2 cup icing sugar
1 cup of all-purpose flour
1 1/2 teaspoons of baking powder
1/4 tsp salt
1/2 cup cornflour
1 tablespoon iced water


Filling
60g (2 oz) dark chocolate
60 g (2 oz) cream cheese
1 egg, lightly beaten

1. Preheat oven to 350oF. Grease a baking tray. Combine flour, baking powder, salt.
2. Beat butter and icing sugar until creamy. Add flour mixture and water. Process for few seconds until mixture comes together. Wrap in plastic wrap and refrigerate for an hour.
3. For the filling, melt dark chocolate. Beat cream cheese until soft, add cooled melted chocolate and half of the beaten egg, and mix well.
4. Roll out the shortbread mixture between two sheets of aluminum foil to about 1/4 inch thickness. Cut out rounds with a cookie cutter. If you don’t have anything round to cut with, just cut out squares with a knife.
5. Place half the rounds on the prepared tray. Place 1/2 teaspoon of the filling in the centre of the rounds, brush edges with remaining beaten egg and place the remaining rounds over the filling. Press edges lightly to seal.
6. Bake 10-15 minutes or until golden. Transfer to wire rack. Dust warm cookies with powdered sugar, or a mixture of powdered sugar and cocoa….or just use Nesquik like I did :-)


Enjoy the cookies with a hot cup of tea or coffee.

~Gayatri

Friday, August 12, 2011

Peanut butter stir-fry

Yum


I like to make more elaborate meals on weekends when I have a lot of time, but try to keep my weeknight dinners simple. There is a variety of such speedy dishes like sandwiches, pasta, soups etc., but one of my favorite quick and easy dinners is a stir-fry. Not only are stir-frys simple to make, but they could also be made healthy by picking the right ingredients. Also, there is a lot of room to play with different flavors, colors and textures by choosing different combinations of vegetables as well as sauces, and you can use as many ingredients as you want! Heres a recipe for a vegetarian stir-fry with a peanut butter sauce. Along with vegetables, I’ve also used seitan (http://en.wikipedia.org/wiki/Wheat_gluten_(food)), which is basically wheat gluten, so it is a good source of protein. You can use any vegetables you like, as well as other proteins including meat, fish, tofu. For the sauce, I used peanut butter and soy sauce as the base, with other ingredients that help enhance the flavor. But the proportions of all these ingredients can be adjusted according to personal preference.

Ingredients:
1 Tbsp oil
1 medium onion, chopped (~1 inch pieces)
1 orange/green bell pepper, chopped (Try to keep the size of all the chopped vegetables approximately the same so that they cook evenly)
1 cup sliced mushrooms
1.5 cups broccoli florets
1 cup seitan
5-6 basil leaves, chopped
1/4 cup roasted cashews
3 cloves garlic, finely chopped
1/2 inch ginger, finely chopped
3 Tbsp peanut butter
1 Tbsp soy sauce
1/2 Tbsp white wine vinegar (or lemon juice)
1 tsp honey
1/4 tsp paprika
1 tsp crushed red pepper
salt
water
Blanch the broccoli florets by dropping them in boiling water for about a minute and then immediately drain them under cold running water. If using other denser vegetables like cauliflower, carrots etc., blanch those as well.

To make the sauce, mix the peanut butter, soy sauce, vinegar, honey, 1 Tbsp water, paprika, ginger, crushed red pepper flakes. Taste and adjust any ingredients to your liking. Add more water if required.

Heat a wok or large frying pan over medium-high heat. Add oil and swirl around.
Once oil is heated, add onions, chopped bell pepper and sauté for a minute. Add mushrooms, broccoli and seitan. Saute for another minute. Add roasted cashews and chopped basil.

Add the sauce and give a quick stir. Add salt according to taste (DO NOT add salt before the sauce since soy sauce is pretty salty).

If required, deglaze the pan (loosen and dissolve the bits of food stuck to the pan) with a little water. Remove from heat and serve hot. The stir-fry goes really well with rice, but is just as good by itself.

~Gayatri

Friday, July 8, 2011

Parlez-vous Français? Part II: Chocolate Mousse

Yum

After quite a long break from blogging, we are back with a recipe for another French dessert. It’s a rich, creamy chocolate mousse, which can be made with your favorite flavor. This dessert is perfect to be served in individual bowls/cups at parties and can be made a few days in advance. But more importantly, there is no cooking or baking involved, making it a super easy (and super fun!) dessert.


Ingredients:
150 g dark chocolate (~3/4 cup, melted)
3 eggs, whites and yolks separated
50g butter (just under 1/4 cup)
4 tbsp sugar
Your choice of flavor (raspberry, mint, rum, lemon zest, orange zest, coffee, etc.)

1. Melt the chocolate and add butter to it immediately so that the butter will melt as well.

2. Beat egg yolks and add your chosen flavor to it. You will have to adjust the quantity according to your liking. So far we have used raspberry (~10-12 puréed raspberries), and orange (~1/2 tbsp zest + 1/2 tbsp orange juice). It can also be made with just chocolate without any extra flavor.

3. Add the egg yolk mixture to the chocolate and butter mixture.

4. Beat egg whites until foamy, then add sugar slowly while whipping and continue till stiff peaks are formed.

5. Fold a few spoonfuls of the egg whites into the chocolate mixture and then add the chocolate mixture to the whites and fold until completely incorporated. Make sure you do this gently. Do not whisk the mixture.

6. Pour the mixture into serving bowls (or a big bowl if you just want to scoop it out and serve) and refrigerate for a few hours. It can be stored in a refrigerator for up to a week, but it is so delicious that it probably won’t last that long :).


~Gayatri

Wednesday, June 1, 2011

Parlez-vous Français? Part I: Madeleines

Yum
Our friend and labmate, Carrie, recently returned from a 4-month stint in Paris, France as part of her doctoral studies (we were insanely jealous the whole time =P). After she re-acclimated to life in the Midwest, the three of us got together to have a dinner-movie-cooking night, and made some delicious desserts while watching Disney's Beauty and the Beast - which, fittingly, takes place in France :) One of the desserts we made were little shell-shaped sponge cakes called madeleines. The recipe we used was originally in French, so here is the English translation - including some of those pesky metric conversions!

Ingredients (makes 9 madeleines):
50 grams butter (about 3.5 tbsp)
1 egg
65 grams sugar (about 1/3 cup)
1 packet vanilla sugar (about 2 tsp vanilla sugar*)
65 grams flour (about 2/3 cup)
pinch of salt

Preheat oven to 180C (350F). Soften butter and mix with sugar and vanilla sugar until well mixed. Add salt and flour and mix. Fill madeleine molds with batter and bake for 10 minutes, or until madeleines are golden brown. Remove from mold and let cool.

These little treats taste fantastic as they are, but we added a chocolate option to ours. Since we made a big batch of madeleines, we melted some dark chocolate and then coated about half the madeleines with chocolate - très délicieux!

~Karla

*If you can't find vanilla sugar, it can be substituted with a mix of regular sugar and vanilla extract: 1 tablespoon vanilla sugar = 1 tablespoon granulated sugar + 1/4 teaspoon vanilla extract. You can also make vanilla sugar at home: Place 2 cups granulated sugar in a container with an airtight seal. Cut one vanilla bean in half, scraping out the seeds into the sugar. Place the bean halves into the sugar, covering them well. Close the container and allow it to sit for about 2 weeks. Add more granulated sugar as you use the vanilla sugar - the beans remain effectively flavorful for several months. (Source: http://www.ehow.com/about_5332306_substitute-vanilla-sugar.html)


Monday, March 14, 2011

Spinach and Brown Rice Gratin

Yum
Although most people love rice, there are a few oddballs like me, who don’t! As a kid, I used to try to hide the rice from my plate to fool my parents into believing that I ate it all…but I don’t think that worked very well. Anyway, knowing the health benefits of rice, I do try to include it in my meals – but that requires a little bit of creativity :)
Heres a recipe for a brown rice - spinach gratin, which tastes great and is nutritious. Its a good way to use leftover rice and is also very easy to modify to include different veggies according to your taste. I only had bell peppers at home, so that’s what I used, but you can add peas, corn, olives, carrots etc.
Recipe modified from: http://www.101cookbooks.com
Ingredients
2 cups cooked brown rice (white rice will work as well)
1.5 cups chopped spinach
1 small green pepper chopped
1/2 medium onion chopped
2 eggs (I used egg beaters)
1/2 tbsp olive oil
1/2 cup shredded Gruyere cheese (or Parmesam)
1/4 cup toasted almond slices (or chopped walnuts)
salt to taste
optional: 1/2 cup crumbled tofu

Preheat oven to 400 F. Set the rack in the top third of the oven. Grease a 9 inch round baking dish.

In a large bowl, mix together all the ingredients except eggs and 1/4 cup cheese. Adjust seasoning; add some herbs, spices if you like. Beat eggs well in a separate bowl and fold into the rice mixture. Pour mixture into the prepared pan and top it with the remaining cheese.

Bake for 25-30 min or until the rice is set and the cheese on top is golden. Remove from oven and serve warm.

~Gayatri

Friday, February 11, 2011

Vegetarian Thanksgiving (Tofurkey not included)

Yum
My parents came down to visit us last Thanksgiving, so we decided to cook them a feast, vegetarian style. We did have a few traditional turkey legs, but one of the main dishes was lasagna - only with zucchini slices instead of noodles! Low-carb! :) The original recipe came from a cookbook called Simply Delicious Vegetarian by Carla Bardi, and it was pretty tasty the first time we made it, but we decided to put our own (somewhat healthier) spin on it. This one takes a lot of prep time, but we think it's worth it!


Ingredients
4-5 large green zucchini, sliced length-wise (about 1/8 to 1/4 inch thick)
1/2 - 1 cup mushrooms, chopped
1/2 - 1 cup asparagus, chopped
1/2 - 3/4 cups sun-dried tomatoes, chopped (soak in warm water for about an hour to soften)
grated Parmesan cheese
1 - 2 cups bread crumbs (we used finely crushed bran flakes instead)
skim milk, both powdered and regular
garlic, salt, pepper
shredded mozzarella cheese (low-fat or part-skim)


Prep the zucchini: It's best to slice the zucchini at least 4 hours ahead of time to help reduce the moisture in the slices. Lightly salt the slices and layer them in a colander, with paper towel between the layers of zucchini. Put something heavy on top (like a stack of bowls) to help press some of the water out of the slices. When you are ready to make the lasagna, broil the zucchini slices 5-7 minutes per side to further reduce moisture.

To make the filling: chop the mushrooms, asparagus and sun-dried tomatoes, and saute them, seasoning them with salt, pepper and garlic. Pour about 1/4 cup skim milk into the pan and stir. Alternately add Parmesan cheese and powdered skim milk to thicken the mixture, until it is almost like a bisque. If you add more milk than cheese, be sure to also add more spices. (Note: if you don't have, or can't find, powdered skim milk, you can use 2% or whole milk, and add more grated cheese than milk to the mixture.) You can experiment with different filling ingredients, like spinach. The original recipe called for carrots, shallots and celery - which we though was a little boring :)


Put it all together: Heat oven to 350F. Layer the bottom of a baking dish with the broiled zucchini slices, spread a thin layer of filling over the zucchini, sprinkle with a layer of bread crumbs, then sprinkle grated Parmesan cheese on top. Repeat this process until all the filling is used up. Make sure to leave enough zucchini for a top layer to cover the last of the filling (making an odd number of zucchini layers). Sprinkle the top layer of just zucchini with bread crumbs, and instead of using Parmesan cheese, top with shredded mozzarella. Bake 15-25 minutes or until the cheese on top is melted and/or browning slightly at the edges. Let cool, then slice and enjoy!

~Karla