The days are getting shorter and soon, instead of bemoaning how hot and humid it is, we'll be griping about the cold! As a final farewell to summer, here's a classic recipe for berry pie that's pretty simple but easily lends itself to personalization - like these cute little mini-pies!

Ingredients:
~6 cups berries - strawberries, blueberries, raspberries, blackberries, your choice!
~1.25 cups sugar (I used Splenda)
1/2 cup flour (I used finely ground whole wheat flour)
~1.25 cups sugar (I used Splenda)
1/2 cup flour (I used finely ground whole wheat flour)
~1 tbsp lemon juice
3 pie crusts (for regular pie, use only 2 pie crusts)
1. Preheat oven to 425°F.
2. Wash berries (slice if necessary, so they are roughly the same size) and mix them in a bowl.
3. In a separate bowl, mix sugar and flour. Combine the dry mixture with the berries.
4. Sprinkle lemon juice over the berry/flour mixture, let sit 10 minutes to let juices come out. Stir occasionally.
For regular pies
5. Place one pie crust in a 9-inch round pie pan and fill with the berry mixture.
6. For a double crust, lay the second pie crust on top and crimp the edges together, cutting away the excess. For a lattice crust, cut the second pie crust into ~1/2-inch strips. Lay one strip vertically in the center (dividing the pie in half), then one horizontally, also at the center. Working your way out, alternately lay strips horizontally and vertically in a lattice pattern until the strips are used up. Space the strips about 1/4 to 1/2 inch apart. Crimp edges together and cut away excess.
7. Slightly roll up the edges of the crust to help prevent berry juices from oozing over. As this doesn't always keep the juices in, line a cookie sheet with foil and put the pie pan on the cookie sheet to catch any rogue juice drippings.
8. Bake at 425°F for 10 minues, then reduce heat to 325°F and bake for another 50 minutes. Let cool.

For mini-pies:
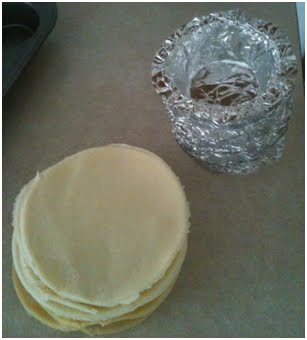
5. Line a muffin pan with foil. Though it takes some work, lining each muffin cup separately will make it much easier to remove the mini-pies after baking. NOTE: It is best not to use muffin cup liners, as the crust will snag on the ridges and tear.
5. Line a muffin pan with foil. Though it takes some work, lining each muffin cup separately will make it much easier to remove the mini-pies after baking. NOTE: It is best not to use muffin cup liners, as the crust will snag on the ridges and tear.

6. From each of the 3 pie crusts, cut circles about 3 inches in diameter with a cookie cutter, or some other circular object, like a huge mug :-) Save the rest of the crust.
7. Press the circular crust rounds into each muffin cup. The rounds should be large enough that some extra is able to fold out on the muffin pan. Spoon the berry mixture into each muffin cup.

8. Using the crust left over from cutting the small circular rounds, cut ~1/4-inch strips about 3-4 inches long. Arrange over the top of each muffin cup in a small lattice pattern (see step 6 for regular pies on how to do this). Crimp edges together and slightly roll them up to help prevent berry juices from spilling over.
9. Bake at 425°F for 10 minues, then reduce heat to 325°F and bake for another 10-20 minutes. Let cool.

Serve the pie à la mode for a sweet, anytime dessert!
~Karla
Note: Fresh berries work best, but if using frozen berries, make sure they are defrosted and discard excess liquid so that the pie doesn't get too soggy.
~Karla
Note: Fresh berries work best, but if using frozen berries, make sure they are defrosted and discard excess liquid so that the pie doesn't get too soggy.


