Sunday, February 28, 2016

Pork Roast

Yum
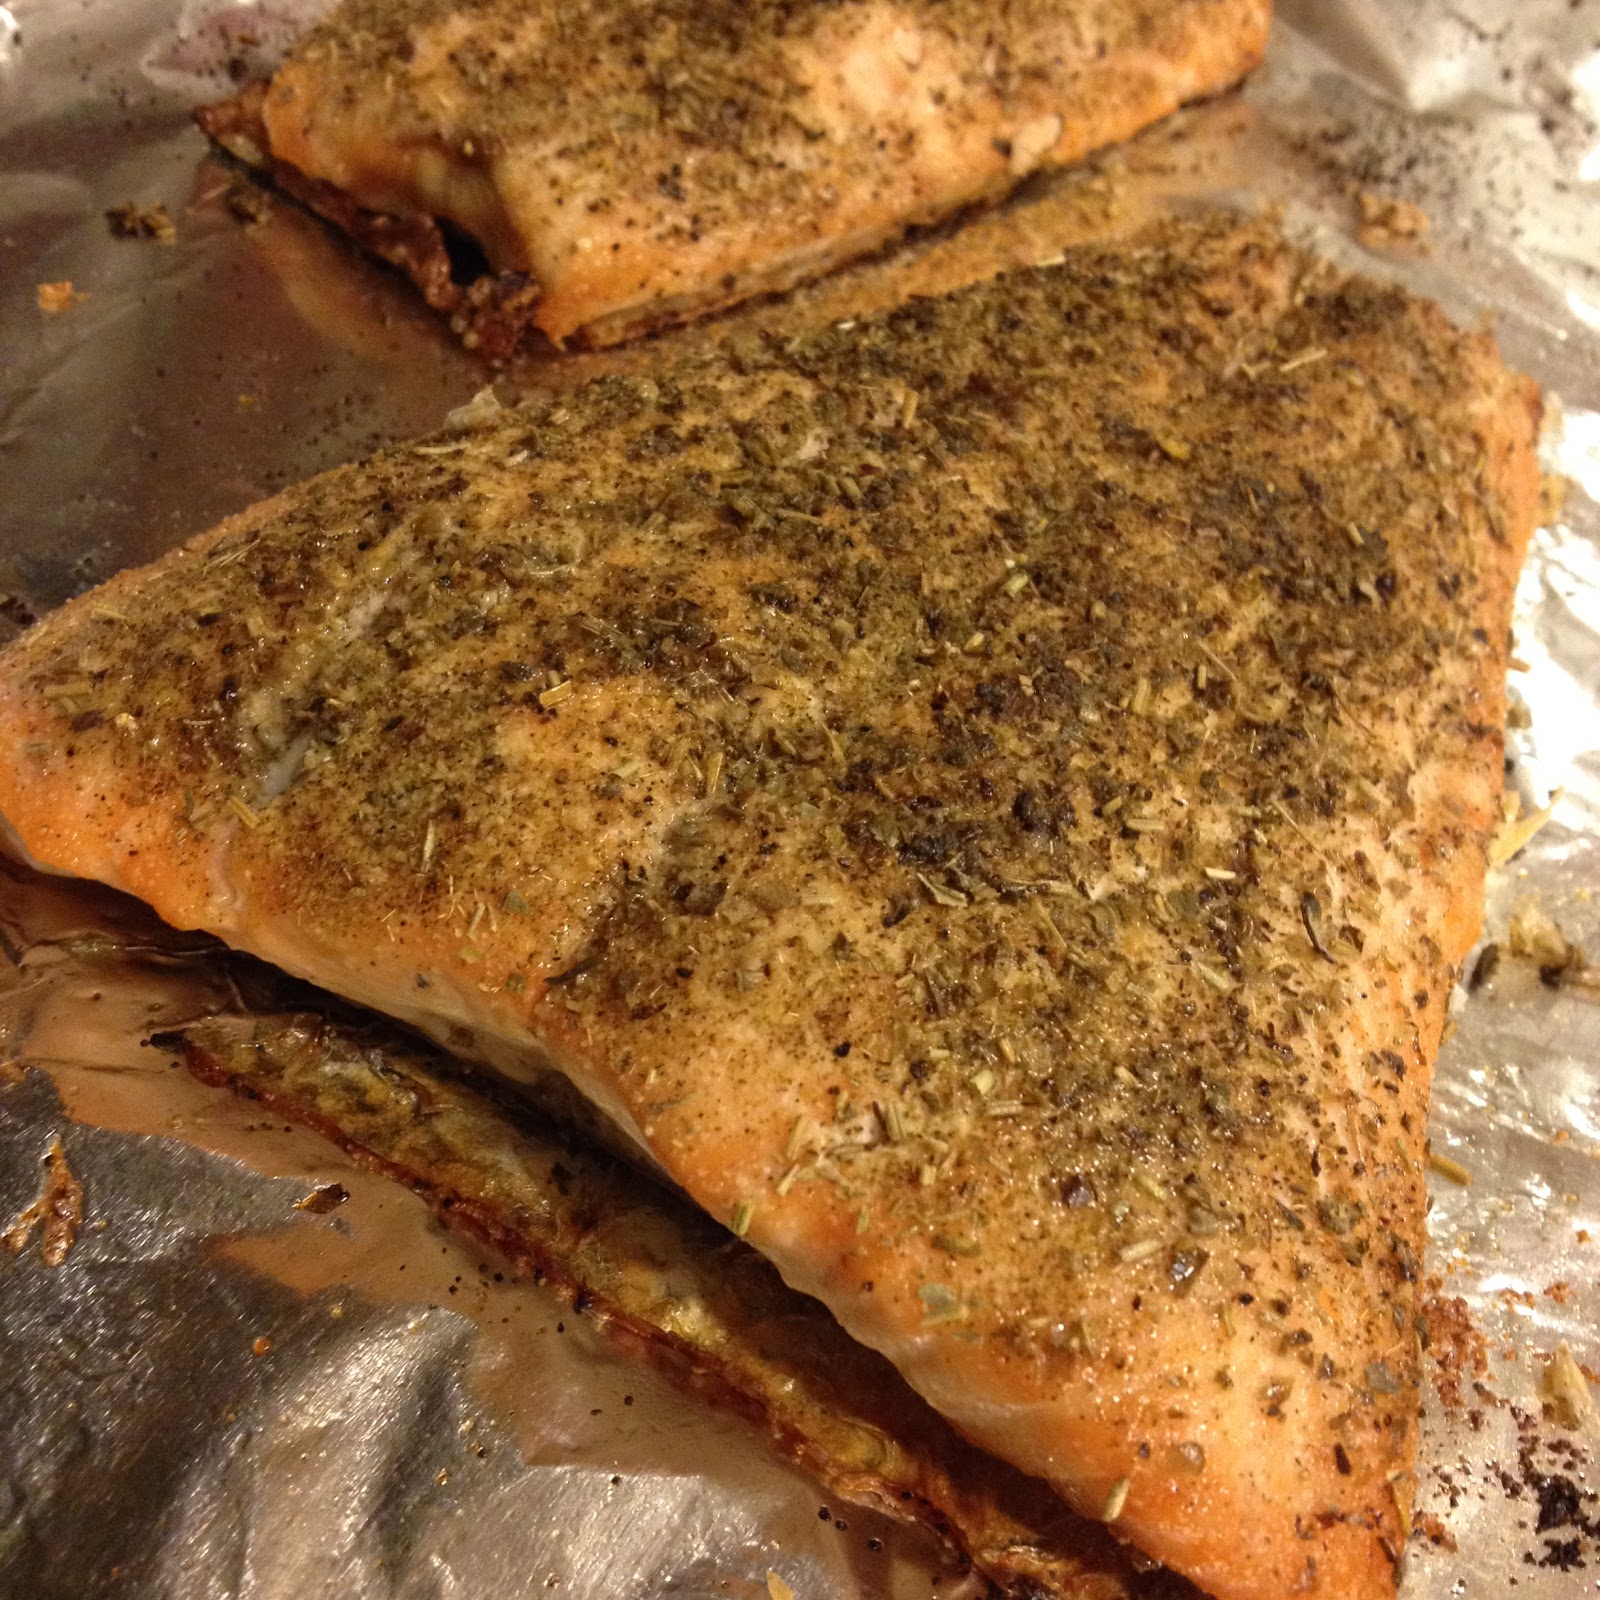
In my house, protein for our meals consist predominantly of chicken, since it’s extremely versatile and it can be really easy to make something delicious very quickly (sprinkle with herbs and spices, broil a few minutes on each side, and voilĂ !). Occasionally, though, I’ll switch things up and get some pork chops to marinate, and they don’t last long with my husband and toddler gobbling them up! This past holiday season, we were treated to delectable pork coated with fresh herbs and roasted to that perfect combination of crispy, tender, and juicy. Of course I wanted to replicate it! But, since the original recipe called for mostly fresh herbs to be minced or ground with a mortar and pestle, I wanted to try a version with easy-to-get dried spices. The taste was admittedly a little different, but delicious nonetheless, and a dish I would definitely make again!

IMG_5448_col.JPG

Ingredients:
~3-lb pork roast
~2 TBSP fennel seeds
2 TBSP crushed rosemary
1 tsp ground sage
2-3 garlic cloves, minced
1-2 tsp lemon juice
¼ tsp salt
¼ tsp red pepper flakes
¼ tsp black pepper
2 TBSP olive oil


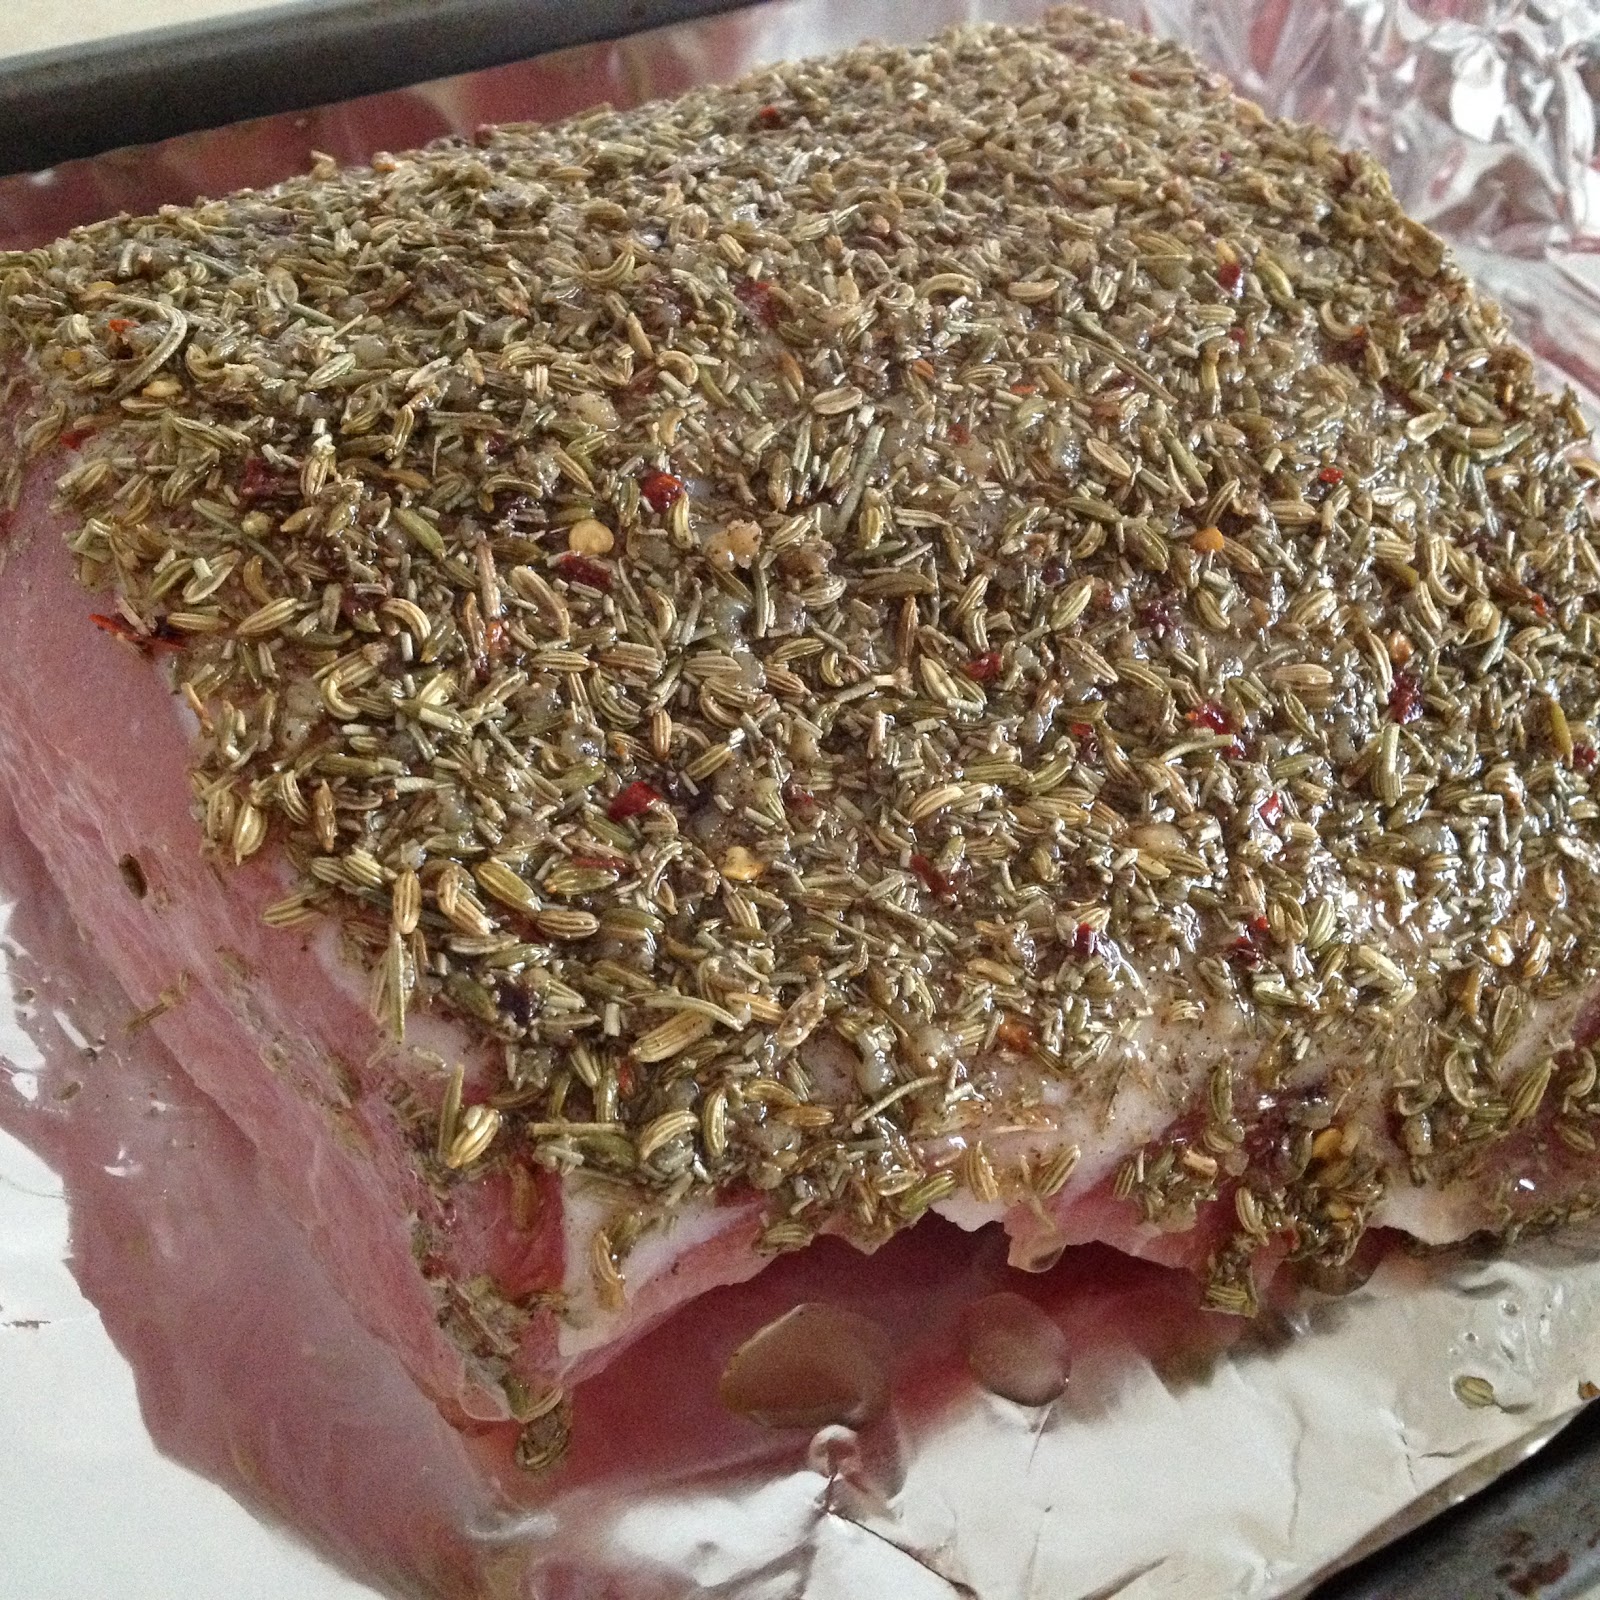
Preheat the oven to 450°F. Lightly grease a roasting pan. Combine all the herbs and spices with the olive oil and mix well, forming a paste. Place the pork roast fat-side up in the pan. Rub the herb paste all over the top of the pork.

IMG_5414.JPG

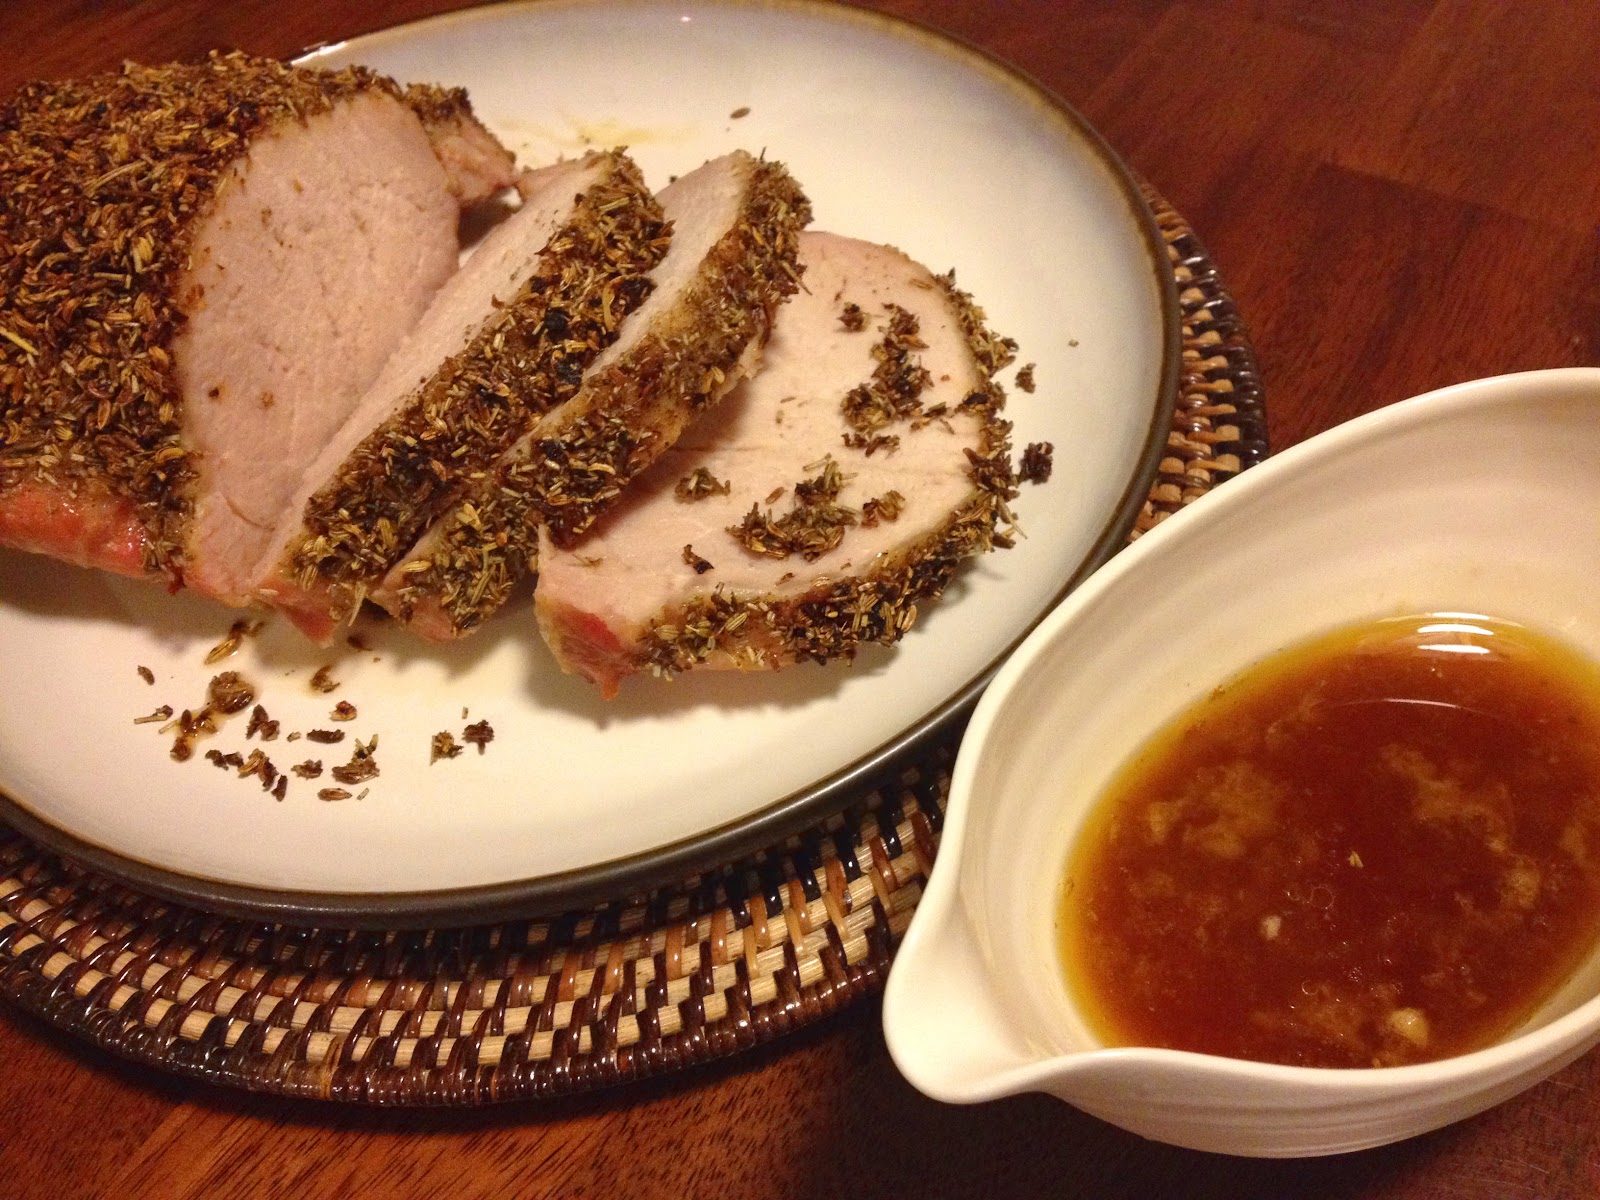
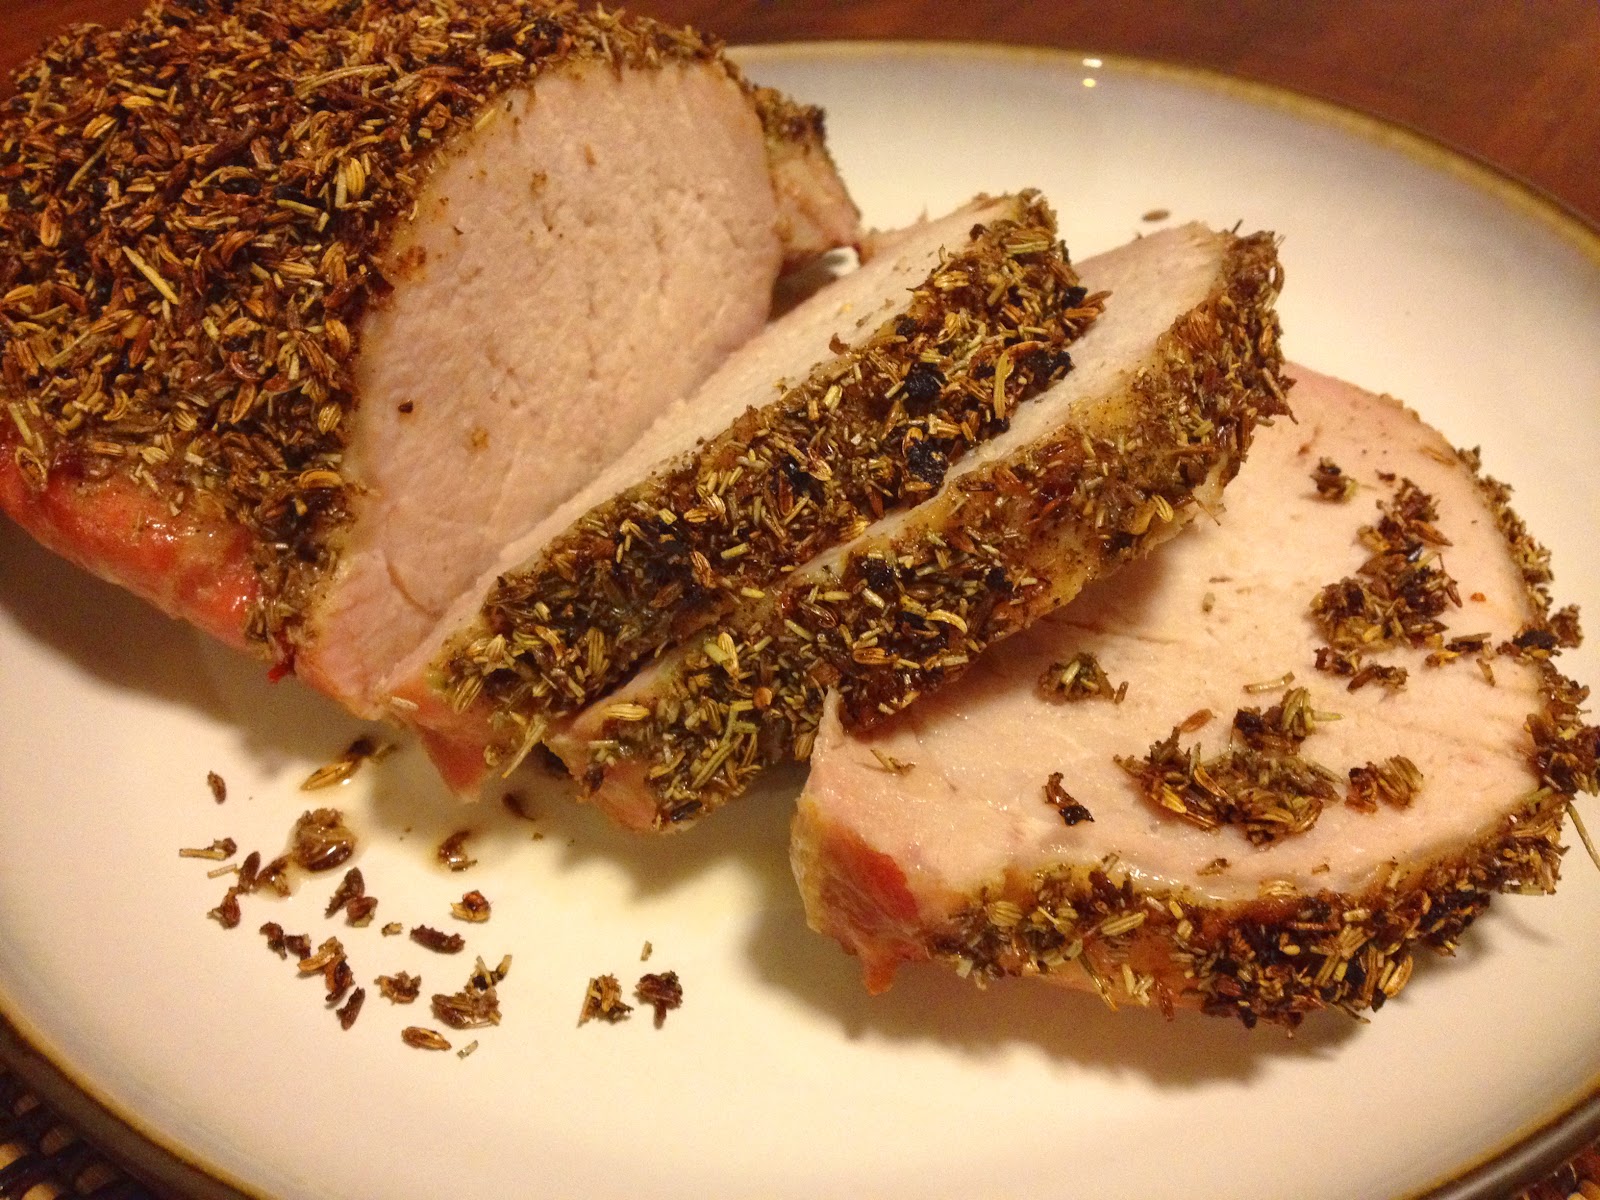
Bake at 450°F for 10 minutes, then reduce the heat to 250°F and bake an additional 50-80 minutes, until the internal temperature measured with a meat thermometer is 145°F. Let cool for about 10 minutes before slicing and serving.

IMG_5440_col.JPG

Pour any drippings from the pan into a bowl to enjoy the pork “au jus”!

~Karla


Find us on Facebook

Savory, juicy, herb-y pork roast.http://cooksofcakeandkindness.blogspot.com/2016/02/pork-roast.html

Posted by The Cooks of Cake and Kindness on Sunday, February 28, 2016

Thursday, February 25, 2016

Pistachio, Cashew and Chopcolate Chip Biscotti

Yum
A couple months ago I was in the Maryland and DC area visiting friends. I reached their home in the evening after a very short flight, so I was in no way tired and was excited to explore the area with them. But probably to ensure that I won’t get cranky from hunger, my hosts decided to feed me some snack before we headed out. My friend Soumya brought out a plate of beautiful looking biscotti that I couldn't have resisted even if I wanted to. She told me that she had bought those at Starbucks. Had she not told me later that she was joking, I would have absolutely believed that! These decadent homemade biscotti were much easier to bite into than the usual extra hard ones, and so tempting that it became my favorite travel snack for the rest of the trip.


DSC_5108.JPG


A little bit of a background on biscotti and my love/hate relationship with them - until I came to the US some 10 years ago, I didn’t know these cookies existed. But while I was at Purdue, the Nonni’s triple chocolate biscotto (yes, that’s the singular form!) quickly became a fairly regular afternoon snack. As much as I love the taste, the disappointing thing about biscotti for me is that they are generally difficult to eat without dunking them in tea/coffee/milk. But they taste so good, that I was determined to find out why the extra hard (and not all that pleasant) texture. Turns out, the twice baked hard cookies were prepared that way to increase the shelf life in the verrrrry olden days (biscotti can be traced back to 1st century AD). These long-lasting cookies used to be a convenient snack for travellers. Apparently during the European renaissance period, these cookies were even enjoyed dipped in wine!


Anyway, coming back to the present- I found out that Soumya had used one of Giada De Laurentiis’ biscotti recipes with some very good modifications. She had cut down on the sugar and used all brown sugar instead of white, orange zest instead of lemon, and also changed up the add-ins such as nuts, chocolate etc. I followed her directions, with one minor change of switching out half of the all purpose flour with whole wheat. The baking times I used are also lower than the original recipe - partly because I was worried about ending up with very hard cookies, and partly because I was too impatient.


Ingredients: (Makes ~3 dozen biscotti)
2 cups flour (I used half all purpose and half whole wheat flour)
1 ½ teaspoons baking powder
½ cup dark brown sugar
½ cup (1 stick) unsalted butter, at room temperature
zest of 1 Navel orange
¼ teaspoon salt
2 large eggs
¾ cup coarsely chopped nuts (I used half cashews, half pistachios)
⅓ cup dark chocolate chips


Preheat oven to 350 F. Line a baking pan with parchment paper.


Whisk together the flours, baking powder and salt.


In a large bowl, cream the butter, sugar and orange zest. Add the eggs, one at a time, whisking until well combined. Add the flour mixture and beat until just combined. This is not an easy step, but persist and you’ll end up with a lovely dough.


At this point it is best to use your hands (or perhaps a wooden spoon) to mix in the nuts and chocolate chips.


Divide the dough in half, and make two elongated logs. Put them on the prepared pan, leaving some room since they will expand a little. Gently pat them down, trying to ensure the width and height stays approximately the same everywhere to ensure even baking.


DSC_5095.JPG


Bake in preheated oven for 30 minutes. Remove from oven and let them cool on a wire rack for ~10 minutes before slicing about 1” thick using a sharp serrated knife. At this stage the cookies are still cooking inside with the heat that's trapped and are a bit fragile, so they are prone to breaking if the wait time is too short or too long. I like to start slicing around 10 minutes after taking them out of the oven, and as I get to the center of the logs, I let them rest for another minute or two if they’re too warm.


Place the biscotti back on the baking sheet, cut side down, and bake for another ~12-15 minutes. Remove from oven and let them cool completely on a wire rack before storing in an air-tight container.


DSC_5102.JPG

Enjoy with a steaming cup of tea or coffee… or wine if that suits your taste!

~Gayatri

Find us on Facebook:

Delicious crispy (but not overly hard!)...

Posted by The Cooks of Cake and Kindness on Thursday, February 25, 2016

Tuesday, February 23, 2016

Creamy Cauliflower and Tofu Gratin

Yum
A creamy gratin can be a wonderful side to any meal. But if you’d like to make it the main dish, here’s a way to make it healthy so it can be enjoyed guilt free! I used orange cauliflower in this recipe, and tofu to add protein. You could add other vegetables as well, making sure they won’t release too much liquid when baked. For example, if using zucchini or mushrooms, saute them to evaporate some moisture before baking. I’ve also used Bechamel sauce made with just a couple teaspoons of olive oil, some whole wheat flour and non-fat milk; a dash of salt and pepper and you won’t even miss the cheese! I did add a little bit of grated parmesan cheese on top towards the end of baking to get that characteristic golden brown crust you expect to see on a typical gratin.


DSC_5124.JPG


Ingredients: (Serves ~6)
10-14 oz extra firm tofu
1 small head of cauliflower (I used orange cauliflower)
½ red onion - thinly sliced
1-2 cups bechamel sauce (link:http://cooksofcakeandkindness.blogspot.com/2011/10/crepes-and-crespelle.html)
½ tsp oil
Salt
Crushed black pepper
1 Tbsp grated Parmesan cheese (optional)
Chopped parsley for garnish (optional)


While preparing the bechamel sauce, you can prep the tofu, cauliflower and the onions. Steam cauliflower florets until tender but not mushy (they will cook further in the oven).


Heat oil over medium heat in a saucepan. Add the sliced onions, sprinkle a little bit of salt, cover and cook for a few minutes. Remove the lid and stir the onions, cover and cook further on medium heat until onions are browned. Take the lid off, deglaze the pan with a splash of water and cook until the water is evaporated. Take the onions out and use the pan for cooking tofu.


To prepare the tofu, cut the tofu into ¾” thick slices. Using a paper towel, squeeze out as much water as possible. Lay down a few slices in a single layer in the pan in which onions were cooked. Let them brown over medium high heat. Turn the slices over and brown the other side. Repeat with remaining tofu slices.

Preheat oven to 400F.


To assemble the gratin, spoon about ¼ cup of bechamel sauce at the bottom of a baking dish. Lay down the tofu slices, top them with cauliflower and onions. Sprinkle some salt and crushed black pepper. Spoon over the remaining sauce evenly.


Cauliflower Tofu Gratin.jpg


Bake for 20 minutes in pre-heated oven at 400F. If using cheese, sprinkle it on top of the gratin and broil on low for a few more minutes until sauce is bubbly and cheese is browned. Let cool for a few minutes before serving.


DSC_5131.JPG


~Gayatri

Find us on Facebook:

Cauliflower and tofu gratin - a warm and creamy comfort food for the cold days, made healthier by omitting heavy cream...

Posted by The Cooks of Cake and Kindness on Tuesday, February 23, 2016

Friday, February 19, 2016

Cashew Date Smoothie

Yum
Smoothies are awesome! They make a convenient on-the-go meal, they’re delicious, and you can pack a lot of different nutrients in just one drink. On most days I have a smoothie either for breakfast or for dinner. Usually these contain a variety of fruits and green veggies depending on what I have on hand. But sometimes I like to switch things up and make a protein rich nut smoothie - perfect as a post-workout recovery drink! Pistachios, cashews and almonds are all wonderful options, and in this particular recipe I’ve used cashews as the base, sweetened with dates. You can add some vanilla protein powder, flaxseed or any other nutritional additive you prefer, just taste it as you go and modify quantities accordingly.


Ingredients (2-3 servings)
¼ cup raw cashews
3-6 pitted dates (depending on how sweet you like it)
Pinch of cardamom powder
½ tsp rose water (optional)
6-8 ice cubes
1-2 cup of water (depending on how thick you want it to be)
Additional water for soaking cashews
Honey (optional)
chia seeds (optional)

Soak the cashews and dates in water for at least 2 hours. Scoop them out once soaked and add them to a water, cardamom powder and rose water to a blender and puree the cashews. Once you have a smooth mixture, add the ice cubes and blend. Adjust the number of dates till you achieve desired sweetness. You could also use honey to sweeten the drink.

Serve as is or with chia seeds (pre-soaked) and/or a drizzle of honey.

~Gayatri

 
Note: If you are saving the smoothie for later, keep it refrigerated and shake it before serving as the water might separate.

Find us on Facebook:


What's your favorite post-workout drink/snack?Here's an idea for a delicious creamy cashew and date smoothie as a...
Posted by The Cooks of Cake and Kindness on Friday, February 19, 2016

Tuesday, February 16, 2016

Oil Free French "Fries"

Yum
There are several recipes out there for baked French fries that need only a little bit of oil to coat the potatoes. But recently I came across this interesting recipe that is completely oil free and uses egg whites to crisp up the potatoes. I was a little worried that it might smell like eggs, but I was pleasantly surprised that there was absolutely no hint of eggs once baked!


DSC_5140.JPG


Ingredients:
1-2 large potatoes (I used Russet)
1 egg white - beaten
Paprika (optional)
Salt to taste
Grated Parmesan cheese (optional)
Fresh parsley - finely chopped (optional)


Preheat oven to 350 F. Line a baking pan with parchment paper.


Wash and peel the potatoes and slice them about ¾- 1cm thick. Toss the potatoes with the egg whites and coat evenly.


Lay down the potatoes on the prepared pan in a single layer. Sprinkle some paprika and bake for ~15 minutes. Flip them over and bake for another 10-15 minutes until the potatoes are cooked through (test one of the fries). If you’d like them to be golden brown, broil on high for a minute or so.


Remove from oven, sprinkle some salt and toss around to coat. For an even more delicious flair, toss in some fresh grated Parmesan cheese and parsley.


DSC_5144.JPG

~Gayatri

Find us on Facebook:

A healthier version of crispy French "fries" - completely oil free!http://cooksofcakeandkindness.blogspot.com/2016/02/oil-free-french-fries.html
Posted by The Cooks of Cake and Kindness on Tuesday, February 16, 2016

Saturday, February 13, 2016

Peanut Butter Truffles

Yum
One more day until Valentine's Day, and you know what that means....sweets! Though, to be honest, it doesn't have to be a holiday to want sweets. I get cravings for sweets all the time. And when I say “all the time” I really mean ALL THE TIME. Thankfully, I can restrain myself so that my indulging-to-craving ratio is relatively low. In an effort to reduce the guilt that sometimes accompanies those indulgences, I’ll try making treats that are a little less unhealthy (like these blueberry banana muffins made with whole wheat flour) or have some benefit to balance the sweet (such as these protein-packed peanut butter oat balls).

This recipe is based on the peanut butter and oat balls. I was actually aiming for a cake-pop type treat - a chocolate covered peanut butter ball on a stick. But, the consistency of these didn’t like the sticks very much, so I turned them into truffles! They are a little bit like buckeyes, but not as sugary-sweet, and they have flaxseed for a little extra fiber.


IMG_5428_col.JPG


Ingredients: (makes ~20 truffles)
1 cup oats (I used ½ cup quick oats and ½ cup old-fashioned oats)
½ cup all natural creamy peanut butter
¼ - ½ cup ground flaxseed
⅓ cup honey or maple syrup
1 tsp vanilla extract
~½ cup dark chocolate chips for coating
~¼ cup crushed peanuts for topping


In a large bowl, combine oats, flaxseed, peanut butter, honey, and vanilla, and mix well. Refrigerate for about half an hour to let the mixture firm up. Form balls about 1 inch in diameter.

Heat the chocolate chips in a microwave-safe bowl for about 30 seconds at a time, stirring in between, until all the chips are melted. Dip the balls in chocolate and place them on a plate covered with plastic wrap. Sprinkle with the chopped peanuts. Refrigerate the balls to let the chocolate coating set. Serve the balls in individual mini-cupcake liners for a festive flare. Happy indulging!


IMG_5458.JPG

~Karla

Find us on Facebook


A sweet treat for Valentine's Day!http://cooksofcakeandkindness.blogspot.com/2016/02/peanut-butter-truffles.html
Posted by The Cooks of Cake and Kindness on Saturday, February 13, 2016

Wednesday, February 10, 2016

Egg Stuffed Paratha

Yum
Stuffed parathas are a very common dish in Indian cooking. The fillings range from vegetables such as potatoes, cabbage, to cheese, paneer etc. It’s basically thin bread stuffed with deliciousness, so the possibilities are endless! One of my favorites is egg stuffed paratha. This version of the paratha does not involve filling the dough before rolling. Instead, you roll out the dough very thin and then add the raw egg mixture onto it as the paratha cooks, and then fold the edges over to hold the egg mixture inside. I know it sounds very tricky! My mom has been making it for us for years but I only recently garnered the courage to try making it myself. I have to say my dough wasn’t rolled out as thin as hers, so the dough-to-filling ratio ended up being a little higher, but it was delicious nonetheless.


This paratha is best made on a concave pan, so that the egg mixture can stay in place without spreading outside the paratha. Since I didn’t have a pan like that, I decided to make it in a fairly small flat bottom pan so that the sides of the pan could help contain the filling.


DSC_5170.JPG


Ingredients:
Chapati dough
Whole wheat flour
Oil (optional)
Warm water
Salt


Filling (enough for 2 parathas)
1 large egg
1-2 Tbsp chopped onion
½ Roma tomato, chopped
1 Tbsp chopped green bell pepper
1 tsp chopped cilantro or parsley
Minced green chilies (to taste)
Salt (to taste)
Any other spices/herbs that you enjoy in your omelettes


Make the chapati dough by mixing wheat flour and salt to taste. Add a little bit of oil (if using) and mix. Knead with enough water to get a soft (but not sticky) dough. Alternatively, you can skip the oil mixed in with the flour and put some oil on your palms as you knead.


There are several good tutorials for chapati/roti making online if you’ve never made the dough or the chapatis before. This is a good one from Aayi’s recipes.


Prepare the filling by whisking the egg and mixing in all the other ingredients. If you prefer, you could saute the onions first.


DSC_5148.JPG


Make a small ball (~2” diameter) of the dough and using a rolling pin, roll it thin into a somewhat square-ish shape. If you have a flat bottom pan like me, it’s best to have the chapati size larger than the pan size, so that the filling won’t spread outside.


Heat a couple drops of oil in a pan over medium heat, gently transfer the chapati to the pan. Add half of the filling in the center and move the pan around to spread it a little. Bring in opposite corners and try to seal them with some of the egg mixture using a spatula. Once they seem somewhat secured, bring together the other two corners and do the same.


Egg stuffed paratha.jpg


After the bottom is cooked completely and has some nice golden brown spots, flip the paratha over and cook on the other side. There might be some egg mixture leaking out if it is still too raw, but it tastes great so that shouldn’t be a problem!. Take the paratha out once both sides are cooked and the egg mixture feels like it is cooked - a good way to check is to press down gently with the spatula, and a perfectly cooked omelette inside the paratha will seem puffy and spring back.


Serve hot with ketchup or your favorite chutney.


DSC_5162.JPG


~Gayatri

Find us on Facebook:

Egg stuffed paratha - a perfect breakfast paratha!http://cooksofcakeandkindness.blogspot.com/2016/02/egg-stuffed-paratha.html

Posted by The Cooks of Cake and Kindness on Wednesday, February 10, 2016

Sunday, February 7, 2016

Caprese Tart

Yum
A light and crispy savory tart can be a fun snack or a nice appetizer to begin a meal. The inspiration for this caprese tart comes from a tomato tart recipe by our friends at Breaking Naan. The tomato tart consists of a baked puff pastry, topped with mozzarella cheese, thinly sliced tomatoes, garlic, olive oil and herbs - simple ingredients and easy steps, especially if you’re using a pre-made frozen puff pastry sheet. In this recipe, the toppings are modified just a little by switching fresh basil for chives and adding some tart balsamic vinegar to contrast the creaminess of the cheese.


DSC_5114.JPG


Ingredients:
1 puff pastry sheet - defrosted if frozen (I used Pepperidge Farm frozen puff pastry)


Toppings:
2 large tomatoes sliced very thin (I used Roma tomatoes)
1-2 low moisture mozzarella cheese slices
2-3 fresh basil leaves
Salt (optional - I didn’t use any)
Black pepper or red pepper flakes (optional)


Dressing:
Extra virgin olive oil
Balsamic vinegar
Minced garlic


Heat oven to 400 F. Cut the puff pastry sheet into 3 parts lengthwise. The one I used comes folded in thirds making this very easy. Place the puff pastry on a baking pan. Gently roll the edges and seal the seam by pressing down with your fingers. This is an optional step but the slightly raised edges keep the tomato juice from leaking out and it also makes good presentation. Using a fork, poke holes in the pastry (except for the rolled edges) to keep it from rising too much.


DSC_5111.JPG


Bake for ~15 minutes until the pastry is golden brown. Don’t brown it too much because it will be going back in the oven with the toppings.


To make the marinade, mix 1 part olive oil with 2 parts balsamic vinegar. Add minced garlic (to taste).


Tear the mozzarella slices into small pieces and spread them evenly on the baked pastry sheets. Layer the tomato slices on top - I got about two layers of thin slices. Spoon over the dressing, add black pepper or pepper flakes (if using), and broil in the oven for about a minute until cheese melts.


Chiffonade or coarsely chop the basil and sprinkle on top of the prepared tarts. Slice and serve warm as an appetizer or a side.


DSC_5112.JPG


~Gayatri

Find us on Facebook:

Crispy Caprese Tart - inspired by the tomato tart by out friends at Breaking Naan...

Posted by The Cooks of Cake and Kindness on Sunday, February 7, 2016

Thursday, February 4, 2016

Herb-crusted Salmon

Yum
Salmon is my favorite fish to eat. I love it in lox form on a bagel with cream cheese, I love it in sushi form (with or without rice), I love it marinated and grilled...I pretty much love salmon any way it’s prepared. Now, quality seafood is not really the first thing you think of when living in landlocked Indiana, especially if you are on your weekly one-stop shopping trip at the nearest superstore. On occasion, though, I’m able to plan exceptionally well and carve out some time to make a special trip to pick up some fresh fish. Invariably, it will last exactly one meal and I will regret not having gotten more.


Sometimes, when I plan meals ahead, I will do some sort of marinade for the salmon, such as a teriyaki type marinade. Other times, I whip up a simple dish needing almost no prep time - herb-crusted salmon! Cover with herbs and spices, pop in the oven, and done! Unless, of course, you want rice or a side. Then there’s a little more planning to do...

IMG_5395.JPG

Ingredients: (serves 2 hungry adults and 1 kind of hungry toddler)
2 medium-sized salmon filets
~1 tsp thyme
~1 tsp rosemary
~1 tsp sage
~¼ tsp pepper
~1-2 tsp garlic powder
~1 tsp marjoram
note: you can also use fresh chopped or minced herbs

Line a baking sheet with lightly greased foil. Place salmon pieces on the sheet skin-side down. Season liberally with the herbs and spices (amounts in the ingredients list are just a suggestions - adjust to preference) so that a thin crust is formed. Broil ~6-7 minutes on each side. Serve with your favorite side!

IMG_5399.JPG

~Karla

Find us on Facebook
 

Simple, succulent, savory salmon!http://cooksofcakeandkindness.blogspot.com/2016/02/herb-crusted-salmon.html

Posted by The Cooks of Cake and Kindness on Thursday, February 4, 2016