Thursday, August 18, 2016

Garlic Toast

Yum
One of the best parts of any Italian dish is the deliciously buttery, garlicky, toasty bread that usually comes with it. Actually, it might be THE best part. Excuse me, waiter? Just wrap my dinner to go...I’m still nomming on the bread! But who wants to wait to go to a restaurant just to enjoy some garlic bread? Granted, if it’s the super fancy kind with fresh cloves of garlic and house-made bread… However, you can easily make simple garlic toast at home, and given that this recipe only calls for 4 ingredients (3 if you don’t care much for parsley), you might already have everything you need!


Ingredients:
1 loaf French bread (or other bread of choice)
Butter (or margarine, or olive oil)
Garlic powder
Parsley flakes (I used dried parsley flakes, but freshly chopped parsley would be even better)


Heat oven to 350°F.

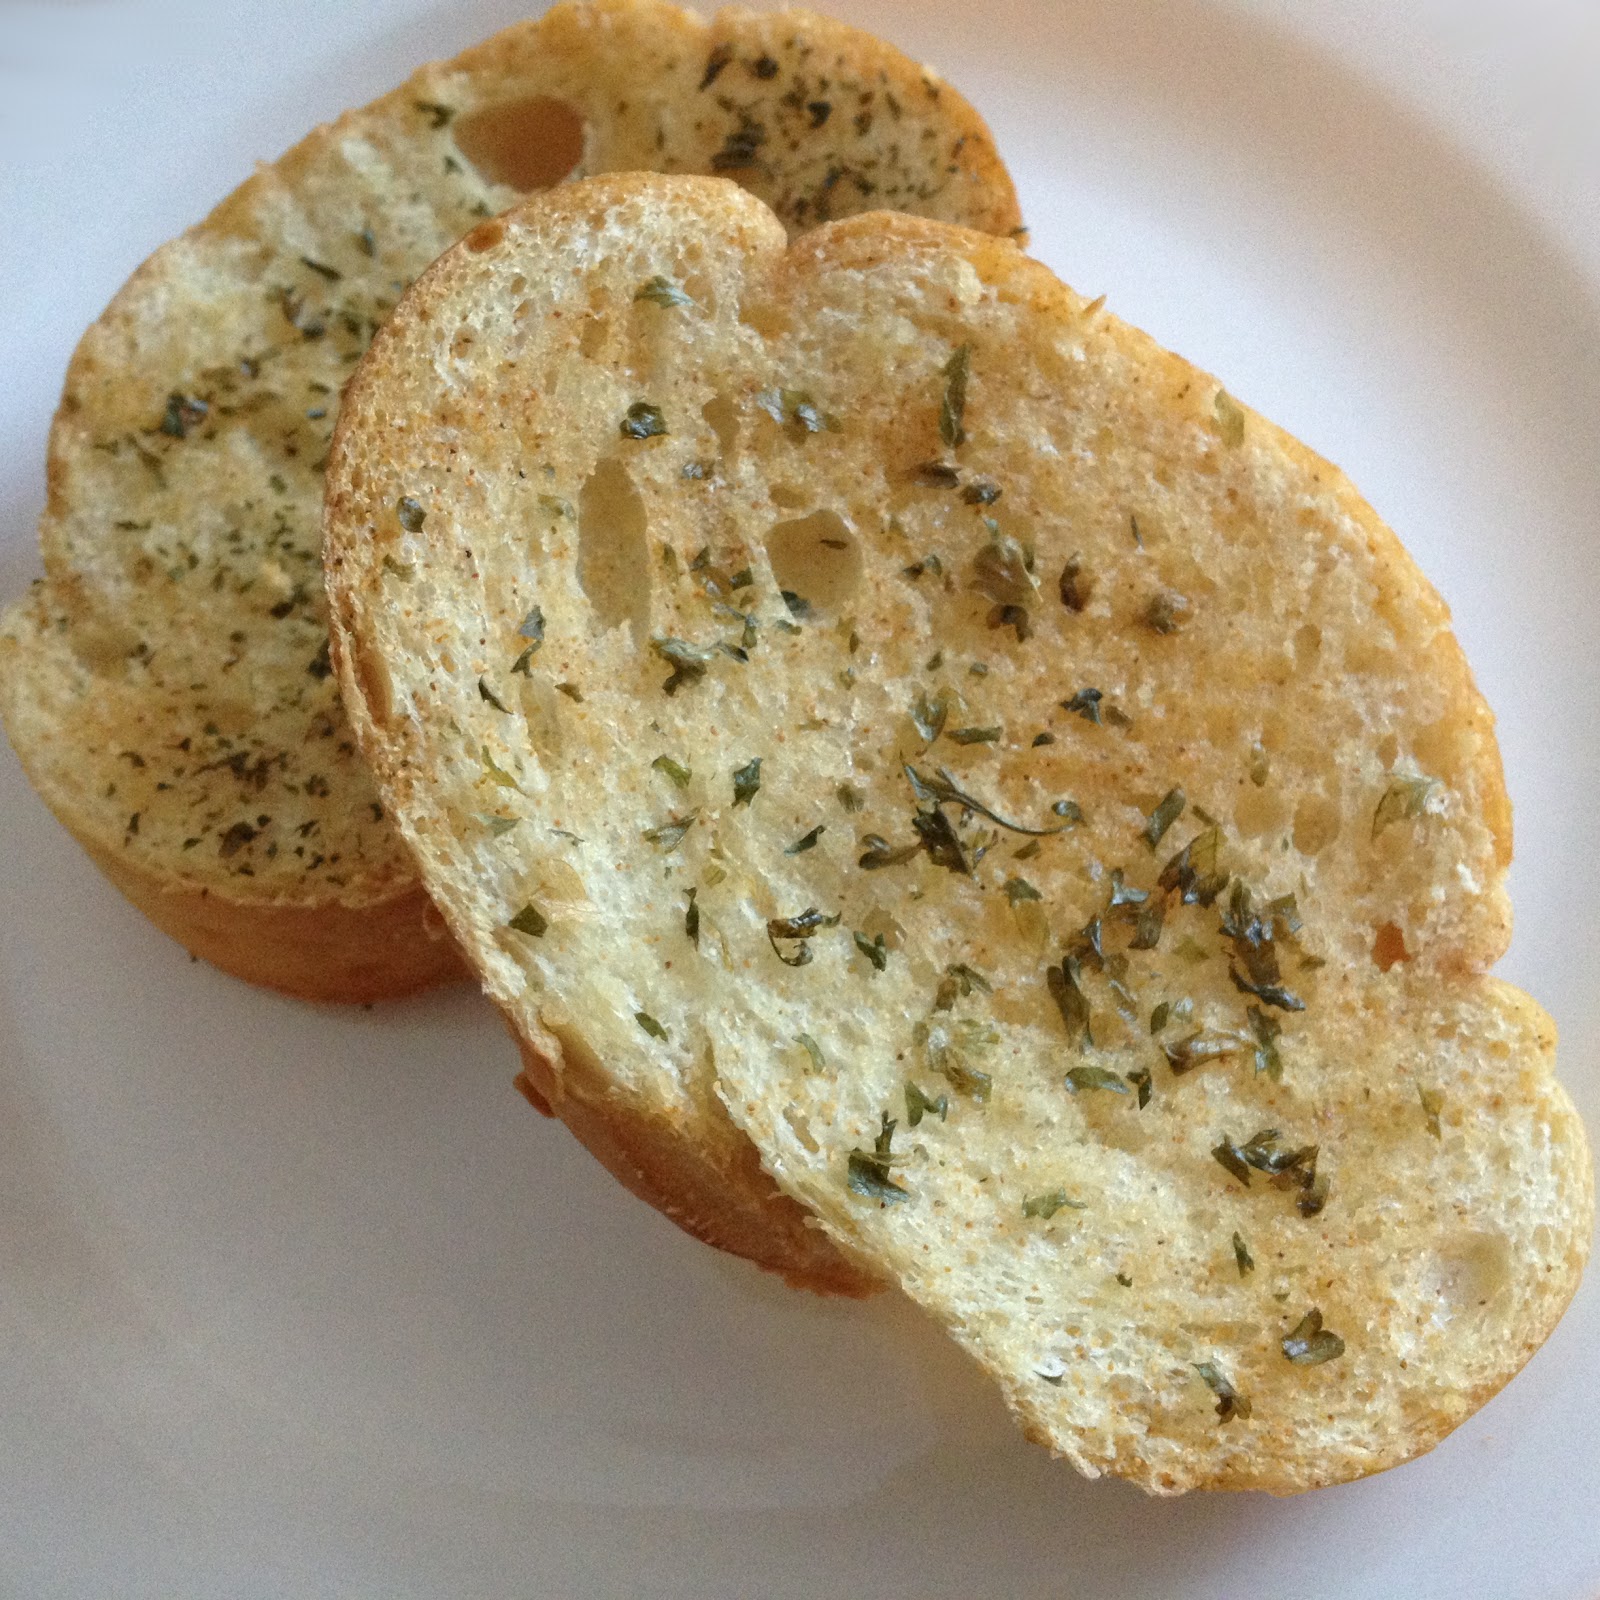
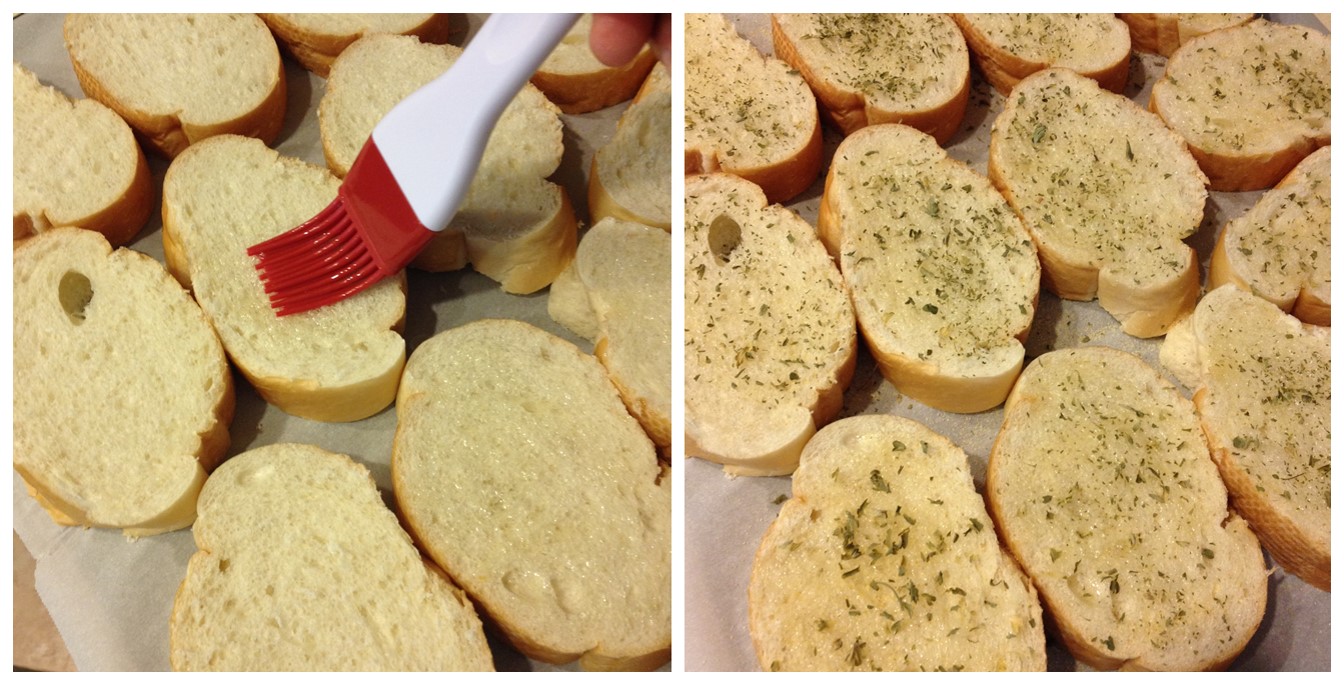
Slice the bread into 1 inch thick slices. Generously spread butter or margarine (or brush with oil, as pictured) on one side of the slices. Liberally season with garlic powder, and then dust with parsley flakes. Place non-seasoned side down on a baking pan (no need to grease the pan, but you can line with foil or parchment paper if you wish).


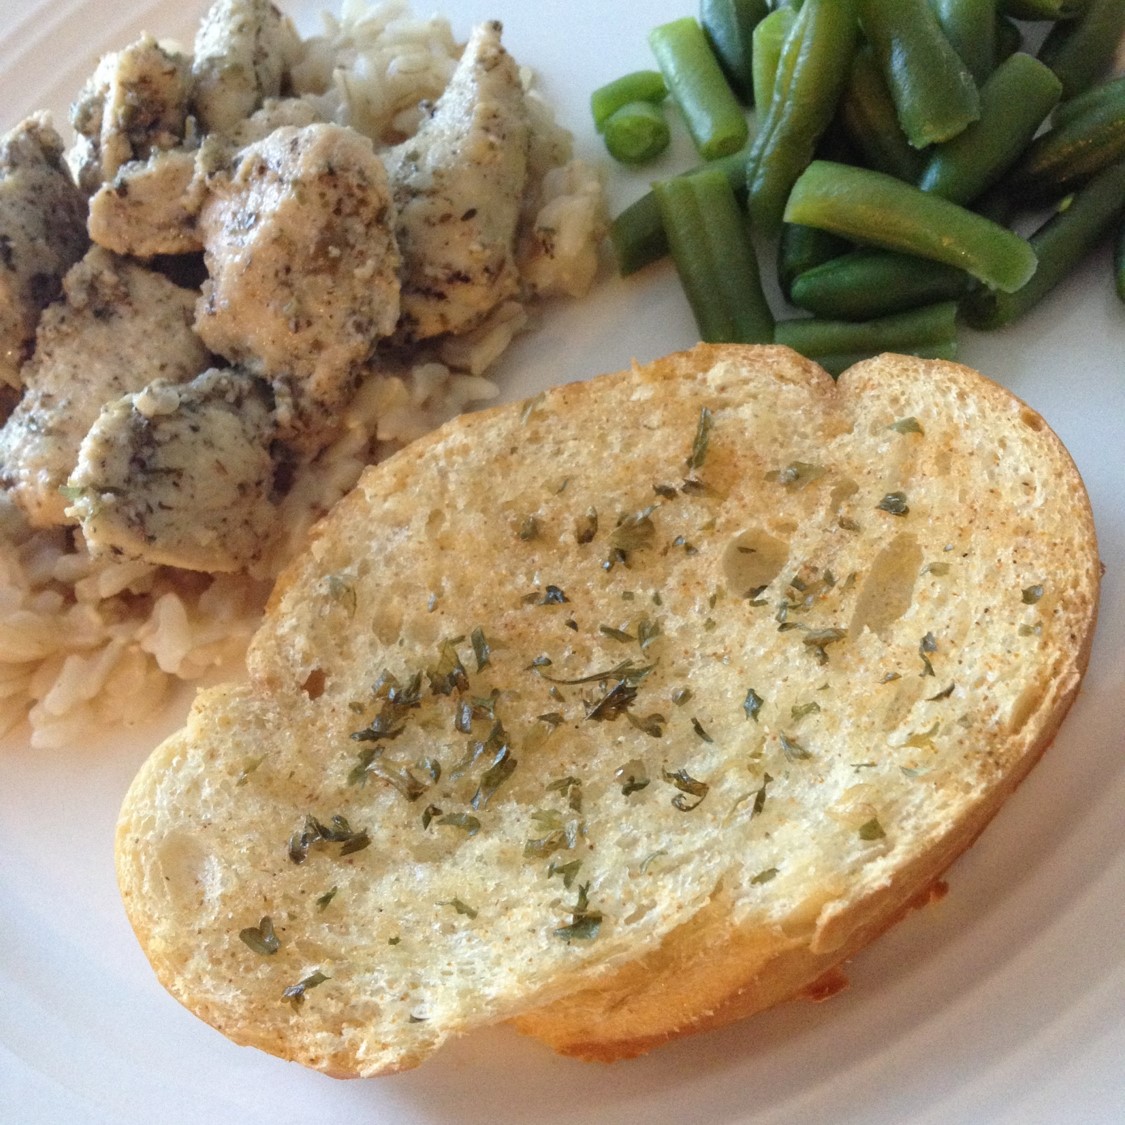
Bake 10-15 minutes, depending on your preferred level of crispiness. When cool enough to handle, serve with your main dish (if you can restrain yourself from sampling!).


If you happen to have leftovers, refrigerate them in an airtight container. You can reheat them in a microwave (~5-10 seconds), but reheating in an oven will result in crispier toast. Enjoy!

~Karla

Find us on Facebook
 

Sunday, August 7, 2016

Savory Dill Cakes (Shepu Vadi)

Yum
Leafy greens are a good source of iron & calcium among other nutrients. I’m a big fan of most leafy vegetables, but they may not be everyone’s favorite. However one can always find ways to sneak them into various dishes. One such nutrient packed delicious snack is dill cakes. Dill (which is known as “shepu” in Marathi language) is used in India not just as an herb for flavoring, but also as a main ingredient in a lot of dishes. The dill cakes (or shepu vadi) can be served several ways - steamed, pan fried or deep fried. Steaming and then deep frying is a very common version, but to reduce the fat content, I prefer steaming and then pan frying if I really want the crispiness. The basic ingredients are dill and chickpea flour. Beyond that, spices and add-ins such as sesame seeds, caraway seeds (ajwain) etc. can be added based on taste preference.


Ingredients:
1 cup packed chopped fresh dill
~1 cup chickpea flour (besan) - sifted
1 tsp coriander powder
1 tsp cumin powder
~1 inch grated ginger (or to taste) - could use ginger powder
¼ tsp turmeric powder
1 tsp toasted sesame - optional
Salt to taste
1 small green chili - optional
½ tsp jaggery - optional
Water
Oil (optional for pan frying)


DSC_6580.JPG


In a bowl or large plate, mix all ingredients except water. Add water a couple teaspoons at a time to make a thick dough.


Roll the dough into a log. Bring water to boil, place the dill roll in a steamer and steam for 15-20 minutes, until completely cooked. You can check by inserting a knife or toothpick - once cooked, there should be hardly any crumbs sticking to the knife/toothpick. I also like to line the steamer with lettuce/cabbage leaves to prevent the dough from sticking to the steamer. Parchment paper could be used for the same, or you can grease the base of the steamer with some oil.


DSC_6585.JPG


Once slightly cooled, slice the steamed roll ~¼“ thick. These steamed dill cakes are ready to serve as is if you’d like the healthiest option. To make them even more delicious and add a nice crisp, I like to pan fry the slices with a few drops of oil until golden brown on both sides. Whichever way you choose, the taste won’t disappoint you!


DSC_6810.JPG


~Gayatri

Find us on Facebook:

Thursday, August 4, 2016

Mushroom Asparagus Quiche

Yum
What can I say about quiche that hasn’t already been said? It’s an easy-to-make dish, it can be customized however you like, and, with its filling of eggs, milk (or cream), and cheese, it is substantial enough to satisfy just about anyone. You can get super creative with assembling the various ingredients and produce works of art, but even fledgeling foodies can prepare a quiche that looks and tastes delicious. The main fillers in this quiche are mushroom and asparagus - which is a fairly misunderstood and underappreciated vegetable! For other tips and suggestions on how to cook asparagus, please visit our friends at Quick Easy Cook. Their blog is teeming with information on subjects ranging from kitchen utensils to specific ingredients and foods to chef apparel (think comfortable shoes!) - and has a plethora of quick and easy healthy recipes that even novice cooks can master.

Okay, back to the quiche - here's a simple dice-and-dump recipe for a hearty breakfast, lunch, or dinner!


Ingredients: (serves 6-8)
~8 asparagus spears
~4oz mushrooms
4 eggs
1 cup milk (I used 1%)
~1 cup + 3 TBSP shredded cheddar cheese
~2-3 cloves garlic, minced
Pepper, salt, paprika to taste
1 pie crust


Heat oven to 350°F.

Beat eggs in a bowl. Add milk and spices and mix well. Finely chop the asparagus and mushrooms.


Toss the chopped mushroom and asparagus with 1 cup of shredded cheese. Place pie crust in a 9” pie pan, spread veggie-cheese mixture into the pie crust, then pour in the egg-milk mixture. Sprinkle the remaining shredded cheese on top.

Bake 40-50 minutes, until a toothpick inserted in the center comes out clean. Let the quiche cool for 5-10 minutes, then dig in!


~ Karla

Find us on Facebook


Monday, August 1, 2016

Cabbage Soup

Yum
The unpredictability of midwestern weather is truly exemplified by the unexpected summer thunderstorms. It can pour down all morning making you walk through deep streams of water to get to work, and by the time you leave for home, the sun would have dried everything up so well, it’d make you wonder if the rain that had completely drenched you from head to toe, really happened - well, unless your feet are still frozen cold from wearing wet shoes all day! Oh well.. I really do like rain, so no complaints!

It’s those rainy days that make me crave a comforting bowl of soup. As much as I like indulging in creamy soups such as broccoli-cheddar or tomato basil bisque, nothing beats a delicious hot broth-based soup. I make cabbage soup often, adding whatever else I have on hand. Corn is one of my favorite things to add to this soup to get a burst of juicy sweetness every now and then. Sometimes I add broccoli to the same soup, even chunks of potato or some boiled chickpeas. The key to tying all these flavorful ingredients together is the broth that’s infused with ginger, garlic and bay leaves. You could also add peppercorns, or cloves if you prefer. I like to make my own vegetable stock*, but a readymade one or even water could be used in this soup.


DSC_6002.JPG


Ingredients: (~4-5 servings)
½ medium cabbage - chopped
½ - ¾ cup chopped onion
½ red pepper - chopped
1 small carrot - thinly sliced
¼ cup corn kernels (~½ ear of corn)
2 bay leaves
1 garlic clove - minced
½ inch piece of ginger - grated
Salt and/or soy sauce - to taste
~3 cups water/stock* (See note at the bottom for making homemade stock)
½ - 1 tsp oil
Chopped parsley for garnish (optional)


Heat a little bit of oil, add onions, pepper, ginger, garlic and bay leaves, and sauté over medium-high heat until onions are translucent. Add corn, pepper, cover and cook for a minute until veggies are slightly softened. Add cabbage, mix well and saute for a few minutes. Add 2 cups of vegetable stock or water, season with salt or soy sauce and ground black pepper. Soy sauce is especially a good choice if you’re using water instead of stock. Increase the heat, let the soup come to a boil and add more stock as necessary. Add chopped parsley if desired.
 
Serve hot alongside some hearty toasted bread or a light salad with fresh greens.


DSC_6000.JPG


~Gayatri


*Note: An easy way to make vegetable stock at home is to save vegetable scraps in an airtight bag or container in the freezer. That way, when you need some stock, all you have to do is add them to water, let it boil and reduce for some time, strain and use in your recipe. I’ve even used ice cube trays to freeze extra stock. The good thing about this is that you can control what you put in it and can even flavor it as you like - I like to add ginger and/or some whole spices when I’m making the stock.

Find us on Facebook:

Wednesday, July 27, 2016

Blueberry Banana Cheesecake Bread

Yum
We eat a lot of bananas at my house - plain, with peanut butter, in oatmeal, you name it. Sometimes we buy too many, and half of them will pass an acceptable level of ripeness before we have a chance to eat them...so I’ll mash some up to make these delectable blueberry banana muffins - my go-to recipe for using up super ripe bananas. They are perfectly sized for breakfasts, as well as snacks that don’t make you feel too guilty. But, as with many things that I make a lot, I got a little bored with these and wanted to mix things up a little bit. I came across this recipe that literally does just that: banana bread split by a cream cheese layer - yum! I’m a huge fan of cheesecake, so adding a layer of cheesecake-y goodness sounded like the perfect boost for my basic recipe.


Ingredients:
Base banana bread recipe can be found here
Add-ins: ~¾ cup blueberries (I used frozen, and did not thaw before adding to the batter, but did try to remove any excess ice that had built up)

For cream cheese filling
8oz cream cheese, softened (I used reduced fat)
6 TBSP all-purpose flour
½ cup granulated sugar
2 eggs


Heat oven to 350°F. Grease and flour two 9x5 loaf pans.

Prepare the blueberry banana bread batter according to the directions found here.

For the cream cheese filling, combine all ingredients and mix well (use a hand mixer with whisk attachment for best results).

Pour banana bread mixture into the loaf pans until they are ½ - ⅔ full. Pour half of the cream cheese mixture into each loaf pan on top of the banana bread batter, gently spreading it with a spoon or spatula to fill all corners. Top with the remaining banana bread batter.

Bake for 50-60 minutes, until a knife inserted in the center comes out clean. Tent foil over the loaf pans after about 30 minutes to bake evenly and prevent the top and sides from cooking faster than the center.


Let the bread cool for about 15 minutes, then slice and enjoy with a cup of coffee or tea!

~Karla


Find us on Facebook
 

Monday, July 25, 2016

Zucchini Spiral Quiche

Yum
There are so many things to love about summer - long sunny days, fluffy clouds, beautiful sunsets, and weekend farmers markets! Farmers market is my prime motivation on Saturdays to get an early morning workout. Once I’m up and about, and feeling good about having burnt some calories, I head to the market for delicious breakfast crepes or tacos, and pick up fresh veggies and fruits for the week. Lately I’ve been seeing über bright yellow & green zucchini at several vendor booths. Last week I got one of each, and decided to make something that really highlights those lovely bright colors. I had seen pictures of spiral quiches floating around on the internet, and quiche being one of my go-to dishes when I can’t figure out what to make, I thought I’d give the spiral quiche a try! I added ricotta cheese to the custard to make it a bit dense so it could hold the zucchini. This quiche certainly required some extra efforts, but the eye-catching results were worth it, and it was absolutely delicious!

 
DSC_6084.JPG


Ingredients:
2 large Zucchini (1 green, 1 yellow)
1 pie crust
3 eggs
¾ cup part skim ricotta cheese
¼ cup skim milk
1 Tbsp freshly grated Parmesan cheese - optional
¼ tsp Nutmeg - optional
Salt and ground black pepper


DSC_6066.JPG


Preheat oven to 350 F.
 
Wash the zucchini and slice them very thin lengthwise?. You want the slices to also be of similar width so slices towards the wider middle might need to be cut in half lengthwise. Sprinkle a little bit of salt on the slices and let them sit for a half hour to release moisture. Use paper towels to squeeze out as much moisture as possible. If this step is skipped you’ll end up with a lot of liquid in the quiche as it starts baking. If this happens, don’t worry! Just use paper towels and soak up the liquid on top and continue to bake. You might have to repeat blotting a few times during the total baking period.


DSC_6076.JPG


While the zucchini slices are resting, lightly grease a 9” baking pan and line it with pie crust. Add pie weights (or dry beans, rice etc.) and bake the crust for 10 min. Increase the oven temperature to 375 F.
 
Make the custard by mixing the eggs, ricotta cheese and milk in a bowl. Add nutmeg and season with salt and pepper (remember there’s salt on the zucchini slices!!).


Assembling the quiche:
Add the custard to the semi baked pie crust.
 
Start rolling one zucchini slice with the skin side on top. Roll it really tight! Then take another slice of different color and roll it around the first one. Keep doing this till you get a tightly wound disk about 5-6” in diameter (or as wide as you can hold securely). While you are rolling it is best to have someone assisting or use heavy objects to hold the ends of the zucchini slices in place. I had a few glass bowls helping me with this.
 
Once you have a 5-6” disk, gently pick it up and place it in the center of the pie crust with the custard. Continue adding zucchini slices till you reach the crust. You’ll get custard all over your hands but trust me, it’s totally worth it!
 
Transfer the baking pan to the oven and bake for ~45-50 min until the custard is well set. As I mentioned earlier, don’t worry if you see liquid pooling on top. You can just soak it up with a paper towel. Once the custard is set to your liking, sprinkle grated cheese on top and broil on high for a couple minutes until the cheese is browned.
 
If at any point you feel like the crust is getting too dark, you can cover the crust with Aluminum foil. This will allow the rest of the quiche to continue baking while reducing the intensity of heat transferred to the crust.
 
Once baked, let the quiche cool for ~5-10 minutes, then slice and serve!


DSC_6087.JPG


~Gayatri

Find us on Facebook:

Thursday, July 21, 2016

Healthy Broth Sautéed Mushrooms

Yum
Mushrooms are generally on my weekly shopping list, and I like to incorporate them in various dishes such as quiches, crepes, curries etc. But if I am able to get my hands on beautiful fresh wild mushrooms, I prefer to cook them without a lot of additional ingredients to let their flavor really come through. Some of the best ways to do that are to stir fry or sauté the mushrooms by themselves or along with some vegetables.


DSC_6064.JPG


I love stir-frys and simple sautés. These are quick ways to prepare veggies without cooking out all of their nutrients, while boosting flavor with seasoning and softening the vegetables just enough. However, these techniques generally involve using heated oil, thus bringing down the overall nutritional value. That’s where the water or broth sauté method saves the day!

Before I jump into how this sautéeing technique works, let’s take a look at a few cooking methods. Moist-heat cooking methods such as boiling, steaming, poaching etc. use a medium such as water, broth or steam where the pressure and temperature of the medium enables the cooking process. These are great for preserving the ingredient flavors and getting a uniform cook. However if a crispy texture or nice caramelization is desired, generally dry cooking methods using air or oil/fat are used. Sautéeing, frying, grilling, roasting etc. fall under this category. Some of these methods make use of heat transfer via conduction from the cooking vessel in addition to the heat from the cooking medium.

For the broth based sauté method, the idea is to start with a little bit of liquid in the pan, get it nice and hot before adding the vegetables, and keep deglazing the pan with the liquid as needed while tossing the vegetables as they cook. So this is kind of a combination technique using the oil free benefits of moist-heat cooking while using the conduction from the pan for browning the vegetables if desired. This method works best in a non-stick pan, but I have used cast iron skillets without any issues, especially if I’m not looking for a lot of crispiness or caramelization.

Ingredients: (Serves 2)
8 oz mushrooms (I used Oyster and Shiitake)
½ - 1 tsp freshly grated ginger
1-2 Bay leaves
Vegetable broth/stock or water (preferably homemade without added salt)
Salt, crushed black pepper


DSC_6043.JPG


Heat ~2 Tbsp broth in a pan over medium-high heat. Once it starts to simmer, add bay leaf and garlic. Let the flavors get infused for a minute or so, adding more broth (~1 Tbsp at a time) as needed.


DSC_6044.JPG


Add the mushrooms when there is enough liquid in the pan to completely coat the bottom in a thin layer and it is simmering. Toss the mushrooms to coat with the broth, cover and cook for ~1 minute to let the them sweat. Remove lid, add more broth if the pan is getting dry and continue to cook uncovered for a couple minutes. I ended up using about ⅓ cup broth by the time the mushrooms were cooked, but this will depend on the type of pan, heat intensity and the mushrooms (or any vegetables) that you’re using. Season with salt & pepper, and add any other seasoning, herbs of your choice. Toss well and take the pan off the heat.


DSC_6055.JPG


Discard bay leaves and serve warm as a delicious side! I served these sautéed mushrooms with simple mashed potatoes - mash boiled red potatoes (with skin) while still hot, add skim milk, butter (optional) to soften, and season with salt & pepper.

These are also a wonderful addition to pasta or salads.

~Gayatri

Find us on Facebook:

Monday, July 18, 2016

Chicken Quesadillas

Yum
About once a week, my family eats at a Mexican place close to our home. We go there so frequently the waitstaff have become buddies with my son, giving him high fives and fist bumps, and tousling his hair as they pass by our table. We are recognized, which is nice...but can lead to some embarrassment. Since the restaurant is so close to us, we often walk there when the weather is nice, pushing the kids in strollers. On one such trip, we finished up a lovely meal, got our bill (which our son has begun to hold himself to take up to the counter to pay), and then started the affair of packing the kids back up in the strollers and making sure we didn’t leave anything behind. This can take upwards of fifteen minutes, especially if we discover a wet or dirty diaper in the process. So, there we are, frantically changing diapers and gathering various kiddie items as the restaurant fills with more patrons waiting for a table. We finally got both kids with clean diapers in their strollers and everything packed up, made sure nothing was left on the table, and, satisfied with another successful restaurant outing with two kids under 3 years of age, proceeded with a relaxing stroll back home. Whew!

Oh, wait…

“Did you pay the El Nopal bill?” my husband asked me the next day. “Nooo….” I replied, my voice trailing off. “...Did you?” Nope, he hadn’t either.

OOPS.

Yes. In our mad rush to clear out, we accidentally forgot to pay our bill. Later that day my husband went in to pay, and they had the bill taped to the wall behind the register. How mortifying! We weren’t sure if we’d ever be able to show our faces there again...which was so very unfortunate, because our favorite dish to share is their chicken quesadilla with guacamole. When we got to craving it again, the embarrassment was still too raw...we decided to just try to make it at home. Turns out, it was actually pretty easy to do! We even had the freedom to add more veggies to the quesadillas, and adjust the amount of cheese to our personal preferences. The bonus with making them at home is we could make burritos with the leftovers! WIN!


Ingredients: (6-8 quesadillas)
3 chicken breasts
1 medium onion
1 green bell pepper
~1 cup Mexican-style cheese blend (Monterey Jack, cheddar, asadero, queso quesadilla - can use all Monterey Jack or cheddar, or Colby Jack, instead of Mexican blend)
6-8 tortillas (I used flour tortillas, about 10” in diameter)
Chili seasoning (spice mix - not red chili powder)
Garlic powder (or fresh minced garlic)
Cumin powder
Salt, pepper to taste
A little oil for cooking


Cook and shred chicken breast per the instructions found here. Slice the onion and green pepper, and sauté in cooking oil over medium heat until the onions are translucent. If the chicken is cooked just before the onion and pepper, you can use the leftover drippings to cook the vegetables. Add the cooked chicken to the vegetables, and season with garlic, chili powder, cumin, salt and pepper to taste. Let simmer for 5-10 minutes.


Place a tortilla in a pan heated over med-lo heat. Sprinkle about 1 TBSP cheese on half the tortilla, spread about ¼ cup of the chicken-veggie mix over the cheese, and then top with more cheese. Fold the other half of the tortilla over, and let it sit for a few minutes until slightly browned and crispy, then gently flip and cook on the other side, until cheese is thoroughly melted.


For some extra crisp, grease the pan with a little bit of butter before assembling the tortilla in it. Serve with a scoop of fresh guacamole and garnish with cilantro.


~Karla

P.S. We’ve since been able to bolster our courage to dine at our favorite Mexican restaurant again, and we made absolutely sure we paid!

Find us on Facebook