Wednesday, July 27, 2016

Blueberry Banana Cheesecake Bread

Yum
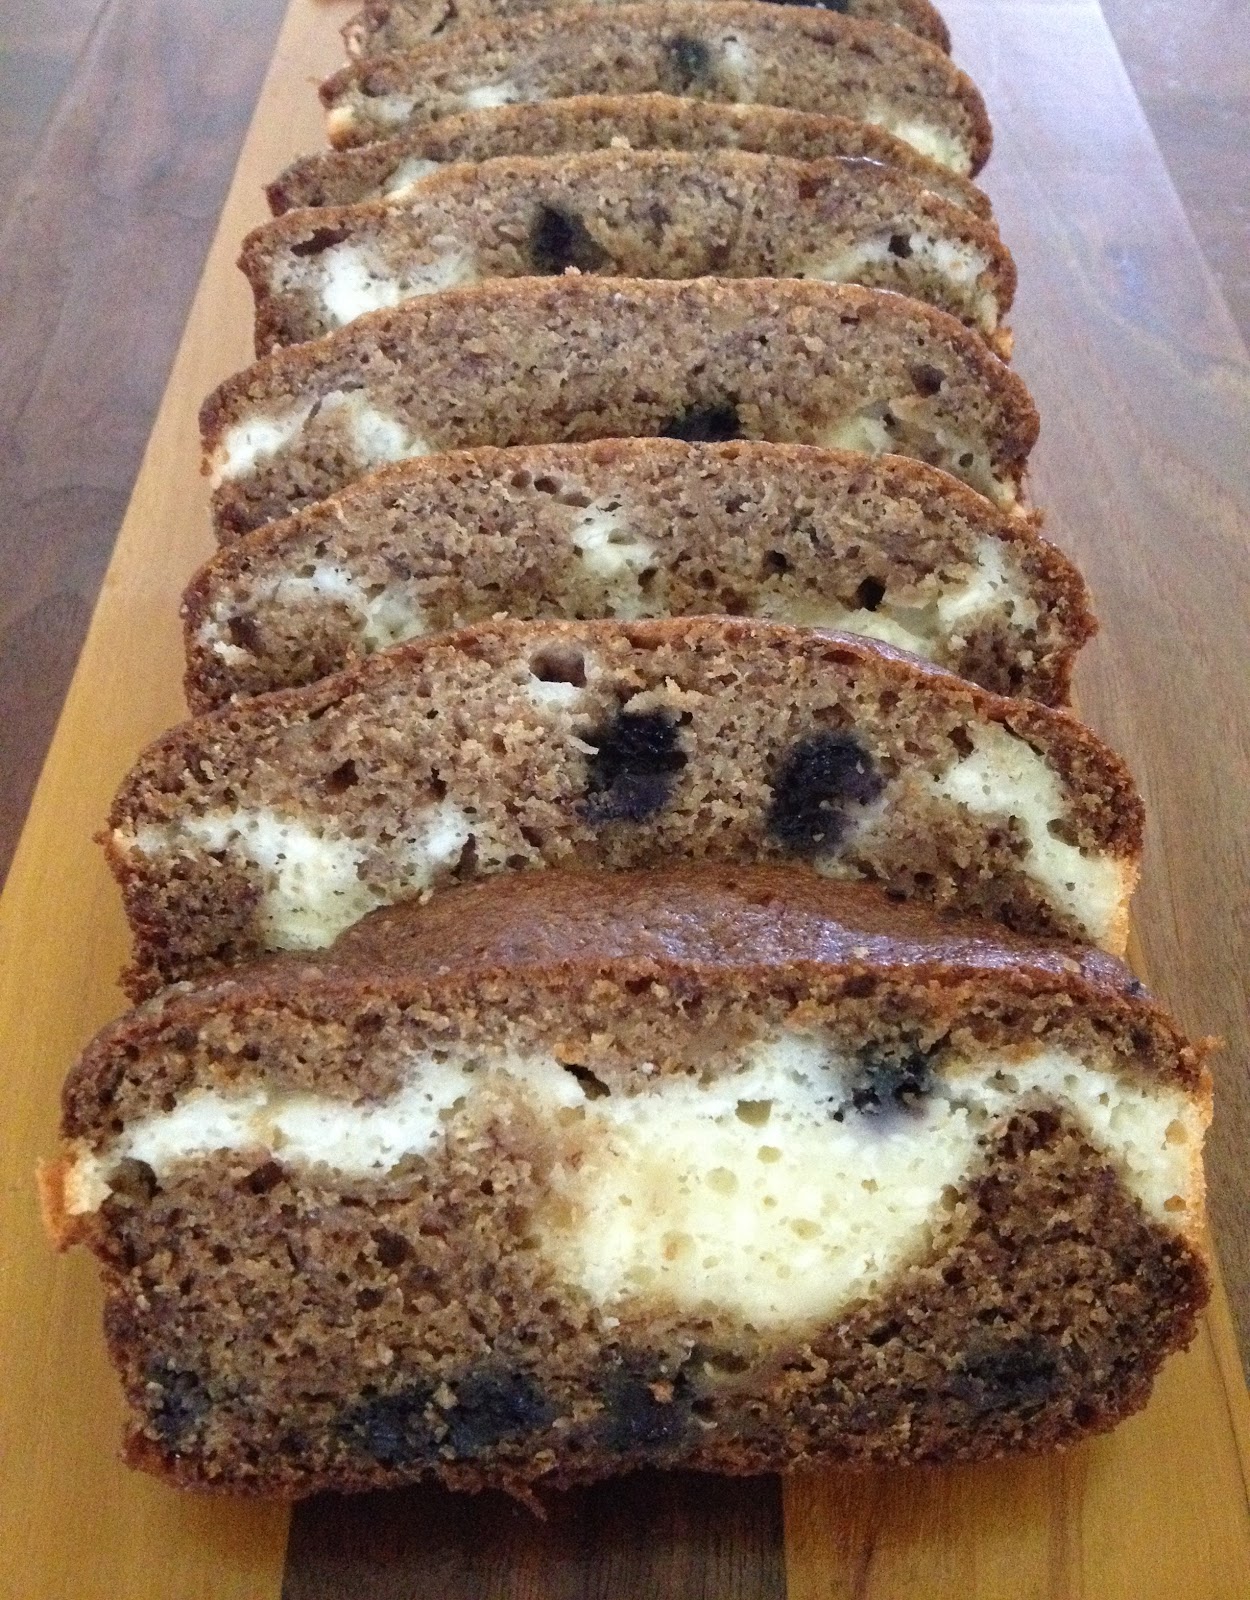
We eat a lot of bananas at my house - plain, with peanut butter, in oatmeal, you name it. Sometimes we buy too many, and half of them will pass an acceptable level of ripeness before we have a chance to eat them...so I’ll mash some up to make these delectable blueberry banana muffins - my go-to recipe for using up super ripe bananas. They are perfectly sized for breakfasts, as well as snacks that don’t make you feel too guilty. But, as with many things that I make a lot, I got a little bored with these and wanted to mix things up a little bit. I came across this recipe that literally does just that: banana bread split by a cream cheese layer - yum! I’m a huge fan of cheesecake, so adding a layer of cheesecake-y goodness sounded like the perfect boost for my basic recipe.


Ingredients:
Base banana bread recipe can be found here
Add-ins: ~¾ cup blueberries (I used frozen, and did not thaw before adding to the batter, but did try to remove any excess ice that had built up)

For cream cheese filling
8oz cream cheese, softened (I used reduced fat)
6 TBSP all-purpose flour
½ cup granulated sugar
2 eggs


Heat oven to 350°F. Grease and flour two 9x5 loaf pans.

Prepare the blueberry banana bread batter according to the directions found here.

For the cream cheese filling, combine all ingredients and mix well (use a hand mixer with whisk attachment for best results).

Pour banana bread mixture into the loaf pans until they are ½ - ⅔ full. Pour half of the cream cheese mixture into each loaf pan on top of the banana bread batter, gently spreading it with a spoon or spatula to fill all corners. Top with the remaining banana bread batter.

Bake for 50-60 minutes, until a knife inserted in the center comes out clean. Tent foil over the loaf pans after about 30 minutes to bake evenly and prevent the top and sides from cooking faster than the center.


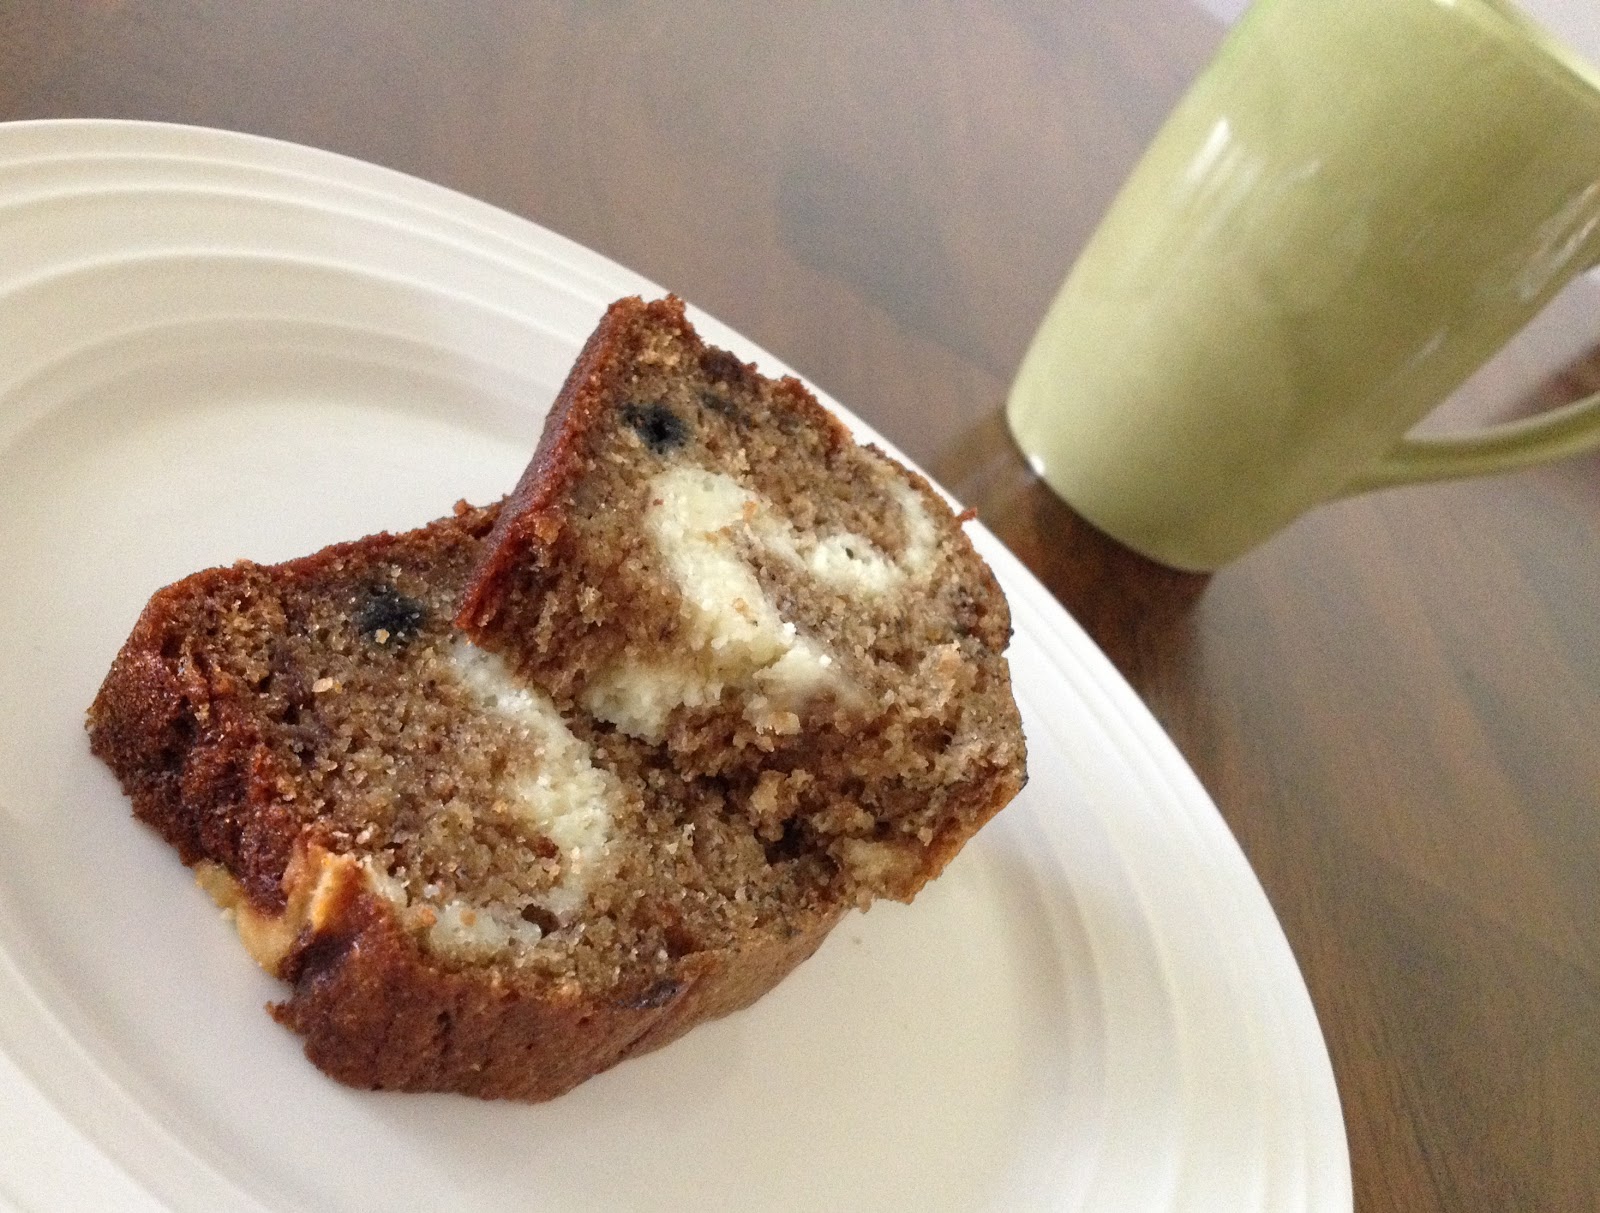
Let the bread cool for about 15 minutes, then slice and enjoy with a cup of coffee or tea!

~Karla


Find us on Facebook
 

Monday, July 25, 2016

Zucchini Spiral Quiche

Yum
There are so many things to love about summer - long sunny days, fluffy clouds, beautiful sunsets, and weekend farmers markets! Farmers market is my prime motivation on Saturdays to get an early morning workout. Once I’m up and about, and feeling good about having burnt some calories, I head to the market for delicious breakfast crepes or tacos, and pick up fresh veggies and fruits for the week. Lately I’ve been seeing über bright yellow & green zucchini at several vendor booths. Last week I got one of each, and decided to make something that really highlights those lovely bright colors. I had seen pictures of spiral quiches floating around on the internet, and quiche being one of my go-to dishes when I can’t figure out what to make, I thought I’d give the spiral quiche a try! I added ricotta cheese to the custard to make it a bit dense so it could hold the zucchini. This quiche certainly required some extra efforts, but the eye-catching results were worth it, and it was absolutely delicious!

 
DSC_6084.JPG


Ingredients:
2 large Zucchini (1 green, 1 yellow)
1 pie crust
3 eggs
¾ cup part skim ricotta cheese
¼ cup skim milk
1 Tbsp freshly grated Parmesan cheese - optional
¼ tsp Nutmeg - optional
Salt and ground black pepper


DSC_6066.JPG


Preheat oven to 350 F.
 
Wash the zucchini and slice them very thin lengthwise?. You want the slices to also be of similar width so slices towards the wider middle might need to be cut in half lengthwise. Sprinkle a little bit of salt on the slices and let them sit for a half hour to release moisture. Use paper towels to squeeze out as much moisture as possible. If this step is skipped you’ll end up with a lot of liquid in the quiche as it starts baking. If this happens, don’t worry! Just use paper towels and soak up the liquid on top and continue to bake. You might have to repeat blotting a few times during the total baking period.


DSC_6076.JPG


While the zucchini slices are resting, lightly grease a 9” baking pan and line it with pie crust. Add pie weights (or dry beans, rice etc.) and bake the crust for 10 min. Increase the oven temperature to 375 F.
 
Make the custard by mixing the eggs, ricotta cheese and milk in a bowl. Add nutmeg and season with salt and pepper (remember there’s salt on the zucchini slices!!).


Assembling the quiche:
Add the custard to the semi baked pie crust.
 
Start rolling one zucchini slice with the skin side on top. Roll it really tight! Then take another slice of different color and roll it around the first one. Keep doing this till you get a tightly wound disk about 5-6” in diameter (or as wide as you can hold securely). While you are rolling it is best to have someone assisting or use heavy objects to hold the ends of the zucchini slices in place. I had a few glass bowls helping me with this.
 
Once you have a 5-6” disk, gently pick it up and place it in the center of the pie crust with the custard. Continue adding zucchini slices till you reach the crust. You’ll get custard all over your hands but trust me, it’s totally worth it!
 
Transfer the baking pan to the oven and bake for ~45-50 min until the custard is well set. As I mentioned earlier, don’t worry if you see liquid pooling on top. You can just soak it up with a paper towel. Once the custard is set to your liking, sprinkle grated cheese on top and broil on high for a couple minutes until the cheese is browned.
 
If at any point you feel like the crust is getting too dark, you can cover the crust with Aluminum foil. This will allow the rest of the quiche to continue baking while reducing the intensity of heat transferred to the crust.
 
Once baked, let the quiche cool for ~5-10 minutes, then slice and serve!


DSC_6087.JPG


~Gayatri

Find us on Facebook:

Thursday, July 21, 2016

Healthy Broth Sautéed Mushrooms

Yum
Mushrooms are generally on my weekly shopping list, and I like to incorporate them in various dishes such as quiches, crepes, curries etc. But if I am able to get my hands on beautiful fresh wild mushrooms, I prefer to cook them without a lot of additional ingredients to let their flavor really come through. Some of the best ways to do that are to stir fry or sauté the mushrooms by themselves or along with some vegetables.


DSC_6064.JPG


I love stir-frys and simple sautés. These are quick ways to prepare veggies without cooking out all of their nutrients, while boosting flavor with seasoning and softening the vegetables just enough. However, these techniques generally involve using heated oil, thus bringing down the overall nutritional value. That’s where the water or broth sauté method saves the day!

Before I jump into how this sautéeing technique works, let’s take a look at a few cooking methods. Moist-heat cooking methods such as boiling, steaming, poaching etc. use a medium such as water, broth or steam where the pressure and temperature of the medium enables the cooking process. These are great for preserving the ingredient flavors and getting a uniform cook. However if a crispy texture or nice caramelization is desired, generally dry cooking methods using air or oil/fat are used. Sautéeing, frying, grilling, roasting etc. fall under this category. Some of these methods make use of heat transfer via conduction from the cooking vessel in addition to the heat from the cooking medium.

For the broth based sauté method, the idea is to start with a little bit of liquid in the pan, get it nice and hot before adding the vegetables, and keep deglazing the pan with the liquid as needed while tossing the vegetables as they cook. So this is kind of a combination technique using the oil free benefits of moist-heat cooking while using the conduction from the pan for browning the vegetables if desired. This method works best in a non-stick pan, but I have used cast iron skillets without any issues, especially if I’m not looking for a lot of crispiness or caramelization.

Ingredients: (Serves 2)
8 oz mushrooms (I used Oyster and Shiitake)
½ - 1 tsp freshly grated ginger
1-2 Bay leaves
Vegetable broth/stock or water (preferably homemade without added salt)
Salt, crushed black pepper


DSC_6043.JPG


Heat ~2 Tbsp broth in a pan over medium-high heat. Once it starts to simmer, add bay leaf and garlic. Let the flavors get infused for a minute or so, adding more broth (~1 Tbsp at a time) as needed.


DSC_6044.JPG


Add the mushrooms when there is enough liquid in the pan to completely coat the bottom in a thin layer and it is simmering. Toss the mushrooms to coat with the broth, cover and cook for ~1 minute to let the them sweat. Remove lid, add more broth if the pan is getting dry and continue to cook uncovered for a couple minutes. I ended up using about ⅓ cup broth by the time the mushrooms were cooked, but this will depend on the type of pan, heat intensity and the mushrooms (or any vegetables) that you’re using. Season with salt & pepper, and add any other seasoning, herbs of your choice. Toss well and take the pan off the heat.


DSC_6055.JPG


Discard bay leaves and serve warm as a delicious side! I served these sautéed mushrooms with simple mashed potatoes - mash boiled red potatoes (with skin) while still hot, add skim milk, butter (optional) to soften, and season with salt & pepper.

These are also a wonderful addition to pasta or salads.

~Gayatri

Find us on Facebook:

Monday, July 18, 2016

Chicken Quesadillas

Yum
About once a week, my family eats at a Mexican place close to our home. We go there so frequently the waitstaff have become buddies with my son, giving him high fives and fist bumps, and tousling his hair as they pass by our table. We are recognized, which is nice...but can lead to some embarrassment. Since the restaurant is so close to us, we often walk there when the weather is nice, pushing the kids in strollers. On one such trip, we finished up a lovely meal, got our bill (which our son has begun to hold himself to take up to the counter to pay), and then started the affair of packing the kids back up in the strollers and making sure we didn’t leave anything behind. This can take upwards of fifteen minutes, especially if we discover a wet or dirty diaper in the process. So, there we are, frantically changing diapers and gathering various kiddie items as the restaurant fills with more patrons waiting for a table. We finally got both kids with clean diapers in their strollers and everything packed up, made sure nothing was left on the table, and, satisfied with another successful restaurant outing with two kids under 3 years of age, proceeded with a relaxing stroll back home. Whew!

Oh, wait…

“Did you pay the El Nopal bill?” my husband asked me the next day. “Nooo….” I replied, my voice trailing off. “...Did you?” Nope, he hadn’t either.

OOPS.

Yes. In our mad rush to clear out, we accidentally forgot to pay our bill. Later that day my husband went in to pay, and they had the bill taped to the wall behind the register. How mortifying! We weren’t sure if we’d ever be able to show our faces there again...which was so very unfortunate, because our favorite dish to share is their chicken quesadilla with guacamole. When we got to craving it again, the embarrassment was still too raw...we decided to just try to make it at home. Turns out, it was actually pretty easy to do! We even had the freedom to add more veggies to the quesadillas, and adjust the amount of cheese to our personal preferences. The bonus with making them at home is we could make burritos with the leftovers! WIN!


Ingredients: (6-8 quesadillas)
3 chicken breasts
1 medium onion
1 green bell pepper
~1 cup Mexican-style cheese blend (Monterey Jack, cheddar, asadero, queso quesadilla - can use all Monterey Jack or cheddar, or Colby Jack, instead of Mexican blend)
6-8 tortillas (I used flour tortillas, about 10” in diameter)
Chili seasoning (spice mix - not red chili powder)
Garlic powder (or fresh minced garlic)
Cumin powder
Salt, pepper to taste
A little oil for cooking


Cook and shred chicken breast per the instructions found here. Slice the onion and green pepper, and sauté in cooking oil over medium heat until the onions are translucent. If the chicken is cooked just before the onion and pepper, you can use the leftover drippings to cook the vegetables. Add the cooked chicken to the vegetables, and season with garlic, chili powder, cumin, salt and pepper to taste. Let simmer for 5-10 minutes.


Place a tortilla in a pan heated over med-lo heat. Sprinkle about 1 TBSP cheese on half the tortilla, spread about ¼ cup of the chicken-veggie mix over the cheese, and then top with more cheese. Fold the other half of the tortilla over, and let it sit for a few minutes until slightly browned and crispy, then gently flip and cook on the other side, until cheese is thoroughly melted.


For some extra crisp, grease the pan with a little bit of butter before assembling the tortilla in it. Serve with a scoop of fresh guacamole and garnish with cilantro.


~Karla

P.S. We’ve since been able to bolster our courage to dine at our favorite Mexican restaurant again, and we made absolutely sure we paid!

Find us on Facebook

Friday, July 15, 2016

Lemon Poppy Seed Muffins

Yum

Have you ever cooked/baked something only because you really wanted to try a new ingredient, or perhaps cook in your new pot or pan, use your brand new ice cream maker, creme brûlée torch, or some other appliance? Well, this muffin was inspired not by an ingredient or a cooking utensil/appliance, but by a beautiful ceramic dish that I wanted to present it in! I was determined to make something pretty to put on this dish as soon as I received it in the mail. A fresh citrusy muffin adorned with little chocolate flowers seemed perfect to go with the lovely red mushroom decoration on the plate.
 
A little bit background on this plate that I’m raving about - My friend Maitreyee makes beautiful ceramic kitchenware & decorative pieces, and she was nice enough to customize this plate for me. You can check out her shop, YayClay (love the name!) on Etsy, or Facebook.


DSC_6021(1).JPG


Ingredients: (Makes 18)
2 cups all-purpose flour
1 tsp baking powder
1/2 tsp baking soda
1/4 tsp salt
1/2 cup milk
3 Tbsp lemon juice
1/2 cup sour cream
¼ cup unsweetened applesauce
¼ cup canola oil
1-1¼  cup white sugar
Zest from 2 lemons
1tsp vanilla extract
2 eggs
4 tsp poppy seeds
(Oil + Applesauce can be substituted with ½ cup butter)
 
Preheat oven to 350°F and line a muffin pan with cupcake liners.
 
Sift the flour, baking powder and baking soda in a bowl. Add salt, mix and set aside.
 
In another bowl mix milk, lemon juice and sour cream, and set aside.
 
In a large bowl, cream together oil, applesauce, sugar, vanilla extract and lemon zest. Add eggs and beat well. Alternately add the flour mixture and the wet ingredients, mixing gently as you fold in the flour. Do not overbeat. Fold in poppy seeds.
 
Pour batter into the lined muffin tin (~¾ full), and bake in preheated oven for ~20-25 minutes until golden brown in color with tops that bounce back when touched.
 
If you want to get a little fancy and add a glaze, mix ½ cup powdered sugar with just enough lemon juice (or milk/water) to get a thick paste. It only takes a couple teaspoons of liquid. Spread or drizzle the glaze on the muffin while it is still warm. Sprinkle some lemon zest and poppy seeds on top for a beautiful presentation and an extra boost of citrus flavor.


~Gayatri

 
Find us on Facebook:

Tuesday, July 12, 2016

Guacamole

Yum
Guacamole is the best Mexican condiment. Actually, forget the qualifier...guacamole is pretty much awesome no matter what you’re eating, and unless it’s loaded with salt, it’s quite nutritious for you! The primary ingredient is avocado, a delicious, versatile and healthy fruit, containing a good source of healthy fats (helping boost HDL - the good cholesterol) and dietary fiber, as well as numerous vitamins. Avocados can be used as a fat substitute in a variety of ways - think spreads (like cream cheese, mayonnaise, other dressings) or as a filling for deviled eggs. And, of course, as a dip! Guacamole is a much healthier alternative to your typical dips loaded with mayonnaise, cheese, or sour cream.


The great thing about guacamole is that you really don’t need a set recipe! It’s so easy to make and can be totally modified to your personal taste. It’s pretty much just mashed avocados with some extras for taste and texture - onions, cilantro, garlic, tomatoes, salt, pepper, or a variety of other spices. You can even add some heat by throwing in some cayenne pepper or chopped jalapenos! Everyone has their own favorite concoction - here’s one that’s served me well.


Ingredients: (~2 cups)
2 ripe avocados
2-3 cloves garlic, minced
1-2 TBSP lime juice
~1 TBSP onion, finely chopped
1-2 TBSP tomato, finely chopped (about half of a Roma tomato) - optional
~1 TBSP cilantro, chopped
Salt, fresh ground pepper to taste

Slice the avocados in half lengthwise and remove the pits. Scoop the avocado meat into a bowl and mash. Add garlic, onion, tomato, cilantro, and lime juice and mix well. Season with salt and pepper to taste.


Garnish with fresh cilantro and serve up as a delicious dip for chips or with your favorite Mexican dish, such as enchiladas or quesadillas (recipe coming soon!).


~Karla

Other dishes you might like having guacamole with:
Chicken and Spinach Enchiladas
Roasted Corn Quesadilla
Vegetarian Enchiladas with Sour Cream Sauce

Find us on Facebook
 

Sunday, July 10, 2016

Coconut Crusted Tofu

Yum
Tofu is inherently not a very tasty ingredient on it’s own, so whether I like any tofu dish depends on the preparation. The ingredients that the tofu is cooked with as well as the method of cooking have the power to greatly alter the simple (fairly bland) tofu and convert it into a flavorful and texturally pleasing dish. I’m continuously exploring different ways to cook tofu with ingredients that complement each other and elevate this plant-based protein to new levels. Some of my favorite recipes are listed at the bottom of this post.


Today’s tofu preparation is not just crispy, tasty and healthy, it’s beautiful green color is also pleasing to the eye. This recipe uses a creamy cilantro and yogurt marinade that gives it a slight tang along with an earthy freshness from the cilantro much like an Indian chutney. The marinated tofu takes a quick dip in dessicated coconut before being pan roasted for additional flavor and a crispy exterior.


DSC_5978.JPG


Ingredients: (Makes 16 pieces)
1 block (14 oz) of extra firm tofu
1 cup dessicated shredded coconut


For marinade:
½ cup packed fresh cilantro
3 Tbsp thick yogurt
2-3 Tbsp water
½ tsp turmeric powder (optional, but recommended for it’s anti-inflammatory properties)
Salt (to taste)
½ green chili pepper (optional)
½ tsp honey (optional)


Drain the tofu block and slice lengthwise about ½ inch thick. Cut it further into triangles or squares based on your preference. I got 16 triangular pieces from one block of tofu. Using paper towels gently squeeze out as much water as possible from the tofu slices.


Make the marinade by combining all ingredients and pureeing in a blender or food processor. Add water a tablespoon at a time until you get a thin paste. Coat the tofu pieces with the marinade and let them sit for at least half hour (preferably longer). Cook the tofu with the marinate in the microwave on high for 5-8 minutes until marinade is reduced but still not completely dry (alternatively you could bake it at 400 F for ~15 minutes). This step helps make the tofu firmer.


DSC_5958.JPG


Spread the dessicated coconut on a plate. Press down a piece of the tofu in the coconut, flip it and coat the other side as well.


DSC_5969.JPG


Cook the coated tofu in a nonstick pan over low heat until the coconut is golden brown, then flip and cook the other side. You could use some oil if desired, but the combination of low heat and non-stick pan could let you get by without any oil.


DSC_5972.JPG


Serve warm with your favorite dipping sauce, or thin out some marinade to make a sauce! This tofu can also be served over a bed of rice or salad drizzled with some marinade as a dressing. To add a sweet and sour component, serve it with this delicious mango relish!


~Gayatri


Other tofu recipes you might like:
Crispy tofu in peanut-based marinade

Find us on Facebook: