Wednesday, July 6, 2016

Baked Chicken Mini-Empanadas

Yum
One of the fun things about cooking is figuring out what to do with various leftovers that at first glance don’t appear to go together at all. Being adventurous with how you mix all those seemingly unrelated ingredients can turn out delectable results...but just as often you might think Wow, I’ll never try that again! On a recent forage into my refrigerator, I happened across some leftover barbecue chicken, brown rice, cheese sticks, and pie crusts. What to do? Previously, I had made these siopao snacks with barbecue chicken, but I didn’t have any biscuits. The pie crust made me think of strudel, but the chicken would have barely filled one. However, the idea of stuffed pie crust led me to think of a childhood favorite - the pasty, pronounced PASS-tee. A hearty filling surrounded by a pastry crust - yum! Then I thought, why not make miniature versions? And then I thought Ooh, maybe I’ll call it an empanada...sounds fancier! The two dishes could actually be considered cousins, as they both are essentially dough or pastry stuffed with a variety of meat, cheese, vegetables, etc., with pasties originating from Cornwall, England, and empanadas originating from Portugal and Spain. Pasties are baked, while empanadas can be baked or fried. Bolstering my resolve to consider these treats as empanadas is the fact that pasties typically contain vegetables - which I did not have. So, “empanada” it was!


Ingredients: (makes ~18 empanadas)


~½ cup cooked rice
~¼ cup shredded cheese (I had a Colby-Jack cheese stick, which turned out to be about ¼ cup after it was chopped up to small pieces)
2 9” pie crusts
1 egg


Heat oven to 350°F.

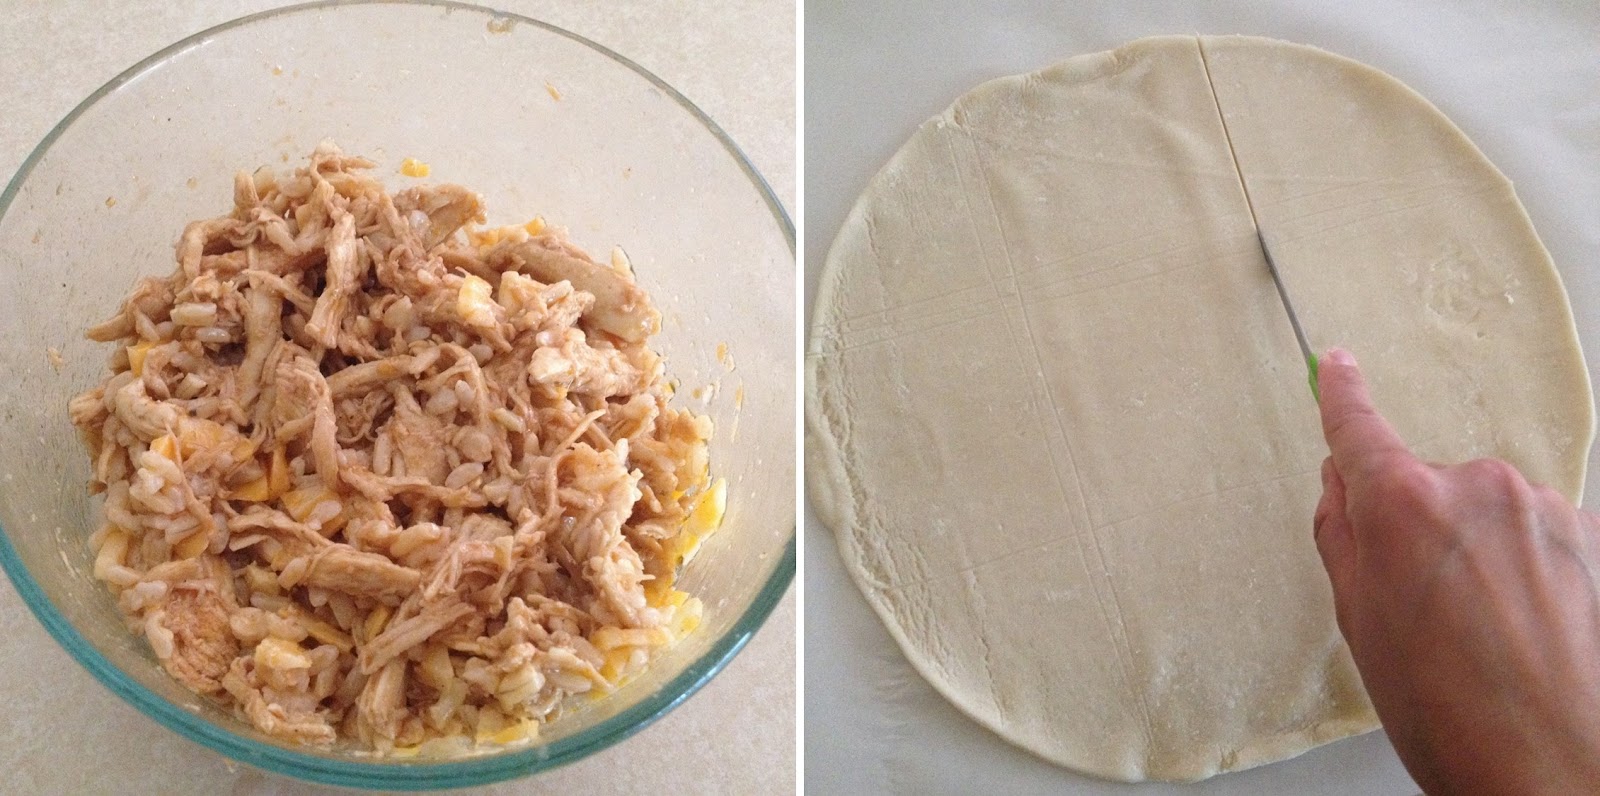
Mix chicken, rice, and cheese together. Roll out pie crusts, and cut them each into thirds both vertically and horizontally.

fill_and_cut.jpg

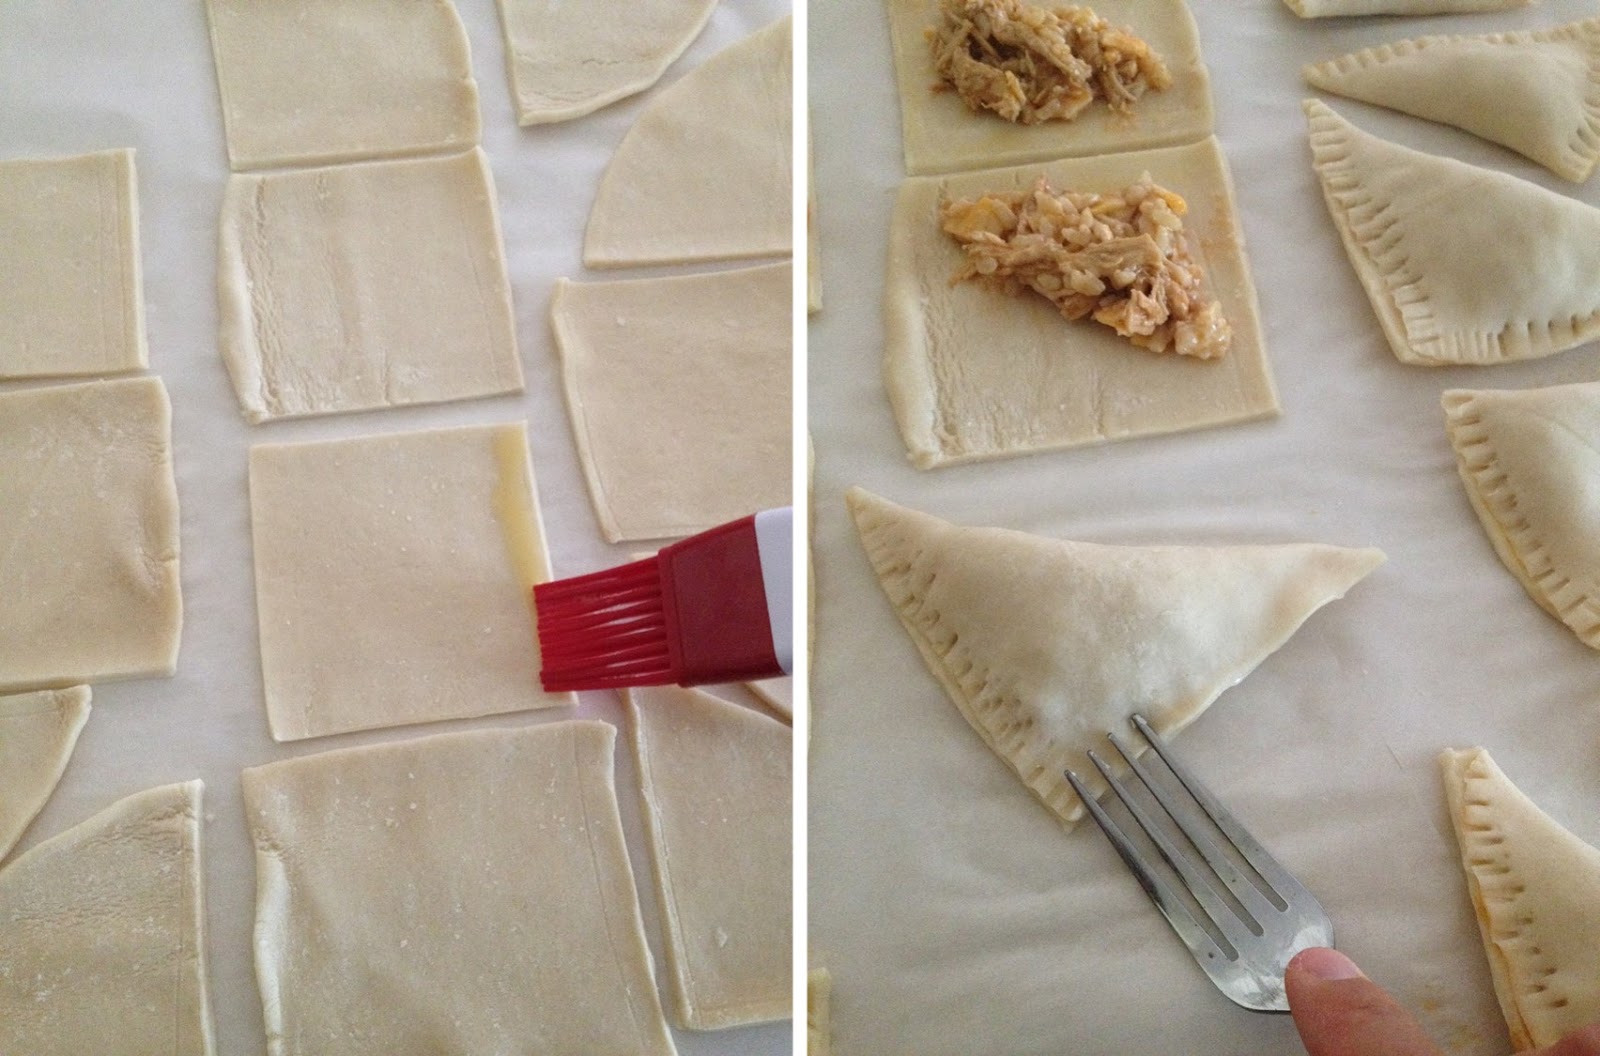
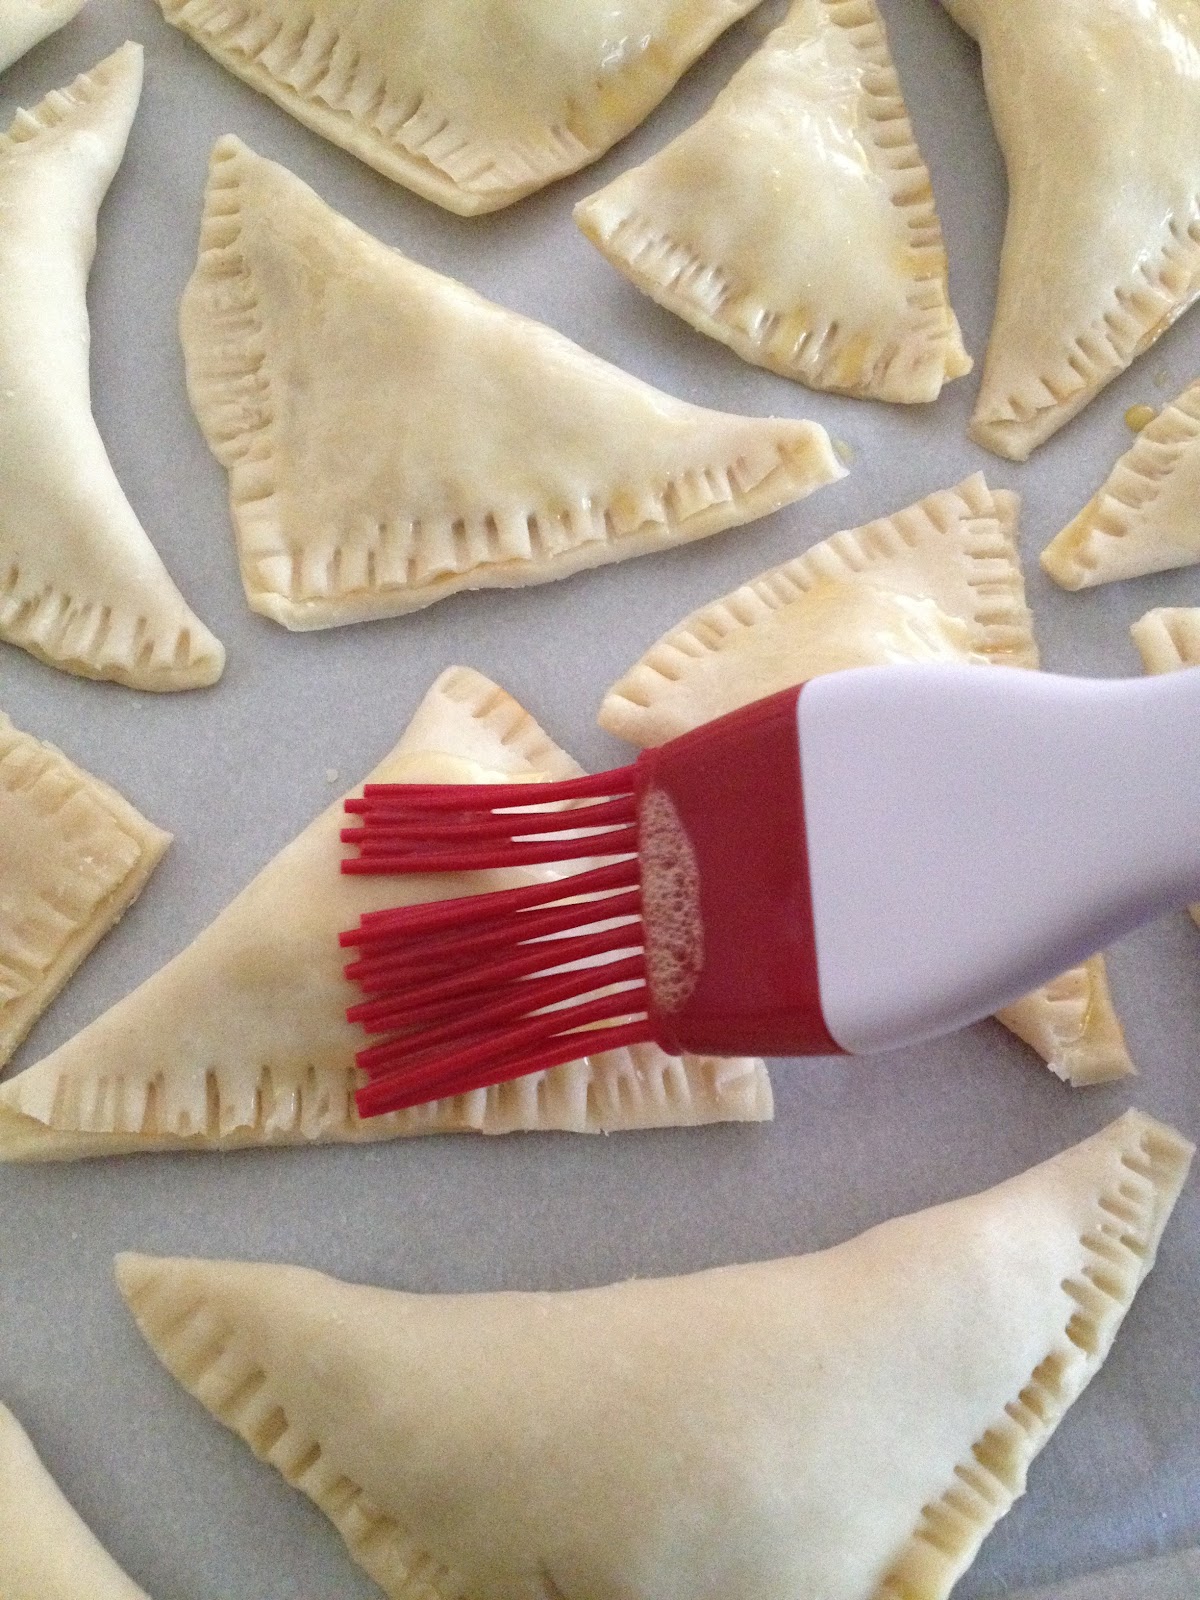
In a small bowl, whisk the egg. Brush egg along the edges of each piece of pie crust to help seal the empanadas. Place ~1 TBSP of the chicken mixture on each piece, then fold the dough over diagonally and pinch the sides together. Use fork tines to crimp and seal.

crimp.jpg

Place on a parchment  lined baking sheet and brush tops with egg.


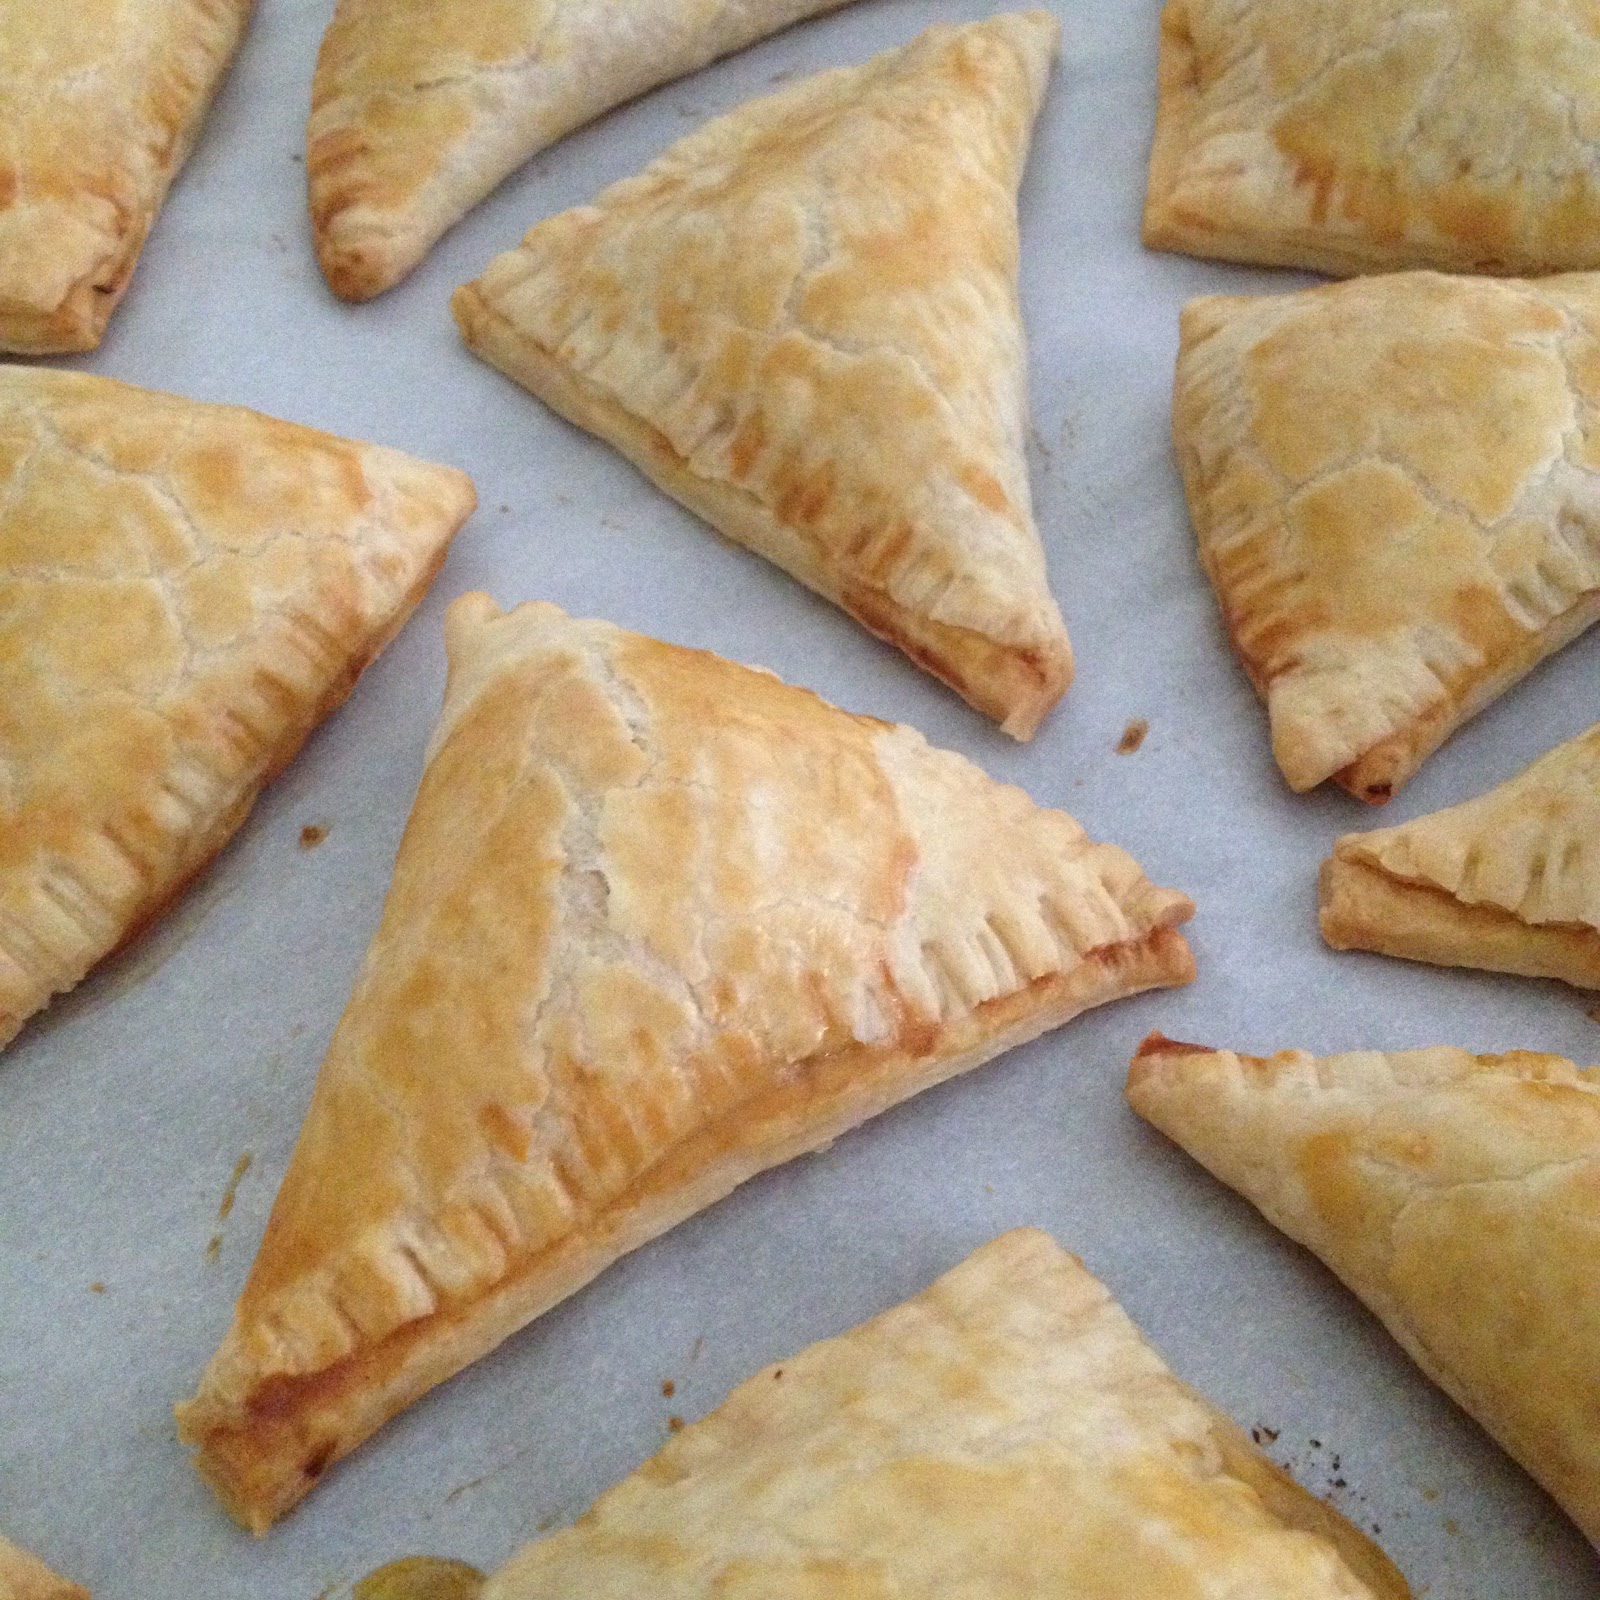
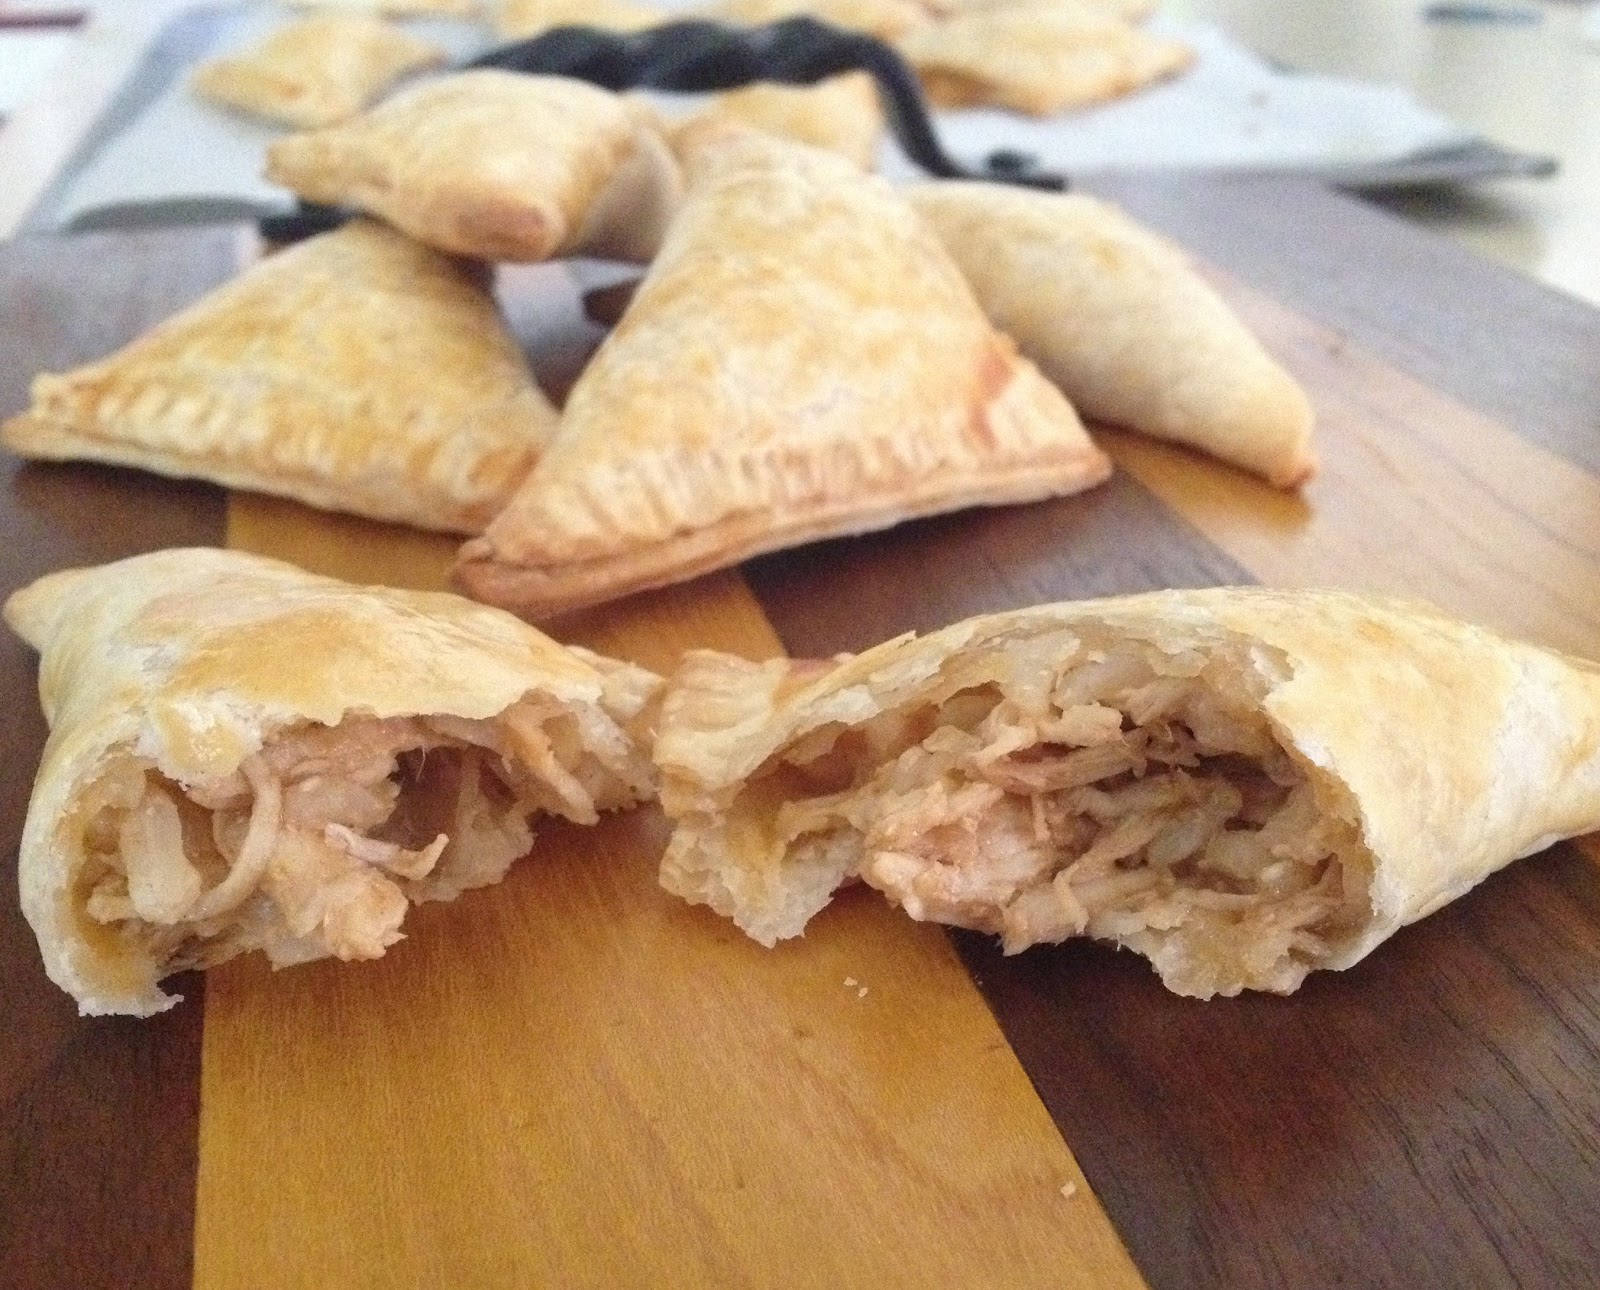
Bake ~20 min until golden brown. Let cool before munching...you might have a hard time stopping with just one!


~Karla


Find us on Facebook


Saturday, July 2, 2016

Cherry Chocolate Smoothie

Yum
Smoothies  don’t really need recipes, just guidelines :). I often go with whatever fruits, veggies that I have in my fridge (and sometimes what I need to finish up so it won’t go bad!), mix and match the with a base such as yogurt, milk, water, juice etc. and adjust the quantities until it tastes good. Recently I bought some beautiful cherries at a farmers’ market - only to realize later that those were sour cherries. Given my aversion to anything sour, I was in a pickle as to how I’d get through all of those cherries. Adding them (along with a bunch of sugar!) to a baked treat such as pie was my obvious choice, but that takes a bit of effort and I was feeling quite lazy that weekend. A fairly heavy Sunday lunch called for a smoothie dinner, and the first thing I saw in my fridge was the carton of beautiful bright cherries. I decided to brace myself and make a sour cherry smoothie - hoping I wouldn’t need to sweeten it too much with sugar/honey or other fruit. I used yogurt to thicken it and get my protein fix, and added cocoa powder for additional flavor. Surprisingly even with the yogurt and sour cherries, I was able to get by with just a little bit of honey.


DSC_5991.JPG


This sweet and slightly tangy smoothie was so delicious that I ended up using all of the cherries making variations of the same recipe! The basic recipe is given here, but it works well with the addition of several other ingredients including protein powders, flaxseed, almonds and chia seeds. So, go crazy with your favorite add-ins but do give this refreshing smoothie a try this summer. I’m sure I’ll be buying more cherries just to make more smoothies!


Ingredients: (Serves 1)
½ cup pitted cherries (I used sour cherries)
½ cup thick yogurt (I used 2% Fage yogurt)
1-2 Tbsp unsweetened cocoa powder (depending on your chocolate liking and quality of cocoa)
½ - 1 tsp honey (optional)
Ice cubes or water as needed to get the desired consistency


DSC_5961.JPG


Blend all ingredients and adjust quantities to taste if necessary. Serve chilled!

~Gayatri

Find us on Facebook:

Wednesday, June 29, 2016

Sauteed Broccolini

Yum
Broccoli is almost a staple in my kitchen, and gets used many different ways. But on days when I just want to fix a quick dinner, my go-to recipe is to saute it with different spices for a variety in flavor. For a change, I decided to get a little fancy and bought some broccolini instead of reaching out for broccoli at the grocery store. The tender stems of broccolini are just as delicious (and nutritious) as the florets. A quick saute with garlic and lemon juice was all it needed to make the fresh broccolini a lovely side dish. I decided to take the flavor up a notch with some pine nuts and Feta cheese. Not only did it help the taste, it also really enhanced the textures of this simple dish.


DSC_5955.JPG


Ingredients: (Serves ~4)
8 oz broccolini - thick stems removed.
1 tsp lemon juice (adjust to taste)
2 cloves of garlic - minced
1 Tbsp pine nuts
1-2 Tbsp crumbled Feta cheese
Salt (optional - I didn’t use any as Feta cheese was salty)
Ground black pepper (optional)
½ tsp oil for sauteeing


Heat oil in a pan over medium heat. Add garlic and saute for a few seconds until fragrant. Add broccolini, stir to coat with garlic and cover and cook for a couple minutes. Remove lid, add lemon juice, salt and pepper, stir and cover for another minute until broccolini starts browning. Add pine nuts, and saute uncovered for a couple minutes until the broccolini has softened to your liking. Remove from heat and stir in Feta cheese. Serve warm as a side.


DSC_5951.JPG


~Gayatri

Find us on Facebook:


Saturday, June 25, 2016

Cashew Date Bars

Yum
I LOVE cashews - they are by far my favorite type of nut. It is always dangerous to keep cashews in the house because I will inevitably over-indulge in them and finish half the container in one sitting! I figure since they are one of the healthier nuts to eat, and since we rarely get cashews (they can be quite expensive!), a cashew-binge every once in a while won’t hurt in the long run.


But, as some binges go, there is regret after - regret that I didn’t have the fortitude to make the cashews last longer! Making trail mix sometimes helps, but I’m just as likely to scarf that down as I am plain cashews. Then I was introduced to the amazing idea of a cashew cookie bar (Nakd and Larabar are two popular brands), in which pulverized cashews and dates are smashed together to form a delicious (and healthy!) snack. These treats can also be a bit pricey, so (as with many things here on our blog) I set out to make my own. I added some cocoa powder, which helped tone down the sweetness of the dates, and a little vanilla extract to maintain the moisture balance which helps the bars keep their shape. The result was a tasty, healthy treat I could feel good about eating - and since the dates are quite dense and nutrient-packed (good source of potassium, magnesium, and dietary fiber), a little goes a long way to satisfy both my cashew cravings and my sweet tooth!


Ingredients:
~1 cup raw cashews
~2 cups dates, pitted and chopped
~2 TBSP unsweetened cocoa powder
~1 tsp vanilla extract


Place all ingredients together in a food processor and process until you get a nice homogenous mixture. If the mixture is too wet or dry, adjust the amount of nuts or fruit as desired.


Line a flat-bottomed container with plastic wrap and pour in the mixture, and pack it down firmly.


Refrigerate for at least half an hour to help it set, then cut it into bars of desired size. If you have other types of moulds (for cookies or candies) you could also use those, pressing the mixture firmly into the moulds for a variety of shapes.


IMG_6145_mod.jpg


Keep bars refrigerated until ready to eat. Enjoy with a cup of coffee or tea!


~Karla


Other recipes you might like: cashew date smoothie

Find us on Facebook

Thursday, June 23, 2016

Mango Relish

Yum
Growing up in India, summer was synonymous with playing in the sun, coming home with parched throats to drink cool water from earthen pots, and most importantly - mangoes! I literally can’t stress enough the excitement over Alphanso mangoes. Ripe Alphanso mangoes are beautifully bright yellow, have a tender texture that’s not as fibrous as a lot of other varieties, and the taste is really what rightfully gives them the title of ‘king of mangoes’.
 
Out here in the US, you can buy really expensive Alphonso mangoes, but I typically settle with other varieties that are more easily available, and honestly - fairly delicious! A ripe, sweet mango is particularly suited for making a sweet and sour relish. This quick and  simple recipe uses ripe mangoes for sweetness, lemon juice for tartness and cilantro & ginger to bring out the freshness of all the ingredients. My favorite way of eating this is with avocado toast, but it makes a wonderful dip for chips and crackers, or can be used as a relish for topping grilled chicken, fish, or tofu.


DSC_5946.JPG


Ingredients: (Makes ~ 1 cup)
½ cup chopped ripe mango
¼ cup chopped onion
1 Tbsp chopped cilantro
⅛ tsp grated ginger
½ tsp lemon juice (or to taste)
1 small Roma tomato - deseeded and chopped
1 small pinch of red pepper flakes (or to taste)
 
Mix all ingredients. Adjust red pepper and lemon juice to your liking. Serve with tortilla chips or crackers. For sweet and sour mango-avocado toast, spread mashed avocado on toasted multigrain bread. Top it with mango relish and enjoy!


DSC_5949.JPG


~Gayatri

Find us on Facebook:

Monday, June 20, 2016

Broccoli and Mushroom Roll-ups

Yum
Any buttery flaky pastry gets infinitely better with a creamy filling in the center - be it something sweet like nutella, pastry cream; or savory like spinach & ricotta cheese. With pre-made pastry dough, delicious appetizer roll-ups can be whipped up in a snap! This time I used broccoli and mushrooms for the filling, and gave it a creamy component by mixing in some cream cheese. While broccoli and mushrooms are some of my favorite ingredients, you can follow the same steps with any other vegetables of your choice, ensuring that you’ve cooked out most of the moisture so it won’t leave the pastry soggy.


DSC_5854.JPG


Ingredients: (Makes 8 pieces)
1 cup chopped broccoli florets
4 oz chopped mushrooms (~1.5 cups)
½ small onion - chopped
2 cloves of garlic - minced
1 tsp oil
Salt, black pepper to taste
2 oz cream cheese - can use low fat
1 tube of Crescent rolls (8 pieces) - can use reduced fat


Filling:
Heat oil over medium-high, add onions and garlic and saute for a minute. Add mushrooms and reduce them to about half, stirring occasionally. Add broccoli, season with salt & pepper, and saute for another minute. Turn the heat to low, add cream cheese and mix well. Take the pan off the heat once completely combined.


DSC_5846.JPG


Assembly:
Preheat oven to 375 F (or as per package directions for the pastry).


Roll out the Crescent dough and gently tear apart each triangle. Add about a Tbsp of the filling at the wide edge and roll towards the other end. Press down on the seam to seal it.


mushroom broccoli crescent rolls.jpg


Place the roll-ups on a greased baking sheet (or lined with parchment paper), and bake in preheated oven for ~12-15 minutes until golden brown. Serve warm.


DSC_5850.JPG


~Gayatri

Find us on Facebook:

Wednesday, June 15, 2016

Roasted Corn Quesadilla with Tomatillo Salsa

Yum
A few weeks ago I made a sweet and sour roasted tomatillo and apple salsa. It was a lot more than I could devour with chips in just a couple days, so I froze some of it and have been using it in different ways since - dipping sauce for veggies, dressing for salads, spread for sandwiches etc. Here’s another recipe that brings out the bright flavors in this salsa - crispy quesadilla with corn tortillas and a roasted corn, pepper and beans filling.


DSC_5821.JPG


Ingredients: (Makes ~4-5)
8-10 Corn tortillas
½ cup roasted tomatillo & apple salsa (Click here for recipe)
¾ - 1 cup shredded Mexican blend cheese (or other quick melting cheese - I used Queso Chihuahua Shredded cheese)


Filling
1 cup sweet corn
1 small red bell pepper - chopped
½ small onion - chopped (~¼ cup)
½ cup black or kidney beans - cooked (or from a can)
1-2 cloves of garlic - minced
1 tsp oil
Salt, black pepper - to taste


To make Filling:
Heat oil over medium-high and add garlic and onions. Saute for a minute, then add the pepper and corn. Let them cook until browned, stirring occasionally. Add the beans, season with salt, pepper, mix well and take off the heat.


Assembly:
Warm two tortillas on both sides. Spread about 1 Tbsp of salsa on one of the tortillas. Top it with 2-3 Tbsp of filling mixture and about 2 Tbsp of shredded cheese. Place the other tortilla on top.


DSC_5819.JPG


Press down with a spatula and cook on medium heat until the bottom is browned and crispy. You can use a little bit of butter/oil if you like. Gently flip the quesadilla and cook the other side until crispy. Cut into wedges and serve with more salsa for dipping.  


DSC_5824.JPG


~Gayatri

Find us on Facebook: