Friday, April 1, 2016

April Fools!

Yum
The concept of “April Fools” is deeply rooted in history. In Chaucer’s Canterbury Tales (1392), which was set “thirty days and two” after March, and which many people mistook to mean “March 32” or “April 1,” a vain cock, Chauntecleer, is tricked by a fox. A French poet, Eloy d’Amerval, in 1508 referred to a poisson d’avril, literally “April fish” - and to this day in France, Belgium, French-speaking areas of Switzerland and Canada, and even Italy (with pesce d’aprile), April 1 is celebrated with attempts to attach paper fish to the backs of unsuspecting victims.

 Fish, Kids, Clip Art, Pink, Cartoon, Educational, Cute

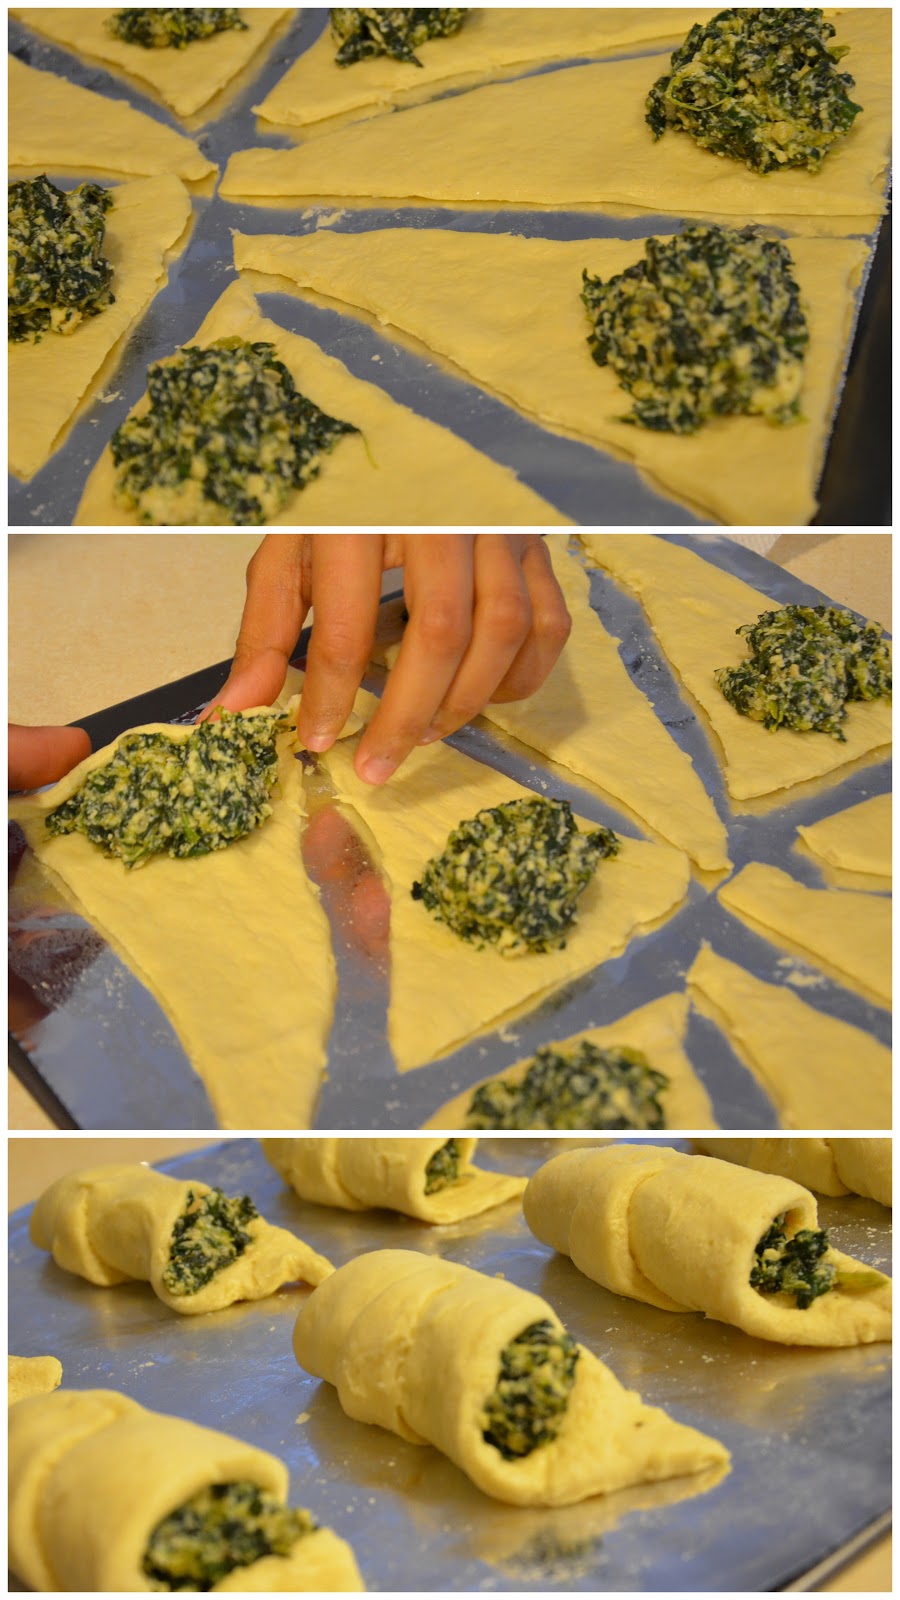
Keeping up with the tradition of trickery and pranking, we’re bringing you a collection of our recipes that feature uncommon twists - usually substituting one ingredient with another “healthier” ingredient. We promise these uncommon twists are still super delicious!


Oil-free french fries (featuring egg whites)

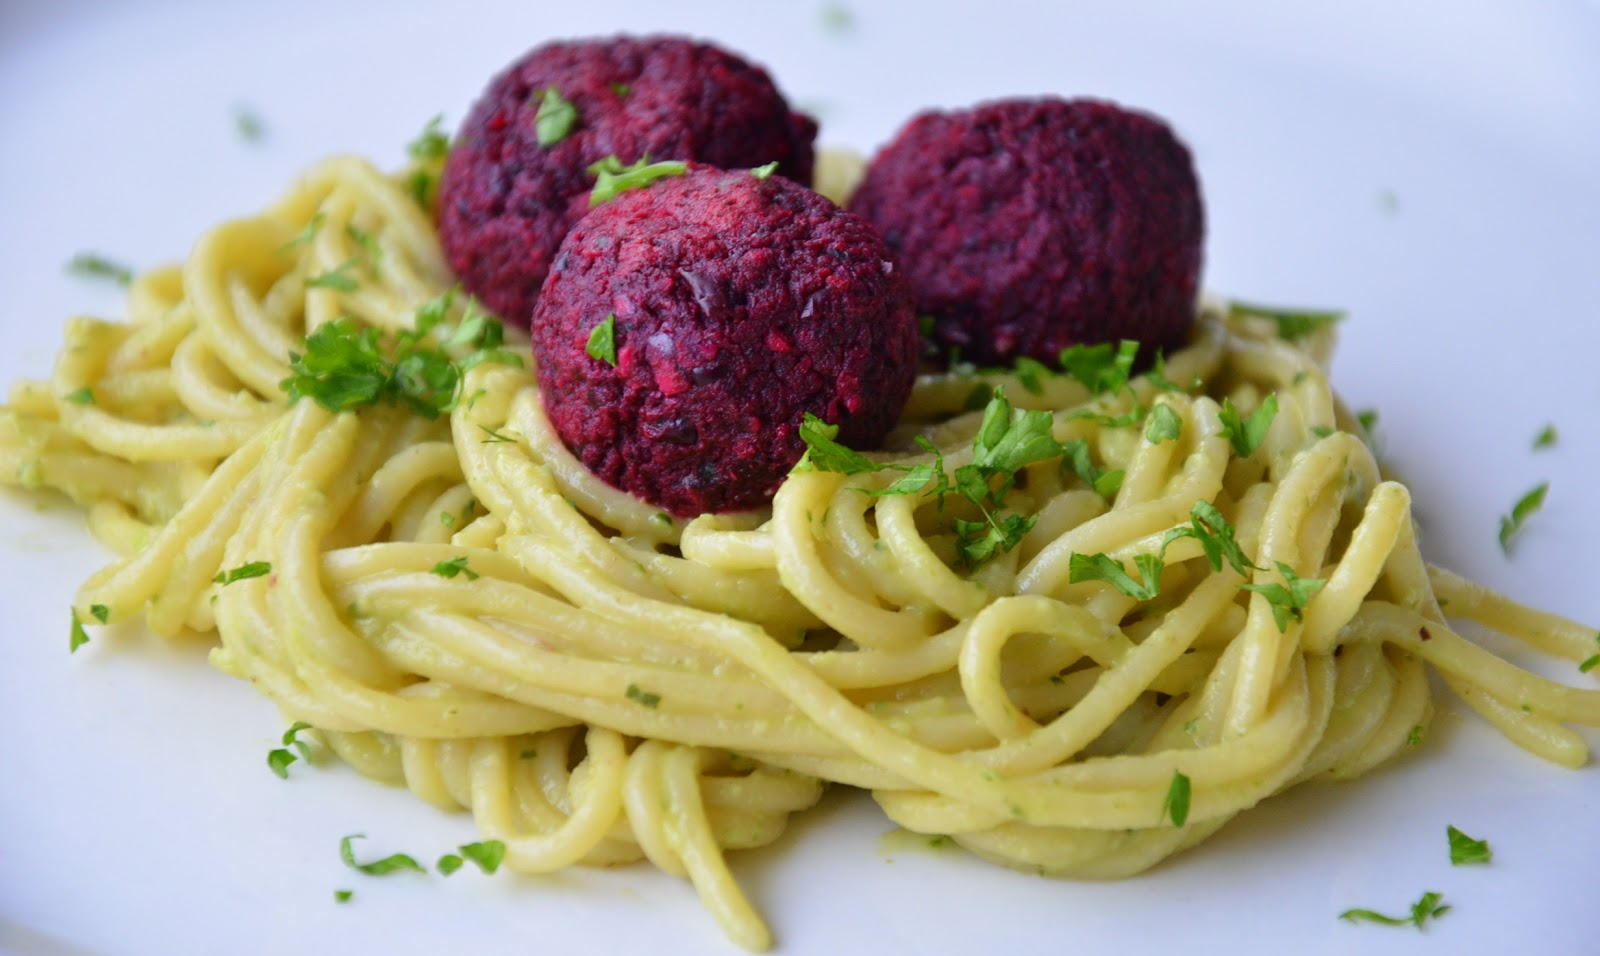
Spaghetti and Beet Balls (featuring spinach and beets) - these are similar in nature to our no-meat balls

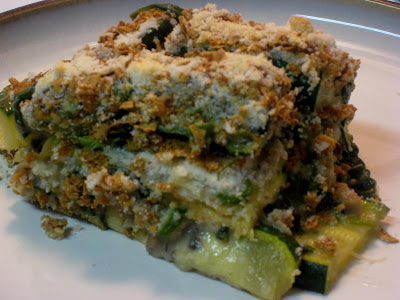
Zucchini Lasagna (featuring zucchini "noodles")

Spinach Walnut Pesto (featuring spinach and walnuts)


Enjoy a day of foolery and deliciously different food!

~Karla & Gayatri

Find us on Facebook
 

Of fish and fools - a brief history of April Fools Day...and some delicious recipes to go along with it!http://cooksofcakeandkindness.blogspot.com/2016/04/april-fools.html

Posted by The Cooks of Cake and Kindness on Friday, April 1, 2016

Saturday, March 26, 2016

Puff Pastry Carrot

Yum
Easter is a time for family and friends, a time to be thankful and to rejoice. It’s a time for presents, candy, colored eggs and of course, bunny rabbits. What better way to please the gifts-bearing bunny than with some delicious carrots? This Easter, impress your guests with puff pastry carrots filled with your favorite spread or creamy salad. They're simple to make, delicious to taste and so fun to look at!


IMG_4609.jpg


Ingredients:
Puff pastry sheet (I used Pepperidge Farms frozen puff pastry )
1 egg, whisked + 1 tsp water for egg wash (optional, but helps give the pastry a nice glossy finish)
Orange food coloring (optional - I didn’t use any)
Your favorite dip or salad for filling - I made a salad very similar to this one
Fresh parsley (for garnish)


Tools:
Cream horn molds (such as this one)


If you don’t have cream horn molds, you can make your own by shaping Aluminum foil into a cone. Make sure the surface isn’t crumpled as the dough will get stuck and the baked “carrot” shell won’t slide off easily. An easy fix is to just add another layer of foil to smoothen out the surface. Another option is to use an ice cream cone and cover it up with foil.


IMG_4423.jpg


Thaw the puff pastry as per package instructions. Cut it lengthwise into  1” wide strips. Starting with a long edge, gently roll the pastry towards the other edge forming a long cylinder.


IMG_4598.jpg


Grease the mold to allow easy removal. With the seam side towards the mold, start wrapping the pastry around the mold from the tip of the cone towards the wide base, making sure there are no gaps. You’ll notice the pastry stretching a bit, but try not to stretch it too much. It is important to not wrap it around too tightly as it will stick to the mold and not come off in one piece once baked.


If you run out of pastry, simply start with another rolled up pastry cylinder, and make sure you fuse the ends by pressing them together. Once you reach the base of the cone, trim the pastry and seal the end to keep it from unfurling.


If using egg wash, brush the egg+water mixture all over the pastry. If using food coloring, this is the time to apply it with a brush as well. Place the pastry wrapped molds seam side down on a baking sheet.


IMG_4600.jpg


Preheat oven to 400 F and bake the pastry for ~ 15-20 min until golden brown. Remove from oven and let it cool down for a couple minutes before sliding it off the mold. It might take a couple gentle twists to break free, but as long as it hasn’t been wrapped too tight, it will come off easily.


IMG_4603.jpg


Let the pastry cool down completely before filling it with your favorite dip or salad. Top it with fresh parsley sprigs and your beautiful puff pastry carrots are ready!


IMG_4607.jpg


~Gayatri

Find us on Facebook:

Puff Pastry Carrot - A fun snack for the Easter!

Posted by The Cooks of Cake and Kindness on Friday, March 25, 2016

Monday, March 21, 2016

Sweet Peppers Upside Down Cornbread

Yum
Every time I see cornbread in the cafe at work, I get excited since it looks so delicious. It was indeed delicious the first time I tried it there, but I was extremely disappointed the second (way too dry) and third (way too salty) time. Since then, I stopped getting it from the cafe, but every time I see it, I crave for some good cornbread! So a few weeks ago I decided to make some at home to satiate those cravings. I like adding veggies to cornbread (like these cornmeal muffins), but the only fresh vegetables I had on hand were mini sweet peppers. I decided to roast them a little to add some nice smokiness. Instead of chopping them up and adding to the batter, I lined them at the bottom of my baking pan, hoping they wouldn’t rise up while baking. Since cornbread batter is quite dense, it worked out just fine and the result was a lovely colorful upside down cornbread.


DSC_5189.JPG


Ingredients:
~10 mini sweet peppers
Ingredients for cornbread from your favorite cornbread recipe. I used this cornmeal muffin recipe without the added veggies.


Wash and trim the stems of the sweet peppers. Slice vertically in halves or quarters (depending on the size of the peppers) and remove all seeds. In a nonstick pan, place the peppers skin side up in a single layer (you could use some oil/butter if needed, but generally they’re okay without it). Cover and cook over medium heat for a couple minutes until the peppers begin to brown. Flip them over and let the skin side get some char. Repeat until the peppers are soft to touch and have been browned on both sides.


DSC_5177.JPG


Line a 8-9” baking pan with parchment paper. Lay down the peppers skin side down in the pan.


DSC_5180.JPG


Prepare the cornbread batter, and gently pour it over the peppers. Bake as per cornbread recipe instructions (I baked mine at 400 F) until it is cooked through in the middle (test with a knife or toothpick).


Let it cool in the pan for a few minutes before flipping it over and slicing the cornbread. Serve warm with a dab of butter.


~Gayatri

Find us on Facebook:

Sweet peppers upside down cornbread - Adding a little more color and taste to simple comfort food.http://cooksofcakeandkindness.blogspot.com/2016/03/sweet-peppers-upside-down-cornbread.html

Posted by The Cooks of Cake and Kindness on Monday, March 21, 2016

Thursday, March 17, 2016

Spinach Pie Roll-Ups

Yum
Several months ago, Gayatri and I cooked up one of our elaborate multi-course dinners. This one had a Mediterranean flair, with eggplant fanned and stuffed with a savory tomato-feta sauce, and baklava ice cream for dessert. For an appetizer, we put our own spin on the traditional spanakopita and served these delightful mini-spinach pies. Using pre-made dough, prep and assembly were super easy - and eating them was even easier! This is a delicious, appropriately hued dish to accompany any shamrock-related shenanigans today - happy St. Patrick’s Day!

DSC_4081.JPG

Ingredients: (makes 16 mini pies)
~1 cup chopped spinach (fresh, or frozen that has been thawed and drained)
~1 cup ricotta cheese
~¼ cup feta cheese
1-2 cloves garlic, minced
1-2 TBSP chopped onion (fresh or dried)
ground pepper, paprika to taste
2 cans crescent rolls
salt to taste (optional)
cooking oil


Heat oven to 375°F.

In a pan over medium heat, sauté spinach, garlic, and onion in a little oil until the onions are soft. Reduce heat to medium-low and add the ricotta and feta cheeses, stirring to break down any lumps until the mixture is smooth. Season with ground black pepper and paprika to taste. Remove from heat and let it cool 5-10 minutes.

While the spinach-cheese mixture is cooling, roll out the crescent roll dough and separate each wedge. Spoon about 1-2 tablespoons of spinach mixture onto the wide end of each wedge, then roll it up starting with the wide edge and pinch the end shut.

  Halloween dinner with Sarah-002.jpg

Arrange on a baking sheet, leaving at least an inch of space (they will puff up a little bit). Bake at 375°F for 10-12 minutes until the edges have a nice golden-brown color. Serve warm and enjoy!

~Karla

Find us on Facebook

Happy St. Patrick's Day! Here's a gratifyingly green snack to kick off your festivities!http://cooksofcakeandkindness.blogspot.com/2016/03/spinach-pie-roll-ups.html

Posted by The Cooks of Cake and Kindness on Thursday, March 17, 2016

Monday, March 14, 2016

Candied Pecans

Yum
I often get mid-afternoon snack cravings - especially if I’m working at my desk and not doing something more interactive. Although I feast on an occasional muffin or chocolate (or pie if it's Pi(e) day at work!), I try to keep these snacks on the healthier side. Nuts are perfect to curb these cravings - rich in protein and the fibre is filling. Raw or toasted nuts are probably the best, but it’s fun to have flavored nuts once in a while. However, the store bought ones typically use a lot of oil for roasting - be it sweet or savory. In addition, the savory ones can have a lot of sodium and the sweet candied ones can often be way too sweet. Not ideal for a workday snack unless you want to risk a sugar crash!

The solution - make your own candied nuts at home with reduced sugar, without any added fats (the nuts provide enough healthy fats), and at a much lower price. The best part is how quick and easy this is. You’d go from plain old pecans to super delicious candied pecans in 5 minutes flat!


DSC_5243.JPG


Ingredients
1 cup pecan halves
¾ - 1 Tbsp dark brown sugar
1-2 tsp water (enough to dissolve the sugar and make a thick concoction)
A small pinch of salt (optional)
½ tsp vanilla essence (optional)

Mix the sugar, water, salt, vanilla in a small bowl. Stir to dissolve the sugar.

In a nonstick pan over medium heat, toast the nuts for ~3 minutes stirring continuously until you get a nice nutty aroma. 

Take the pan off the heat and add the liquid mixture. It will start to evaporate immediately, so stir quickly to coat the nuts. Put the pan back on the stove and keep stirring for another minute or so until the liquid has evaporated and the sugar just begins to crystalize.

Take the pan off the heat and spread the nuts on a plate/cookie tray. Let them cool down completely before storing in an airtight container.
 
DSC_5240.JPG

 ~Gayatri
 
Find us on Facebook:

Low sugar candied pecans with no added fat..http://cooksofcakeandkindness.blogspot.com/2016/03/candied-pecans.html
Posted by The Cooks of Cake and Kindness on Monday, March 14, 2016

Friday, March 11, 2016

Dill and Honey Mustard Baby Potatoes

Yum
Potatoes seem to be universally liked. Hence, if you’re entertaining guests, a potato side dish is generally a safe bet - they are easily available, cook fairly quickly, and are extremely versatile. Go with baby potatoes, and even the presentation will be a win!
 
This recipe makes flavorful baby potatoes that are tender yet crispy. The honey mustard adds a subtle tang to the dish, while dill helps brighten it up.


DSC_5215.JPG


Ingredients:
~½ lb baby potatoes (could use regular potatoes cut up in cubes)
2 tsp honey mustard
1 tsp chopped dill (I used dried dill)
1 tsp olive oil
Salt & black pepper to taste
 
Wash and parboil the potatoes until tender but not mushy. Drain, and cut them in half lengthwise.

Mix the mustard, oil, dill, salt and pepper in a small bowl and add it to the potatoes. Toss to coat the potatoes evenly.


DSC_5211.JPG


In a nonstick pan over medium heat, cook the potatoes for ~8-10 min until they are cooked through and have a golden brown crust. It’s best to leave them alone for a minute or two at a time before stirring. Serve warm as a side topped with a dollop of sour cream.
 
DSC_5219.JPG

~Gayatri

Find us on Facebook:

Dill and Honey Mustard Baby Potatoes - an easy side dish. http://cooksofcakeandkindness.blogspot.com/2016/03/dill-and-honey-mustard-baby-potatoes.html

Posted by The Cooks of Cake and Kindness on Friday, March 11, 2016

Tuesday, March 8, 2016

Chicken Satay

Yum
Chicken is a staple in our house - probably 90% of dinners are made featuring chicken. We have enough favorites that repeating the same dishes doesn’t get old, but every once in a while I want to try something new. I really like trying new marinades because I can prep everything the night before and then just pop the meat in the oven (or fry in a pan) when it’s time to eat. This recipe is for a satay-style marinade. Satay is a traditional dish in Indonesia, and is also quite popular in Malaysia, Thailand, the Philippines, and other Southeast Asian countries. There are many, many varieties - traditionally, satay refers to any grilled skewered meats with various sauces, the most popular of which is peanut sauce. This recipe turns a peanut-based sauce into a marinade for a tangy, peanut-y chicken dish. I have made this dish both by broiling (pictured) and pan-frying, and am eagerly waiting for grilling weather to prepare it in the more traditional way - skewered and grilled.

IMG_5467.JPG

Ingredients: ~6 servings
12 boneless, skinless chicken thighs (or ~1.5lb chicken breast fillets)
~¼ cup all natural creamy peanut butter
~¼-½ cup barbecue sauce
~¼ cup lime juice (fresh tastes best)
1-2 tsp fresh or dried cilantro


Combine peanut butter, barbecue sauce, lime juice, and cilantro in a bowl and mix well. Add chicken and toss, making sure each piece is coated. Cover and marinate in the refrigerator at least one hour (preferably overnight).

When ready to cook, place chicken in a single layer in a baking dish or broiling pan and broil 10-15 minutes on each side until chicken is cooked through (internal temperature of 165F) and has a nice char. Serve with your favorite side.

~Karla

Note: You can also cook in a pan - cut the marinated chicken thighs roughly into thirds (or use chicken breast fillets) and pan-fry on medium heat for about 4-5 minutes on each side (no oil necessary). Then, cook any remaining marinade in the same pan to make a tangy pâté-type spread.

Find us on Facebook
 

Chicken Satay - chicken in a delicious peanut sauce with a tangy twist!http://cooksofcakeandkindness.blogspot.com/2016/03/chicken-satay.html

Posted by The Cooks of Cake and Kindness on Tuesday, March 8, 2016